
Overview & Design Inspiration
Welcome, my fellow yarn lovers! Today, we are diving headfirst into a truly breathtaking project that bridges the gap between classic crochet traditions and modern botanical elegance.
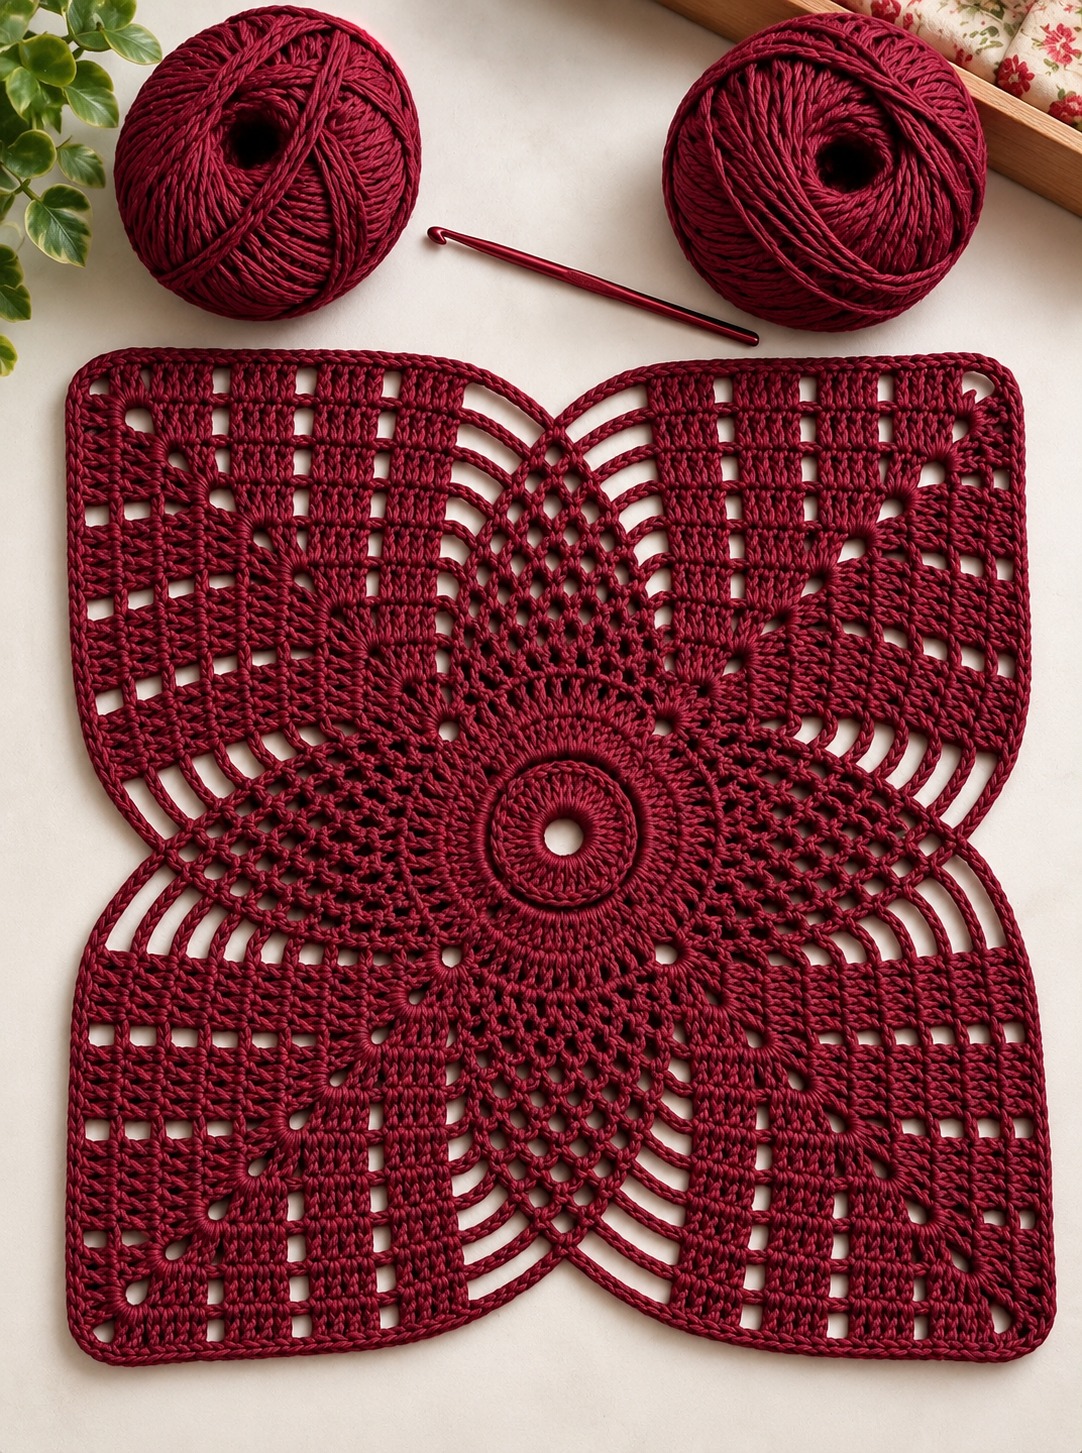
The Crochet Flower Square Pattern is a charming design that transforms a humble ball of yarn into an exquisite work of art. Featuring a delicate central flower surrounded by intricate, lace-inspired openwork, this square offers a wonderfully sophisticated alternative to ordinary granny squares.
Materials & Recommended Supplies
Gathering your supplies is half the fun! To achieve that crisp, high-definition look seen in our inspiration piece, you will want to choose your materials thoughtfully.
- Yarn: Smooth, mercerized cotton yarn in a light or DK weight. A deep burgundy creates a timeless, classic statement, while cream or dusty rose offers a softer touch.
- Crochet Hook: A 3.5 mm (E/4) or 4.0 mm (G/6) hook works wonderfully to keep your lace-inspired stitches neat and structured.
- Notions: Sharp scissors, a yarn needle for weaving in ends, and a flexible measuring tape.
- Stitch Markers: Essential for mapping out your four symmetrical corners and keeping your rounds organized.
- Blocking Tools: A foam blocking mat and rust-resistant pins are absolute game-changers for opening up those gorgeous lace motifs.
Essential Techniques & Stitch Highlights
Working in the round is the heartbeat of this design, allowing the motif to blossom outward from a simple magic ring. You will love watching the transition from flat, solid circles into elaborate, three-dimensional petal layers.
This project artfully combines basic stitches—like double crochets and single crochets—with airy chain arches and fan-like shell stitch groups. The interplay between dense, textured stitches and open mesh creates a lightweight, sophisticated fabric that feels as lovely as it looks.
Construction & Assembly Highlights
The magic of this square lies in its organic, blooming construction method. You begin right at the center with a snug little circle, then gradually build out lush, rounded petal layers that give the flower its gorgeous dimension.
From there, the clever use of strategic chain arches gracefully squares off the circular motif, establishing four crisp corners. The final rounds layer on delicate openwork mesh, balancing the solid floral center with airy, elegant geometry.
Customization & Styling Ideas
One of the absolute best parts of this pattern is how effortlessly it adapts to your personal aesthetic. While a monochromatic deep burgundy screams vintage elegance, playing with a palette of sage green, soft pink, and cream can truly make your floral center pop!
Once you have a stack of these beauties ready, the sky is the limit for projects. Stitch them together for a stunning heirloom blanket, turn a single square into a chic throw pillow cover, or create gorgeous decorative table mats for your next gathering.
Pro Tips for Flawless Results
- Maintain Even Tension: Because this square relies on a mix of dense clusters and open spaces, keeping a steady rhythm will ensure your petals lay flat.
- Never Skip Blocking: Wet blocking is your secret weapon here! Pinning your finished squares to exact dimensions will magically crisp up the lace and square off your edges.
- Use Stitch Markers Generously: Pop a marker into your corner spaces the moment you establish them to save yourself time counting later.
Frequently Asked Questions
Is this pattern suitable for adventurous beginners?
Absolutely! While the finished square looks wonderfully intricate, it is built upon familiar foundational stitches worked step-by-step. Just take it one round at a time.
What yarn weight is best for home decor projects?
DK-weight or sport-weight cotton yarn is ideal because it provides incredible stitch definition and holds its shape exceptionally well over time, especially when washed.
Where can I find the complete pattern and video walkthrough?
You can instantly download the printable PDF pattern and catch our complete step-by-step video tutorial by checking the links at the bottom of this post!
Watch the Full Step-by-Step Video Tutorial
Prefer visual guidance? Follow along with the complete video tutorial below at your own pace: