
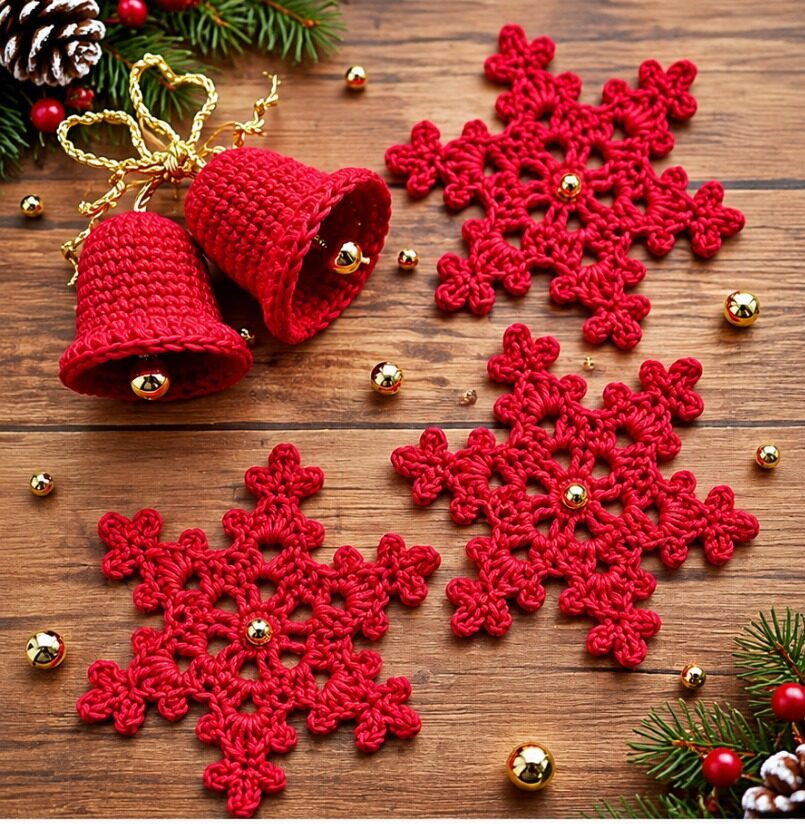
Overview & Design Inspiration
There is pure magic in watching winter’s first snowfall transform the world outside your window. Bring that enchanting, delicate beauty right into your home with our newest holiday obsession: the Crochet A Snowflake Pattern!
Inspired by the intricate geometry of real-world frost crystals, these lovely openwork ornaments combine classic lacework with charming branching tips. Whether hung on your Christmas tree, strung into a festive garland, or gifted to someone special, they instantly infuse your holiday decor with handmade warmth.
Materials & Recommended Supplies
To achieve those crisp, beautifully defined snowflake points, gathering the right stash essentials is key. Here is what you will want to keep on hand:
- Yarn/Thread: Mercerized cotton crochet thread or lightweight cotton yarn (about 10–20 yards per snowflake).
- Crochet Hooks: A 1.75–2.5 mm hook for fine thread, or a 3.0–3.5 mm hook for lightweight yarn.
- Notions: Yarn needle, sharp scissors, and stitch markers.
- Finishing Supplies: Rustproof pins, a blocking board, and optional fabric stiffener for crisp hold.
Essential Techniques & Stitch Highlights
This design is a masterclass in the beauty of decorative crochet lace! Beginning with a versatile magic ring, the project quickly builds a robust central foundation before expanding outward into airy chain spaces.
You will love working through foundational stitches like single crochet and double crochet to build structural stability, while delicate picot stitches add those signature, ornamental points that mimic real snow crystals. The interplay of open spaces and solid clusters gives the finished pieces incredible visual depth.
Construction & Assembly Highlights
While the final ornaments look astonishingly intricate, the construction is wonderfully approachable when broken down into logical, expanding rounds. The motif starts at the very center, blossoming outward into a balanced six-pointed radial symmetry.
As you work from the inner ring to the decorative outer branches, each completed round reveals more of the snowflake’s stunning geometry. Finishing is simply a matter of weaving in your ends, pinning your piece to shape on a blocking board, and applying a touch of fabric stiffener for a polished, heirloom-quality result.
Customization & Styling Ideas
One of the absolute best things about crocheting snowflakes is their incredible versatility. While traditional winter white and festive holiday red are timeless favorites, you can easily experiment with icy blues, sparkling silvers, or soft golds to match your unique holiday palette.
Try stringing several snowflakes together into a whimsical window garland, attach them as gorgeous gift-wrapping embellishments, or hang them on miniature clothespins along a mantel. They work up so quickly that you can easily craft a whole blizzard of ornaments in a single afternoon!
Pro Tips for Flawless Results
- Maintain Even Tension: Keep your stitches consistent so your snowflake’s delicate branches don’t curl or warp.
- Do Not Skip Blocking: Wet blocking is the secret ingredient that transforms a floppy motif into a crisp, geometric masterpiece.
- Use Stitch Markers: Place a marker at the start of your rounds to easily keep track of your symmetry.
- Choose Cotton: Stick to mercerized cotton for the absolute best stitch definition and stiffness response.
Frequently Asked Questions
Are these snowflakes difficult for a beginner to make?
Not at all! If you are comfortable with basic stitches like chains, single crochets, and double crochets, you will find this pattern a wonderfully rewarding and accessible challenge.
Do I have to use fabric stiffener on my finished snowflakes?
Fabric stiffener is entirely optional, but it is highly recommended if you want your snowflakes to hold a rigid, tree-ready shape year after year. Thorough blocking alone will also give them a lovely, natural finish.
How can I access the full step-by-step pattern?
You can easily grab the complete printable pattern and follow along with our step-by-step video tutorial via the downloadable PDF and video links provided on this page!
Watch the Full Step-by-Step Video Tutorial
Prefer visual guidance? Follow along with the complete video tutorial below at your own pace: