
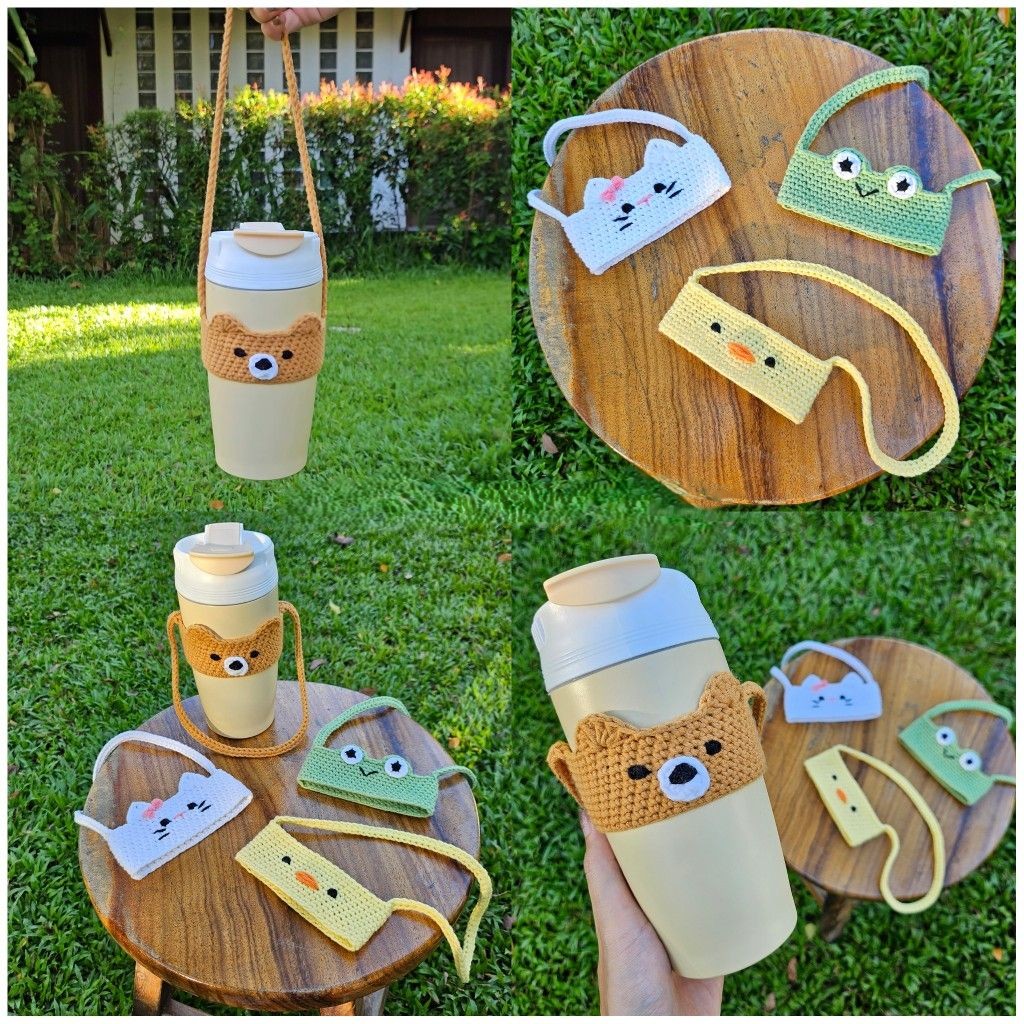
Overview & Design Inspiration
Hello, fellow yarn-lovers! There is nothing quite like combining practical everyday utility with whimsical handmade charm. That is precisely why our community has fallen head-over-heels for the Crochet Bottle Holder Pattern!
This delightful accessory transforms your standard water bottle or travel tumbler into a comfortable, hands-free companion. Best of all, it adapts into an adorable bear, cat, frog, or chick with just a few clever color changes and sweet embroidered details.
Materials & Recommended Supplies
- Yarn: Medium-weight (Worsted / Category 4) cotton or cotton-blend yarn. Cotton provides fantastic stitch definition and durable structure.
- Main Colors: Tan or caramel for the bear, plus small amounts of white, black, and dark brown for facial details.
- Alternative Colors: White for cats, vibrant green for frogs, or sunny yellow for chicks!
- Crochet Hook: 3.5 mm to 4.0 mm (or size needed to obtain your preferred firmness).
- Notions: Tapestry needle, scissors, flexible measuring tape, and stitch markers.
Essential Techniques & Stitch Highlights
This project relies on approachable, fundamental U.S. crochet terminology, making it wonderfully friendly for confident beginners. You will primarily use the humble single crochet (sc) to build a sturdy, reliable band that firmly hugs your favorite container.
Simple slip stitches (sl st) help you join edges seamlessly, while basic shaping techniques allow you to craft sweet little ears and muzzles. Because we keep the foundational stitches straightforward, you can focus entirely on playing with colors and bringing your favorite little animal characters to life.
Construction & Assembly Highlights
The magic of this design begins by measuring your bottle’s circumference and height to create a custom-fit rectangular band. Working in rows of single crochet, you will frequently test the piece against your container to ensure a comfortably snug embrace.
Once the band reaches the right length, the short ends are seamed together to form a tidy cylinder. Next, you will crochet a sturdy strap—reinforced with slip stitches or single crochets—and attach it securely to support your bottle on all your daily adventures.
Customization & Styling Ideas
The customization possibilities for this pattern are truly endless! Swap the caramel yarn and bear ears for crisp white and pointy triangles to craft a cheeky kitten, or choose brilliant green with embroidered eyes for a happy little frog.
You can easily adjust the strap length to suit toddlers, teens, or adults, making it an incredible handmade gift for back-to-school season, outdoor hikes, or farmers market strolls.
Pro Tips for Flawless Results
- Keep your tension firm: A slightly snug crochet band prevents your bottle from slipping out as the cotton relaxes over time.
- Reinforce attachment points: Because carrying a full water bottle places stress on the strap joints, anchor those ends with extra stitches.
- Embroider safely: Use secure knots and weave in all yarn tails on the interior side to keep your animal faces looking pristine.
- Swatch for success: Always take a moment to test your gauge against your specific bottle size before committing to the full length.
Frequently Asked Questions
Can I adjust this pattern for different bottle sizes?
Absolutely! Because this project relies on custom measurements rather than rigid stitch counts, you can easily wrap your foundation chain or adjust your row length to fit skinny tumblers, wide-mouth flasks, or reusable kids’ water bottles.
Why is cotton yarn recommended over acrylic?
Cotton and cotton-blend yarns have much less stretch than acrylic and offer superior durability. This helps your bottle holder maintain its supportive shape and grip without sagging under the weight of a full container.
How do I keep the shoulder strap from stretching out too much?
Crochet chains can naturally elongate when weighted down. To combat this, always work a supportive row of slip stitches or single crochets back along your initial chain strap, and reinforce the ends where they meet the band.
Watch the Full Step-by-Step Video Tutorial
Prefer visual guidance? Follow along with the complete video tutorial below at your own pace: