
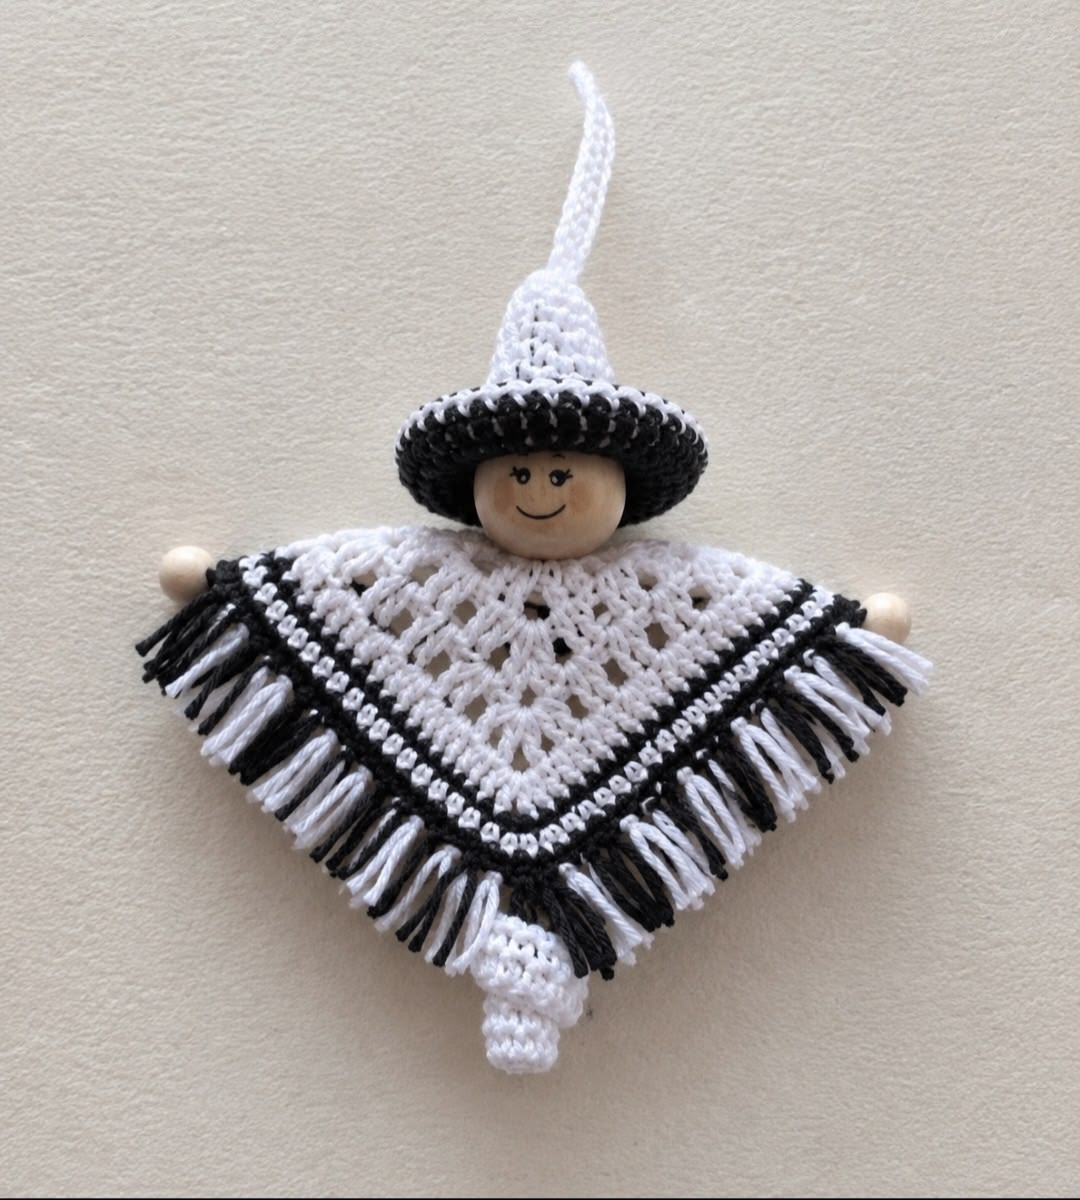
Overview & Design Inspiration
Welcome, fellow yarn lovers! There is something truly magical about small-scale crochet projects that capture our hearts and bring instant joy to our craft spaces. The Crochet Worry Worms pattern is a delightful blend of creativity, kindness, and relaxation, offering a wonderful way to brighten someone’s day.
Whether you are crafting a comforting pocket companion, a thoughtful handmade gift, or a charming seasonal decoration, this versatile little project is an absolute joy to stitch. Because it uses minimal yarn, it is also the ultimate stash-busting project for your leftover scraps!
Materials & Recommended Supplies
Gathering your supplies beforehand ensures a smooth, relaxing crafting flow. Here is everything you need to bring your cheerful little creation to life:
- Medium-weight cotton yarn in white, black, beige, and fun accent colors.
- A 3.0 mm to 3.5 mm crochet hook (US D/3 or E/4) for neat, defined stitches.
- Tapestry needle for weaving in ends and embroidering facial details.
- Stitch markers and sharp embroidery scissors.
- Polyester stuffing or a wooden bead for the head.
- Black embroidery floss for sweet facial expressions.
Essential Techniques & Stitch Highlights
This project is wonderfully approachable while offering plenty of engaging techniques to keep your crochet hook happy. You will practice foundational stitches like the single crochet, half double crochet, double crochet, and slip stitch, alongside beginner-friendly increases.
The design also features delightful lacy elements, such as V-stitches and openwork eyelets, which give the poncho its charming texture. Working in the round creates the signature cone shape for the pointy witch-style hat, while careful shaping ensures every little detail sits just right.
Construction & Assembly Highlights
Bringing your worry worm together is an adventure in narrative crafting! You will begin by working the poncho from the neck opening down, gradually increasing at corner points to form its wide triangular silhouette before finishing with a fun, textured fringe.
Next comes the magical pointed hat, worked in smooth rounds from the magic ring down to a flared brim. Once your components—including the sweet little legs and cozy head—are crocheted and stuffed, you will assemble the pieces symmetrically and embroider an irresistibly cheerful smile.
Customization & Styling Ideas
One of the greatest joys of this pattern is how endlessly customizable it is. Swap out pastel shades for bright rainbow stripes, or dive into a spooky holiday palette to match your favorite seasonal decor!
You can further personalize your creation by adding miniature buttons, tiny embroidered flowers, or playful rosy cheeks. Each adjustment gives your little companion a completely unique personality, making them extra special to give away or display.
Pro Tips for Flawless Results
- Mind Your Tension: Keep your stitch tension consistent so that structural elements like the hat and poncho hold their intended shapes beautifully.
- Prep Your Fringe: Cut all your fringe strands to the exact same length beforehand, and trim them evenly with sharp scissors once attached for a professional finish.
- Embrace Blocking: A light steam or gentle wet blocking session works wonders for defining the lacy poncho stitches and making the fringe hang straight.
- Assembly-Line Efficiency: If you are making a batch of gifts, prep all yarn pieces and accessories first to speed up your crafting workflow.
Frequently Asked Questions
Is this project suitable for beginners?
Yes, absolutely! Anyone with a basic knowledge of chains, single crochets, double crochets, and slip stitches can successfully complete this project with a little patience.
Can I use acrylic yarn instead of cotton?
Yes, acrylic yarn is a fantastic alternative that creates a wonderfully soft finish and comes in an incredible array of vibrant colors.
How can I make the fringe look neat and professional?
Pre-cutting your yarn strands to equal lengths and giving the finished fringe a final trim with sharp scissors will ensure a clean, polished look every single time.
Watch the Full Step-by-Step Video Tutorial
Prefer visual guidance? Follow along with the complete video tutorial below at your own pace: