
Overview & Design Inspiration
Welcome, fellow yarn lovers! There is something truly magical about watching a few simple stitches transform into a charming, fluttering work of art right in the palm of your hand.
The Crochet Button Butterfly Pattern is a delightful, beginner-friendly project that combines quick construction with incredible design versatility. Whether you want to use up your yarn stash or create a sweet embellishment for your latest handmade garment, this adorable butterfly is sure to bring a smile to your face.
Materials & Recommended Supplies
- Yarn: Small amounts of DK or light worsted-weight cotton yarn for crisp stitch definition. Acrylic yarn also works wonderfully for blankets and wearable accessories.
- Crochet Hook: 3.5 mm (E) or 4 mm (G) hook to produce firm yet soft wings that hold their shape.
- Buttons: A decorative two-hole or four-hole button to serve as the unique, elegant butterfly body.
- Notions: Yarn scissors, a yarn needle for weaving in ends, sewing thread, and optional fabric glue.
Essential Techniques & Stitch Highlights
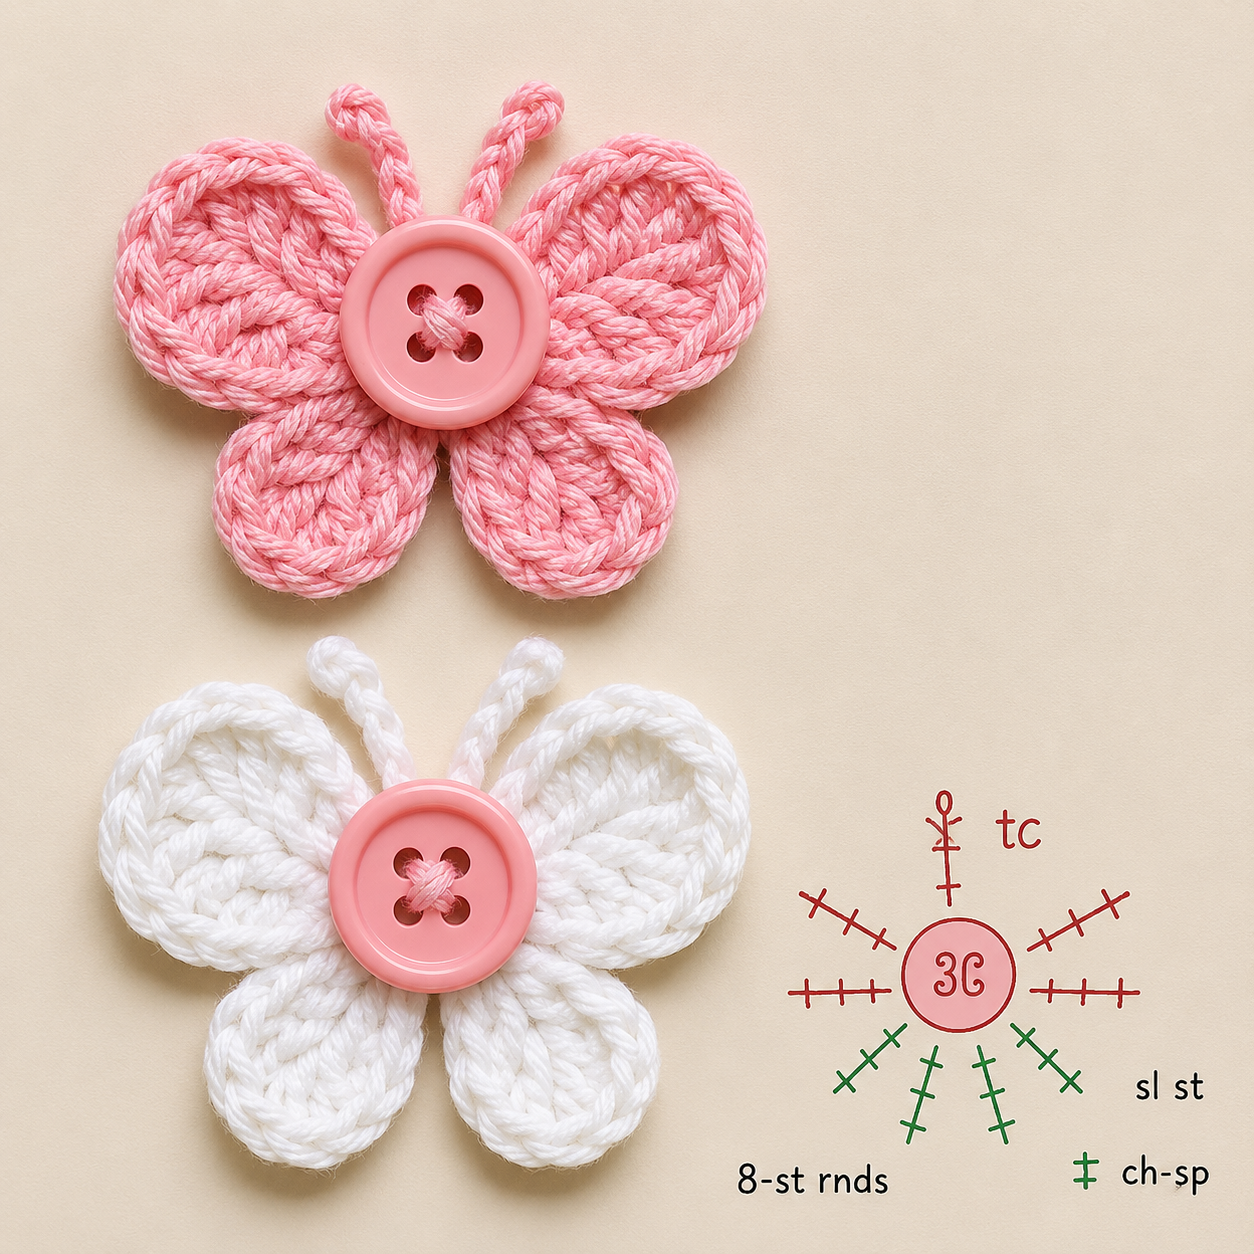
This charming little applique comes together using basic, beloved crochet staples that make the process both approachable and deeply satisfying. Beginning with a secure Magic Ring creates a compact, sturdy center that effortlessly supports all four wings.
From there, you will work a combination of single crochets, half double crochets, double crochets, and tall treble crochets. These varying stitch heights are the secret to sculpting those naturally rounded, beautifully proportioned upper and lower wings without any complicated shaping.
Construction & Assembly Highlights
The magic begins in the center, working a quick foundation round of single crochets into a Magic Ring to establish a strong base. From this snug little hub, you will build out the large upper wings using towering treble crochets, followed by the smaller, delicate lower wings crafted from classic double crochets.
Once your wings are crocheted and neatly fastened off, the real fun begins with the assembly. Centering a gorgeous decorative button over the middle gives your butterfly its signature body, while a couple of tiny folded yarn strands tied securely behind the button form the cutest little antennae.
Customization & Styling Ideas
One of the greatest joys of this pattern is how easily you can customize it to match any aesthetic or season. Soft pastels and pearlescent buttons create dreamy accents for baby blankets, while rustic wooden buttons and bold rainbow shades offer a playful, farmhouse-inspired charm.
You can effortlessly scale this project by swapping your yarn weights and hooks, from miniature embroidery thread butterflies for greeting cards to textured wool ones for cozy winter hats. They make stunning additions to springtime wreaths, handmade tote bags, headbands, and whimsical nursery mobiles.
Pro Tips for Flawless Results
- Maintain Even Tension: Keep your stitches nice and firm, especially when working the taller treble crochet stitches, so the wings maintain their lovely structure.
- Embrace Blocking: If you are using acrylic yarn, give your finished butterfly a light steam blocking (keeping the iron safely away from direct contact) to crisp up every edge.
- Secure Your Buttons: If your butterfly is headed onto a heavily used item or a gift for a younger child, double-check that your button and antennae are stitched down extra securely.
Frequently Asked Questions
Is this pattern beginner-friendly?
Yes, absolutely! As long as you are comfortable with a Magic Ring and basic stitches like single and double crochet, you will find this project quick, relaxing, and entirely achievable.
Do I have to use a button for the body?
While the button gives this pattern its signature look, you can easily substitute a securely embroidered center, a felt circle, or a small crocheted disc if you prefer.
How long does it take to make one butterfly?
Most makers can whip up a single butterfly in just 10 to 20 minutes, making it the ultimate instant-gratification stash-buster!
Watch the Full Step-by-Step Video Tutorial
Prefer visual guidance? Follow along with the complete video tutorial below at your own pace: