
Overview & Design Inspiration
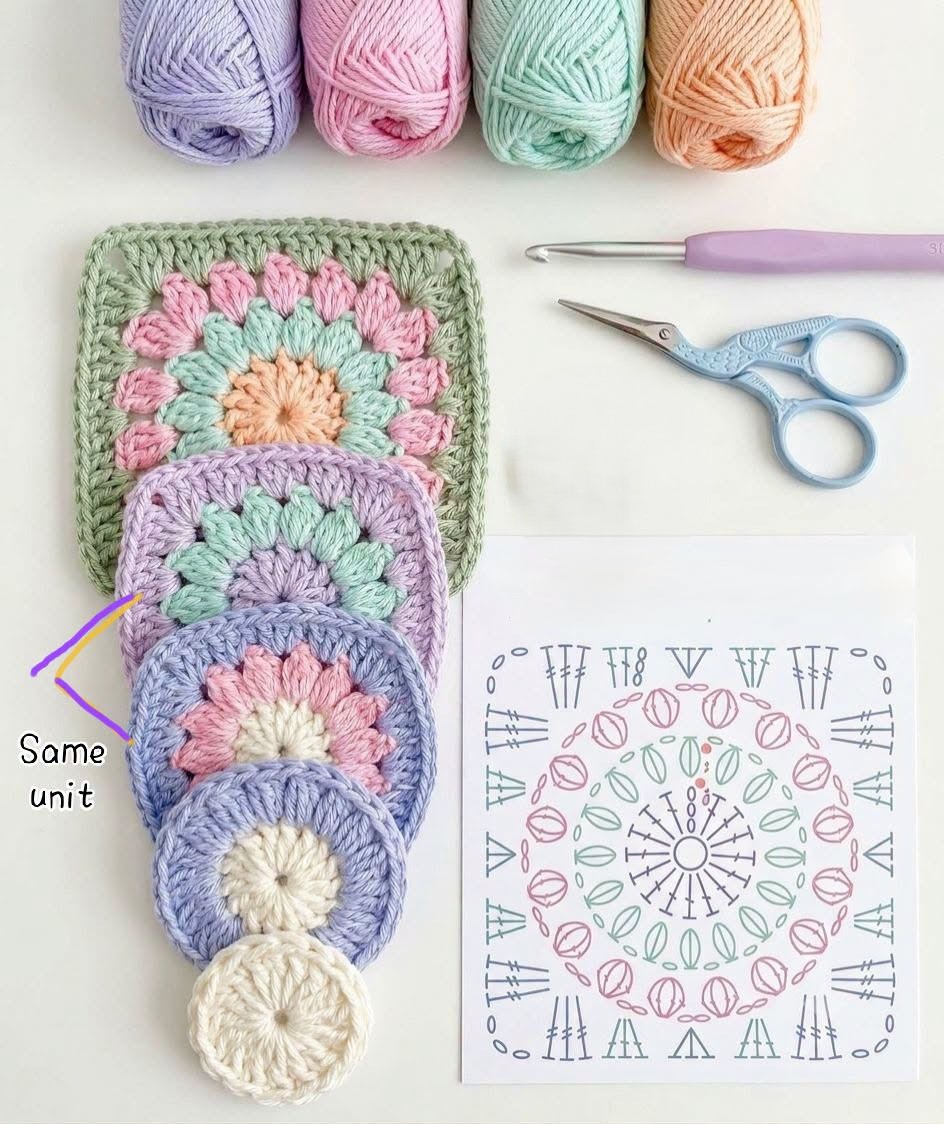
Welcome back, fiber friends! If you are looking for a project that instantly brightens your day and fills your crochet basket with joy, you have found it. The Crochet Sunburst Granny Square is an absolute masterpiece of modern crochet design, capturing the essence of a blooming meadow right on your hook.
What makes this motif so beloved in our community is its stunning three-dimensional texture. By combining a radiantly cozy center with rich, textured petals, it transforms simple yarn into a miniature work of art that begs to be touched and admired.
Materials & Recommended Supplies
Gathering your supplies is half the fun of starting a new handmade adventure! To bring your sunburst squares to life, make sure you have these essentials ready in your craft nook:
- Yarn: Medium-weight (DK or Worsted/Aran) cotton or acrylic yarn. Cotton offers crisp stitch definition, while acrylic provides wonderful drape and washability.
- Colorway: Four coordinating shades for a classic layered floral look, or as many colors as your vibrant heart desires!
- Crochet Hook: 4.0 mm to 5.0 mm (US G/6 to H/8) depending on your personal tension and chosen yarn weight.
- Notions: A trusty yarn needle for weaving in ends, a small pair of snips, and optional stitch markers to keep your corners pristine.
Essential Techniques & Stitch Highlights
This pattern is a wonderful playground for practicing some of our favorite intermediate-beginner techniques. Starting with a classic magic ring creates a seamless, tightly closed flower center that looks remarkably professional.
The true magic happens when you dive into the puff stitches. By pulling up loops consistently and working them together, you build glorious, plump petals that radiate outward. Paired with clean double crochets and clever chain spaces, the design effortlessly squares off the circle in the final round.
Construction & Assembly Highlights
Creating a sunburst square is a delightful journey from a tiny circular blossom into a structured geometric square. You begin at the heart of the flower, working your foundational rounds before blossoming outward with rich, textured petal layers.
The final round is where the real transformation occurs, squaring off the circular motif so it can easily connect with its neighbors. Whether you choose to join your squares as you go with a graceful join method or sew them together later, watching a collection of these motifs turn into a cohesive piece is pure magic.
Customization & Styling Ideas
The creative possibilities for this pattern are practically endless! While traditional sunflower colorways of chocolate brown, golden yellow, and cream are eternally charming, you can easily adapt the palette to match any season or home decor aesthetic.
Stitch a handful of squares together for a stunning accent pillow, or connect dozens of them to craft a show-stopping heirloom blanket. They also make fantastic market tote bags, cozy cardigans, and cheerful table runners that bring handmade warmth into every corner of your home.
Pro Tips for Flawless Results
- Maintain Even Tension: Keep your pull-ups consistent during puff stitches so every petal plumps up to the exact same height.
- Seamless Color Changes: Complete the final yarn-over of your previous stitch using the new color for pristine, invisible transitions.
- Don’t Skip Blocking: Lightly dampening and pinning your finished squares straightens edges and sharpens corners, making assembly an absolute dream.
- Secure Your Ends: Weave yarn tails securely through multiple stitches on the back to ensure your hard work stands up to everyday use.
Frequently Asked Questions
Is the Sunburst Granny Square beginner-friendly?
Yes, absolutely! While it features textured puff stitches, crocheters with a basic grasp of chains, double crochets, and slip stitches can easily master this motif by taking it one round at a time.
What is the best way to join these squares together?
You can use a flat zipper join, a classic whip stitch, or a continuous join-as-you-go method. Slip stitch joining also creates a lovely, tactile ridge between your motifs.
How can I make my puff stitches pop more?
Consistency is key! Make sure you pull your working loops up to a uniform height before closing the puff, and consider using a slightly larger hook if your yarn tends to split.
Watch the Full Step-by-Step Video Tutorial
Prefer visual guidance? Follow along with the complete video tutorial below at your own pace: