
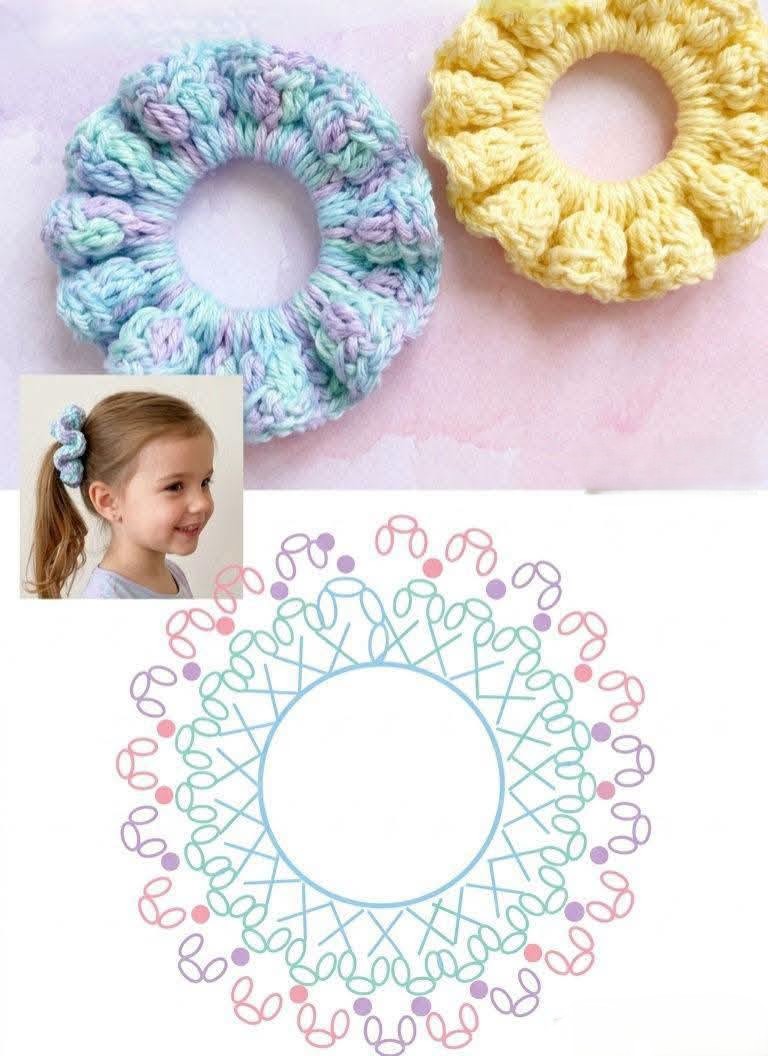
Overview & Design Inspiration
Welcome, fellow yarn lovers! If you are looking for an ultra-satisfying, instant-gratification project, you are going to fall completely in love with the Crochet Scrunchie Pattern. There is something endlessly magical about transforming a simple elastic hair band and a handful of leftover yarn into a chic, handmade fashion statement.
Not only are these charming hair accessories wildly popular, but they also offer a brilliant way to experiment with new textures and colors without committing to a massive blanket or garment. Whether you are crafting a thoughtful handmade gift or treating yourself to a quick weekend make, this versatile pattern is guaranteed to spark joy!
Materials & Recommended Supplies
Gathering your supplies is the exciting first step toward creating your new favorite accessory! Because this project is wonderfully budget-friendly, you can easily dive into your yarn stash to find the perfect match.
- Yarn: Lightweight DK, worsted-weight cotton, or plush velvet yarn. Perfect for stash-busting!
- Crochet Hook: 4.0 mm (US G/6) or 4.5 mm (US 7), depending on your preferred drape and yarn weight.
- Notions: A sturdy elastic hair band, a tapestry needle for weaving in ends, and sharp scissors.
Essential Techniques & Stitch Highlights
The beauty of this design lies in its simplicity, making it an absolute dream for newer crocheters while still holding the interest of seasoned pros. You will practice working directly around a flexible foundation, building up rhythm and muscle memory with every single stitch.
By focusing on repetitive rounds and even spacing, you will naturally refine your stitch tension and hand positioning. Whether you choose to keep your stitches neat and minimalist or load up on ruffles for extra dramatic volume, the techniques you practice here lay a wonderful foundation for more advanced crochet adventures.
Construction & Assembly Highlights
The construction method for this project is delightfully clever and comes together in just a flash! Instead of working flat and seaming later, you will crochet directly around the sturdy elastic hair band, encasing it completely within your stitches.
As you work your way around the circle, the fabric will naturally begin to gather, creating those signature ruffles and luxurious folds. Once you complete your final round, a quick and secure invisible join ensures a seamless, professional finish before you tuck away your yarn tails.
Customization & Styling Ideas
One of the greatest joys of making your own accessories is the endless room for personalization! You can easily adapt your design to match every season, outfit, or holiday.
Try switching to a silky velvet yarn for a touch of retro luxury, or add a delicate picot edge for subtle elegance. They also make incredible party favors, teacher gifts, and stocking stuffers that take less than an hour to stitch up.
Pro Tips for Flawless Results
- Maintain Even Tension: Keep your stitches consistent as you work around the elastic to ensure your ruffles gather evenly.
- Choose Sturdy Elastic: Select a thick, high-quality hair band so your handmade scrunchie retains its stretch and shape over time.
- Secure Your Ends: Weave your starting and ending yarn tails meticulously through multiple stitches to prevent any accidental unraveling.
- Gentle Care: Hand wash your finished scrunchies in lukewarm water with mild soap and lay them flat to dry.
Frequently Asked Questions
Is a Crochet Scrunchie Pattern suitable for beginners?
Yes, absolutely! Most designs rely on basic, foundational crochet stitches, making them one of the best and most rewarding beginner-friendly accessories you can make.
What is the best yarn for a Crochet Scrunchie Pattern?
Cotton yarn offers crisp stitch definition and durability, while plush velvet and soft acrylic yarns provide incredible texture and a gentle touch for your hair.
How long does it take to make a crochet scrunchie?
Most scrunchies can be easily completed within 30 to 60 minutes, making them the ultimate quick project for busy crafters!
Watch the Full Step-by-Step Video Tutorial
Prefer visual guidance? Follow along with the complete video tutorial below at your own pace: