
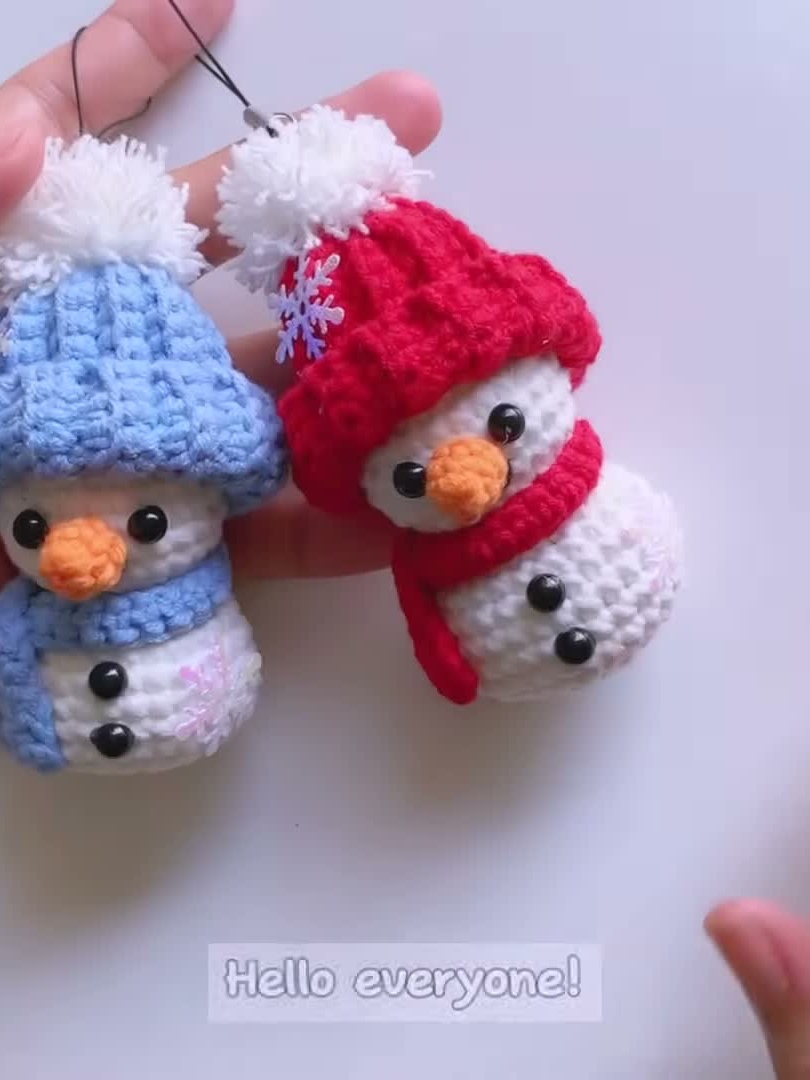
Introduction & Holiday Inspiration
When the first snowflake lands, my thoughts drift to tiny, hand‑made snowmen that can dangle from a keyring or sit on a festive wreath. This crochet snowman keychain is the perfect little project to add a splash of winter cheer to your bag, backpack, or Christmas tree.
Inspired by Mova DIY’s charming tutorial, the pattern is designed for absolute beginners yet still delivers that polished, “hand‑crafted” look you love about amigurumi.
Materials & Yarn Recommendations
- Yarn: 100% acrylic worsted weight (DK) in four colors – Snow White, Cherry Red, Baby Blue, and Carrot Orange.
- Hook: 3.5 mm (E) crochet hook for a tight stitch that holds the stuffing well.
- Stuffing: Polyfill or a small amount of scrap yarn.
- Safety eyes (6 mm) or black embroidery thread for the eyes.
- Keyring hardware (metal split‑ring) and a yarn needle.
The crisp Snow White forms the body, Cherry Red and Baby Blue create the hat and scarf, while Carrot Orange gives the classic carrot nose. Using a worsted weight yarn keeps the snowman sturdy enough for daily use.
Technique Breakdown & Step‑by‑Step Overview
Start with a magic ring and work in single crochet (sc) throughout. The pattern follows the classic amigurumi increase‑decrease rhythm, so you’ll see the snowman grow, then taper for the head.
Body (3 rounds): 6 sc in magic ring, pull tight. Round 2: inc each stitch (12 sc). Round 3: inc every other stitch (18 sc). Fasten off and set aside.
Middle (5 rounds): Work even (18 sc) each round to lengthen the torso. This is where the scarf will be sewn later.
Head (4 rounds): Begin with 12 sc in a new magic ring, increase to 18 sc on round 2, then work even for two rounds. Add safety eyes between rounds 2 and 3, then stitch on the Carrot Orange nose.
Finally, close the opening with a few sc rounds, leaving a long tail for sewing. Slip the body onto the head, stuff firmly, and sew the seam closed.
Finishing, Assembly & Holiday Styling Ideas
Thread the yarn tail through a yarn needle, weave it through the top of the head, and pull tight to secure the body to the head. Slip the keyring through the loop you create at the top of the hat.
Dress your snowman in the matching scarf by crocheting a simple 2‑inch tube in Baby Blue and sewing it around the middle. Add a tiny pom‑pom to the hat for extra charm, or glue a tiny bell for a jingle‑worthy touch.
These snowmen look adorable on a holiday gift bag, as a stocking stuffer, or hanging from a Christmas tree branch. Swap the colors for a “Hanukkah” blue‑white version or a “New Year” gold‑silver combo.
Pro Crafter Tips
- Use a stitch marker to keep track of the beginning of each round—especially helpful when working the magic ring.
- Keep your tension consistent; too loose and the stuffing will show, too tight and the snowman will feel stiff.
- For a smoother finish, block the completed snowman lightly with steam before attaching the keyring.
Frequently Asked Questions
Q: Can I use cotton yarn instead of acrylic?
A: Yes, a cotton DK yarn works fine, but cotton absorbs moisture and may feel heavier. If you plan to use the keychain outdoors, acrylic is more weather‑resistant.
Q: How do I make the snowman larger for a pendant?
A: Increase the starting magic ring to 8 sc, then add an extra increase round for each body segment. Keep the same stitch pattern; the proportions will stay balanced.
Watch the Full Step-by-Step Video Tutorial
Prefer visual guidance? Follow along with the complete video tutorial below at your own pace: