
Introduction & Holiday Inspiration
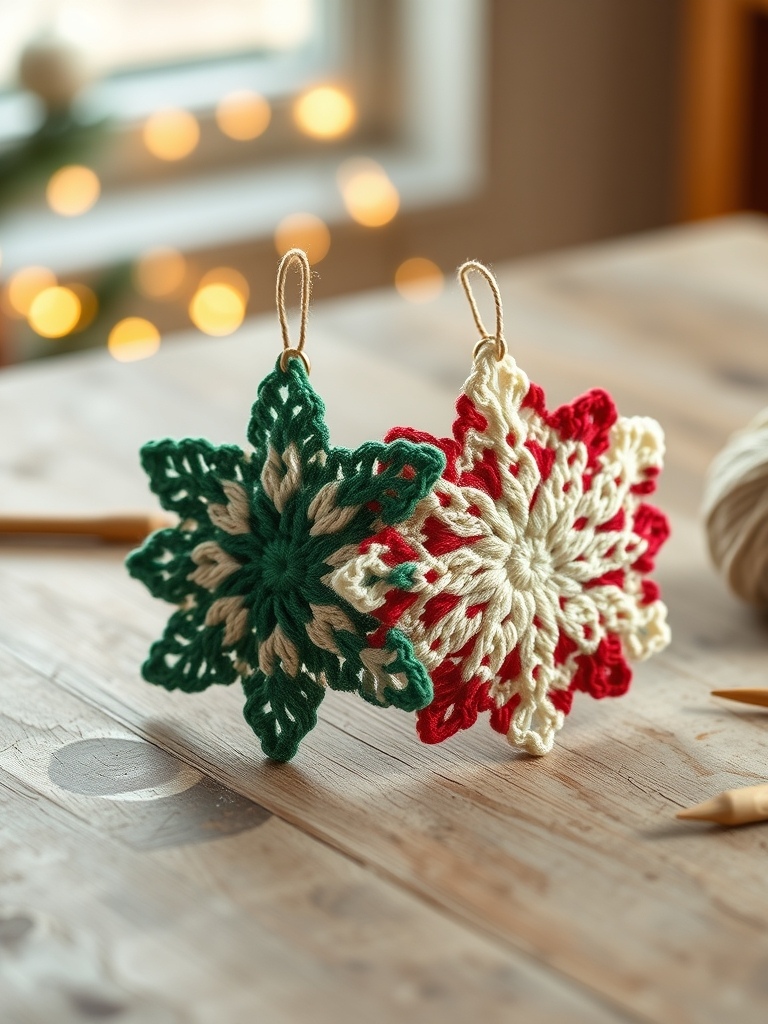
When the first snowflakes drift down, I love turning that delicate sparkle into a handmade ornament that hangs proudly on the tree. This tutorial shows you how to crochet a pair of layered, star‑shaped snowflakes that bring emerald, cream, and candy‑cane red to your holiday décor.
Materials & Yarn Recommendations
- Worsted‑weight (DK works too) cotton or acrylic yarn in three colors:
- Rich emerald green (for the left‑hand inner star)
- Warm cream (used for both outer shells and the right‑hand inner star)
- Candy‑cane crimson (outer shell of the right‑hand snowflake)
- 4 mm (G/6) crochet hook – perfect for the medium weight yarn and gives a nice drape.
- Stitch markers, yarn needle, and a 6‑inch length of 12‑inch metal chain for the hanging loop.
- Optional: tiny pearl beads for extra sparkle.
Technique Breakdown & Step‑by‑Step Overview
Start with a magic ring, then work 6 single crochets (sc) into the ring and pull tight to close – this is the foundation of every star point. Switch to the emerald yarn and increase by working 2 sc in each stitch around (12 sc total) to form the first inner star.
Without changing colors, join a second round of sc in each stitch, then add a half‑double crochet (hdc) between each sc to give the star a subtle raised texture. When the star reaches about 1 inch in diameter, finish with a slip stitch, fasten off, and set aside.
For the outer cream shell, attach cream yarn to any stitch of the inner star and work a round of 2 sc in each stitch (24 sc). Next, create the snowflake “arms” by crocheting 5‑stitch clusters (5 sc together) spaced evenly around the circle, leaving a small gap between each cluster.
After completing the first shell, repeat the entire process for the second snowflake, swapping the colors: start with a cream inner star, then layer a crimson outer shell using the same cluster technique. Finish each ornament with a single slip knot, then weave a short chain loop at the top for hanging.
Finishing, Assembly & Holiday Styling Ideas
Thread a thin yarn tail through the hanging loop and tie a secure knot, or attach a small metal hook for a polished look. If you like extra sparkle, sew a tiny pearl bead at the center of each inner star before closing the final round.
Hang the emerald‑cream snowflake on a pine branch and the cream‑crimson one on a wreath for a coordinated color story. You can also bundle a few together on a decorative ribbon for a festive garland that catches the light beautifully.
Pro Crafter Tips
- Keep tension consistent by holding the yarn at the same distance from the hook; this prevents the star points from wobbling.
- Use a stitch marker to mark the beginning of each round – it saves time when you need to count increases.
- If the ornament feels too stiff, switch to a softer, blend‑yarn (cotton‑acrylic mix) for the outer shell; it will drape more gently on the tree.
Frequently Asked Questions
Q: Can I use a different yarn weight?
A: Absolutely! A sport‑weight yarn will produce a smaller, more delicate snowflake, while a bulky weight creates a bold, statement piece. Just adjust the hook size accordingly (e.g., 3.5 mm for sport, 5 mm for bulky).
Q: How do I make the ornaments larger without changing the pattern?
A: Add an extra round of sc before you start the cluster arms, increasing each stitch by 2 sc per round. This expands the diameter while keeping the star shape intact.
Watch the Full Step-by-Step Video Tutorial
Prefer visual guidance? Follow along with the complete video tutorial below at your own pace: