
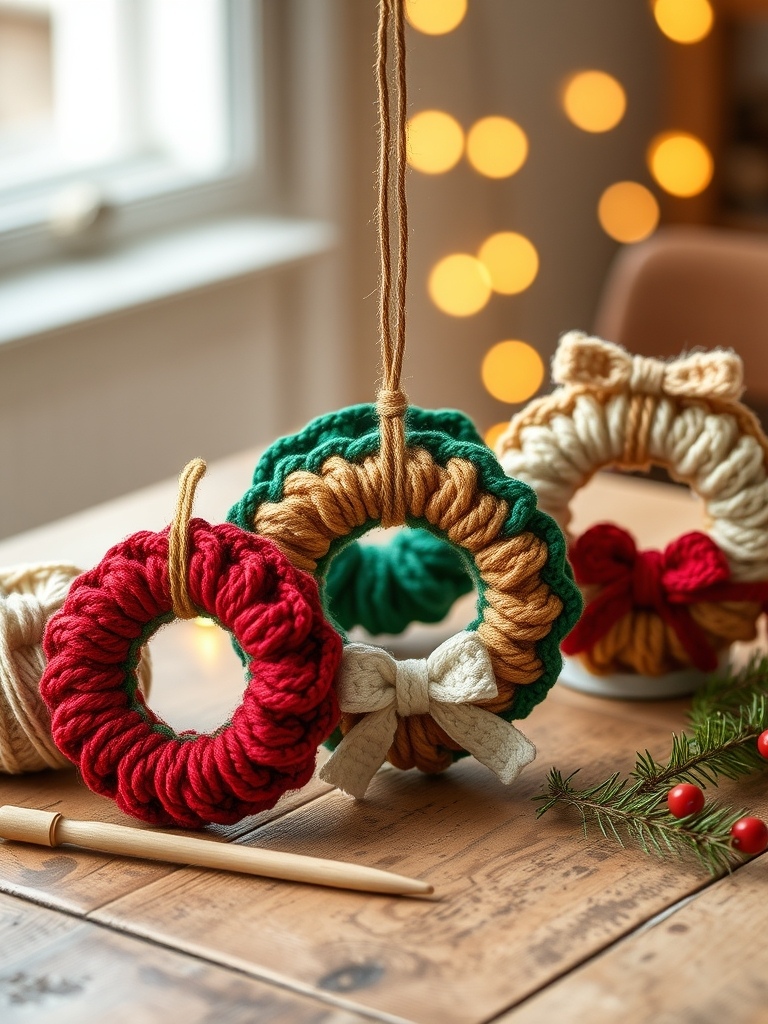
Introduction & Holiday Inspiration
There’s something magical about a handmade wreath hanging on the tree or the mantle. In this tutorial we’ll recreate the three charming crochet wreaths from Tuba Crochet – a red‑and‑green classic, a crisp white‑and‑red combo, and a vibrant green wreath with red accents.
Each wreath features layered rings, a soft bow, and a pop of metallic ribbon, making them perfect gifts or décor for every corner of your home.
Materials & Yarn Recommendations
- Yarn: worsted‑weight (DK also works) acrylic or cotton yarn. Suggested colors:
- Red (e.g., Red Heart Super Saver or Lion Brand Vanna’s Choice)
- Green (forest or mint, same brand)
- White (for the snowy wreath)
- Gold metallic yarn for the ribbon accent
- Hook: 4.0 mm (G/6) for worsted weight; 3.5 mm (E/4) if you prefer a tighter fabric.
- Stitch markers, yarn needle, scissors.
- Optional: tiny metal hoop or embroidery ring for added stability.
Technique Breakdown & Step-by-Step Overview
All three wreaths start with the same core ring, then branch into color‑specific layers and bows.
Step 1 – Magic Ring Foundation: Create a magic ring, chain 2, then work 12 single crochets (sc) into the ring. Pull tight and join with a slip stitch.
Step 2 – First Layer Expansion: Chain 1, *2 sc in each stitch* around (24 sc). This creates the first “leaf” ring.
Step 3 – Second Layer (Color Change): Switch to the second color, chain 1, *2 sc in next stitch, 1 sc in next* around (36 sc). This staggered increase gives the wreath its rounded depth.
Step 4 – Third Layer (Optional Accent): For the red‑accented green wreath, add a third layer in red: chain 1, *2 sc in next stitch, 1 sc in next* around (54 sc). Skip this step for the single‑color wreaths.
Step 5 – Closing the Ring: Work one more round of plain sc (no increases) to smooth the shape, then fasten off.
Step 6 – Bow Construction: Using the same yarn as the wreath’s edging, chain 12, sc across, turn, sc back, and repeat for a total of three rows. Fold the strip in half, slip stitch the ends together, and attach to the wreath with a few hidden stitches.
Step 7 – Ribbon Accent: Cut a 12‑inch length of gold yarn, fold, and tie a tiny bow around the wreath’s base. Slip stitch the ends to secure.
Finishing, Assembly & Holiday Styling Ideas
Weave in all ends with a yarn needle, then gently block each wreath to open the rings and give them a plush shape. If you want a hanging loop, attach a small piece of sturdy yarn or a metal hook to the top.
Style tip: Hang the red wreath on a pine garland, the white‑and‑red on a frosted window, and the green wreath on a mantel with pine cones for a coordinated festive display.
Pro Crafter Tips
- Use a stitch marker to keep track of the start of each round – it saves you from counting stitches twice.
- If the wreath feels too flat, add a fourth layer in a contrasting color; this adds volume without extra yarn weight.
- For a luxe finish, substitute the gold yarn with a thin metallic thread and wrap it around the wreath’s base for a subtle shimmer.
Frequently Asked Questions
Q: Can I use a different hook size and still keep the wreath’s shape?
A: Yes! A slightly larger hook (4.5 mm) will give a looser, more drapey wreath, while a smaller hook (3.5 mm) creates a denser, firmer look. Just adjust your tension accordingly.
Q: How do I make the wreath larger for a door‑sized decoration?
A: Double the stitch count in the first layer (24 sc instead of 12) and increase proportionally in each subsequent round. The same increase pattern applies, just with more stitches per round.
Watch the Full Step-by-Step Video Tutorial
Prefer visual guidance? Follow along with the complete video tutorial below at your own pace: