
Introduction & Holiday Inspiration
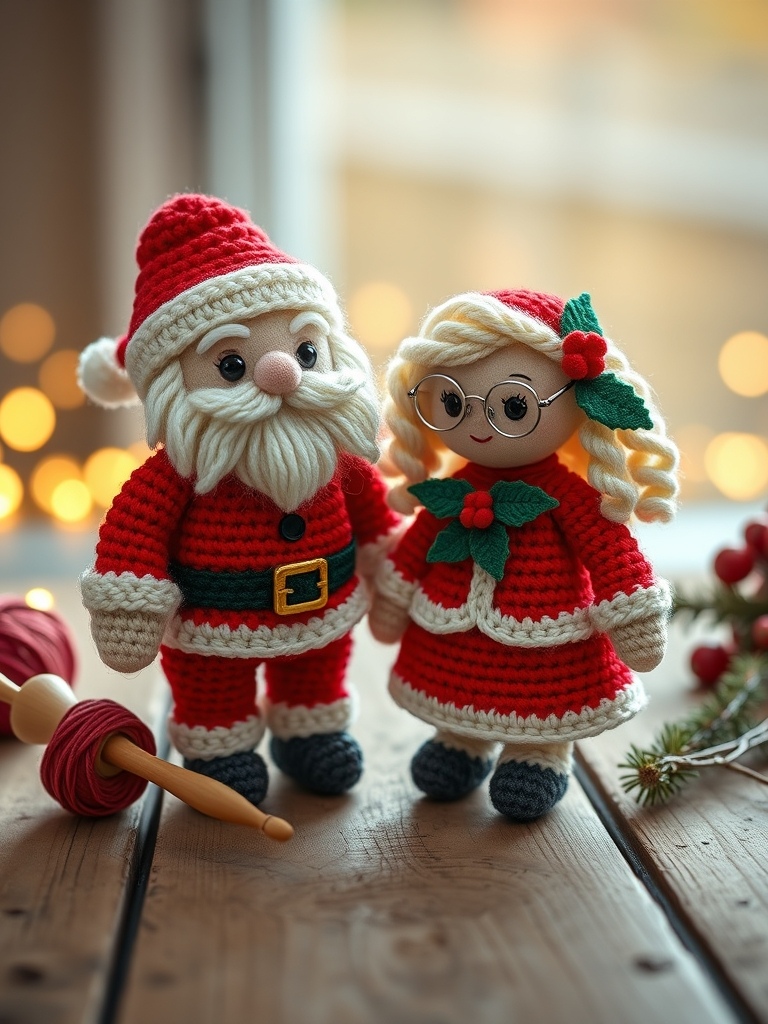
Every holiday season, a pair of smiling Santa and Mrs. Claus amigurumi brings extra cheer to mantels and tree skirts. I discovered GretaWings’ charming tutorial and decided to translate it into a written guide you can follow at your own pace.
Materials & Yarn Recommendations
To match the video’s vivid palette, gather the following yarns in a DK (light‑worsted) weight:
- Candy Cane Crimson – for Santa’s coat, hat, and Mrs. Claus’s dress.
- Warm Cream Wool – perfect for both beards, hair, and the soft inner trim.
- Soft Peach – used for the delicate skin of the faces.
- Dark Chocolate Brown – for the classic belt and shoe details.
- Emerald Green & Holly‑Red – tiny accents on Mrs. Claus’s hat.
You’ll also need a 3.5 mm (E‑4) crochet hook, fiberfill stuffing, a 4‑mm safety‑eye set (or simply stitch closed eyes), a thin wire for spectacles, and a tapestry needle for weaving in ends.
Technique Breakdown & Step‑by‑Step Overview
Start with a magic ring and work in single crochet (sc) unless the pattern calls for a slip stitch increase. The head is a classic amigurumi sphere: 6 sc in the ring, increase 6 sc each round until you reach 24 sc, then begin decreasing.
After closing the face with peach yarn and adding the closed‑eye stitch, attach the cream beard by crocheting a long chain, folding it, and stitching it around the chin. The body follows the same “grow‑then‑decrease” rhythm, using crimson for Santa’s coat and the same color for Mrs. Claus’s dress.
Arms and legs are worked as tubes: 6 sc in a ring, increase to 12 sc, then work evenly for the desired length before capping with a single round of decreases. Insert a safety eye or embroider a tiny smile before stuffing each limb.
The hats are simple cones. Begin with a small magic ring of crimson, increase each round until the base matches the head circumference, then taper to a point. For Mrs. Claus, add a narrow emerald band and a holly‑red pom‑pom before closing.
Wire spectacles are fashioned by bending a thin craft wire into tiny round frames, then sewing them onto the heads with cream yarn. This tiny detail gives the dolls their signature “cheerful squint.”
Finishing, Assembly & Holiday Styling Ideas
Once all parts are stuffed firmly, use the tapestry needle to sew the arms, legs, and hats onto the bodies, following the video’s order of assembly. Weave in all yarn ends and give each doll a gentle press to shape the clothing.
These dolls look delightful perched on a Christmas tree branch, nestled in a decorative basket, or wrapped in a clear gift box for a handmade present. Pair them with a matching crochet wreath for a coordinated holiday vignette.
Pro Crafter Tips
- Mark the beginning of each round with a stitch marker; it prevents losing track of increases and decreases.
- Use a slightly tighter tension for the head and hat so the finished pieces keep their round shape without sagging.
- Block the completed dolls gently with steam to even out any uneven stitches before stuffing.
Frequently Asked Questions
Q: Can I substitute cotton yarn for the cream beard?
A: Absolutely—cotton gives a smoother texture and works well for facial hair, just keep the hook size the same to maintain the original gauge.
Q: How can I make a larger or smaller Santa & Mrs. Claus set?
A: Increase or decrease the number of stitches in the initial magic ring (e.g., 8 sc instead of 6 sc) and adjust all subsequent rounds proportionally; remember to keep the same stitch ratio for a balanced look.
Watch the Full Step-by-Step Video Tutorial
Prefer visual guidance? Follow along with the complete video tutorial below at your own pace: