
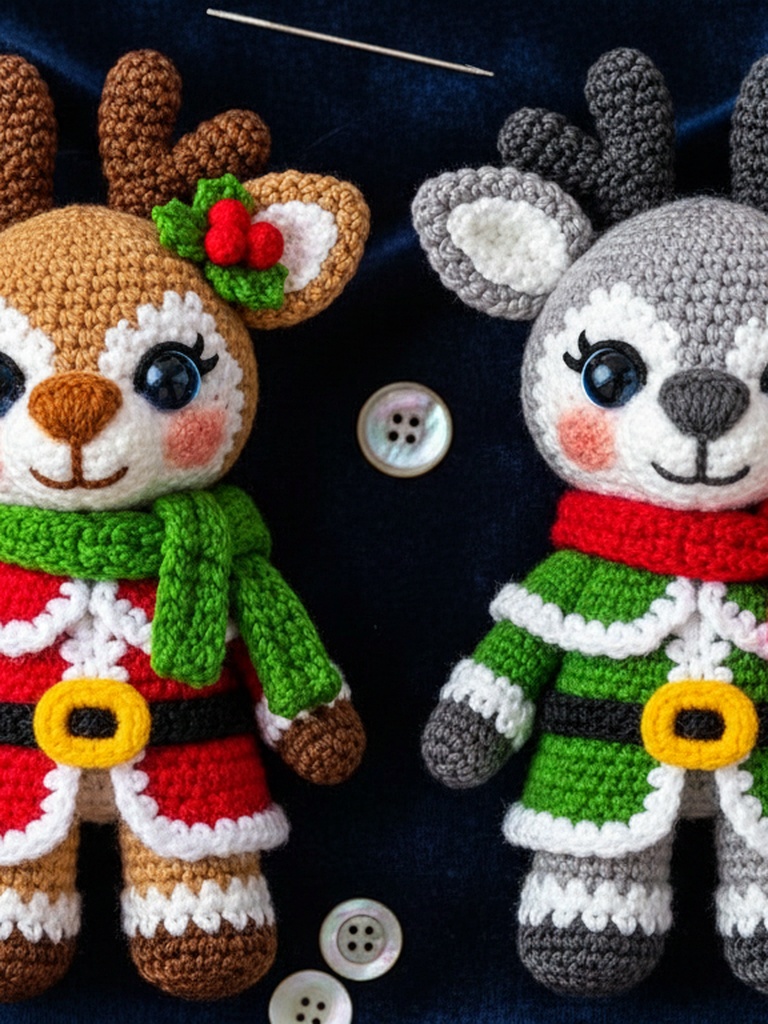
Introduction & Inspiration
When the first snowflakes start to fall, my crochet hook magically finds its way into holiday projects. This year I wanted a tiny, festive friend that could dangle from the tree, the mantel, or a wreath – a cute reindeer that brings a touch of woodland charm to any Christmas décor. The result is this delightful amigurumi reindeer ornament, perfect for beginners and seasoned crocheters alike. Its simple shape, cheerful expression, and easy-to‑follow stitches make it a favorite for gifting, stocking stuffers, or adding a handmade sparkle to your own holiday display.
Materials & Yarn Recommendations
- Yarn: 100% acrylic or super‑soft merino in the following colors – Light Brown (body), Dark Brown (antlers), White (eyes), and optional red for a tiny nose.
- Hook: 3.5 mm (E) for worsted weight yarn; adjust to 3 mm (D) if you prefer a tighter fabric.
- Fiberfill: Premium polyester stuffing for a plush, round finish.
- Safety Eyes: 6 mm black safety eyes (or embroider with black yarn).
- Stitch Markers, Tapestry Needle, Scissors
Step‑by‑Step Stitch Walkthrough
All rounds are worked in continuous spirals unless noted otherwise. Use a stitch marker to keep track of the beginning of each round.
- Head & Body (Light Brown): Magic ring, 6 sc. Increase 6 rounds to 24 sc. Work even for 12 rounds. Decrease 4 rounds back to 6 sc, then close and leave a long tail for sewing.
- Antlers (Dark Brown): Make two separate pieces. Magic ring, 4 sc. Increase 2 rounds to 12 sc, then work even for 6 rounds. Fasten off, leaving a tail for attachment.
- Ears (Light Brown): Chain 4, sc across, turn, sc back, fasten off. Make two.
- Legs (Light Brown): Magic ring, 6 sc. Increase to 12 sc, then work even for 8 rounds. Fasten off, leaving a tail for sewing.
- Assembly: Stuff the head and body firmly. Sew the head onto the body using the long tail. Attach legs to the bottom of the body, spacing them evenly. Sew antlers to the top of the head, angling them outward. Add ears on each side of the head.
- Facial Details: Insert safety eyes 5 mm apart, about 4 mm below the top of the head. Embroider a tiny nose with red yarn and add a smile using black thread.
- Finishing Touch: Thread a 30‑cm length of sturdy ribbon or twine through the top of the head, knot it, and you have a ready‑to‑hang ornament.
Styling & Care Tips
- Hang the reindeer on a sturdy branch, a wreath, or inside a clear glass bauble for a layered look.
- Because the yarn is acrylic, the ornament is machine‑washable on a gentle cycle; hand‑wash for extra softness.
- Store in a breathable fabric bag to keep dust away and preserve the shape.
- Mix and match yarn colors – try a snowy white body with gold antlers for a whimsical twist.
With just a handful of stitches, you’ve created a holiday heirloom that will bring smiles year after year. Share your finished reindeers on social media using #CrochetReindeer and tag us – we love seeing your festive creations!