
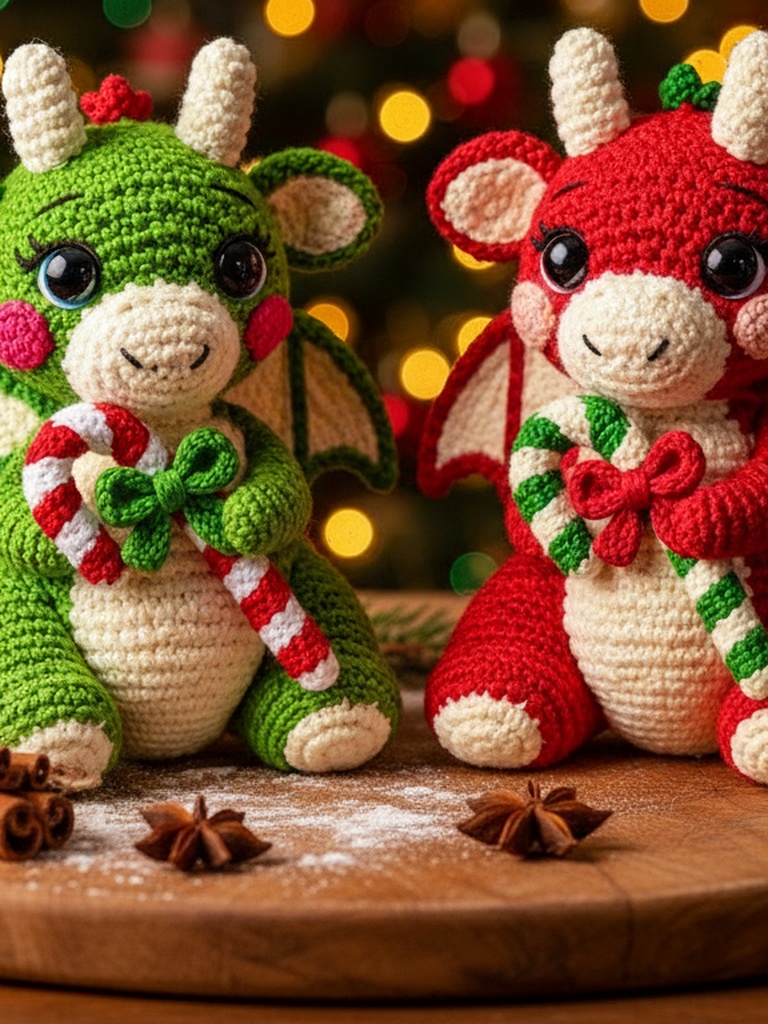
Introduction & Inspiration
When the holidays roll around, we all crave a little extra sparkle and whimsy on our mantelpieces and gift tables. This adorable Christmas Dragon amigurumi blends festive flair with a dash of mythical magic, making it the perfect handmade gift for kids, dragon‑lovers, or anyone who enjoys a cute, cuddly creature. Inspired by classic holiday motifs—think holly, twinkling lights, and a dash of green—this pattern was created to be both beginner‑friendly and delightfully detailed.
Materials & Yarn Recommendations
- Weight: DK or worsted yarn (approximately 100‑120 g). I used a soft, variegated green yarn for the body and a crisp red for the holiday scarf.
- Hook: 3.5 mm (E) for DK yarn or 4 mm (G) for worsted yarn.
- Fiberfill stuffing – medium‑weight.
- Safety eyes (10 mm) or embroidered eyes if you prefer a plush‑friendly version.
- Stitch markers, yarn needle, and a pair of scissors.
- Optional: tiny gold sequins or metallic thread for extra sparkle on the tail.
Step‑by‑Step Stitch Walkthrough
All rounds are worked in continuous spirals unless otherwise noted. Use a slip stitch to join the round and place a marker at the beginning of each round.
- Step 1 – Head: Magic ring, 6 sc. Increase 6 times (12, 24, 36). Work 4 rounds of sc. Begin decreasing: *sc 5, dec* repeat around (30). Continue decreasing until 12 stitches remain, then close.
- Step 2 – Body: Magic ring, 6 sc. Increase to 12, then 24, then 36 stitches over the next three rounds. Work even for 6 rounds. Decrease in the same pattern as the head to shape the tail.
- Step 3 – Legs (make 4): Magic ring, 6 sc. Increase to 12, then work even for 4 rounds. Decrease to close, leaving a long tail for sewing.
- Step 4 – Arms (make 2): Same as legs but only 3 even rounds for a shorter limb.
- Step 5 – Tail: Magic ring, 6 sc. Increase to 12, then 18. Work even for 5 rounds, then begin decreasing every other round until 6 stitches remain. Finish with a few slip stitches for a pointed tip.
- Step 6 – Scales (optional):” Using a contrasting yarn, attach small 4‑stitch round “scale” motifs along the back. Slip stitch into each round, pull tight, and cut the yarn tail.
- Assembly: Stuff each part firmly. Sew legs to the lower body, arms to the sides, and attach the tail to the rear. Embroider a tiny smile and add safety eyes. Finally, crochet a short red scarf (ch 6, sc around, slip stitch to join) and loop it around the dragon’s neck.
Styling & Care Tips
Because this dragon is meant for holiday décor, you’ll want it to stay fresh throughout the season. Gently hand‑wash in cool water with a mild detergent, then lay flat to dry. If you used safety eyes, keep the finished piece out of reach of very young children. To add extra sparkle, tuck a few gold sequins into the tail before the final stuffing step, or use a thin strip of metallic ribbon for a festive tail‑fin.
Display your Christmas Dragon on a mantel, as a tree topper, or tucked into a gift bag for an unforgettable, handmade surprise. Happy crocheting, and may your holidays be as magical as this little dragon!