
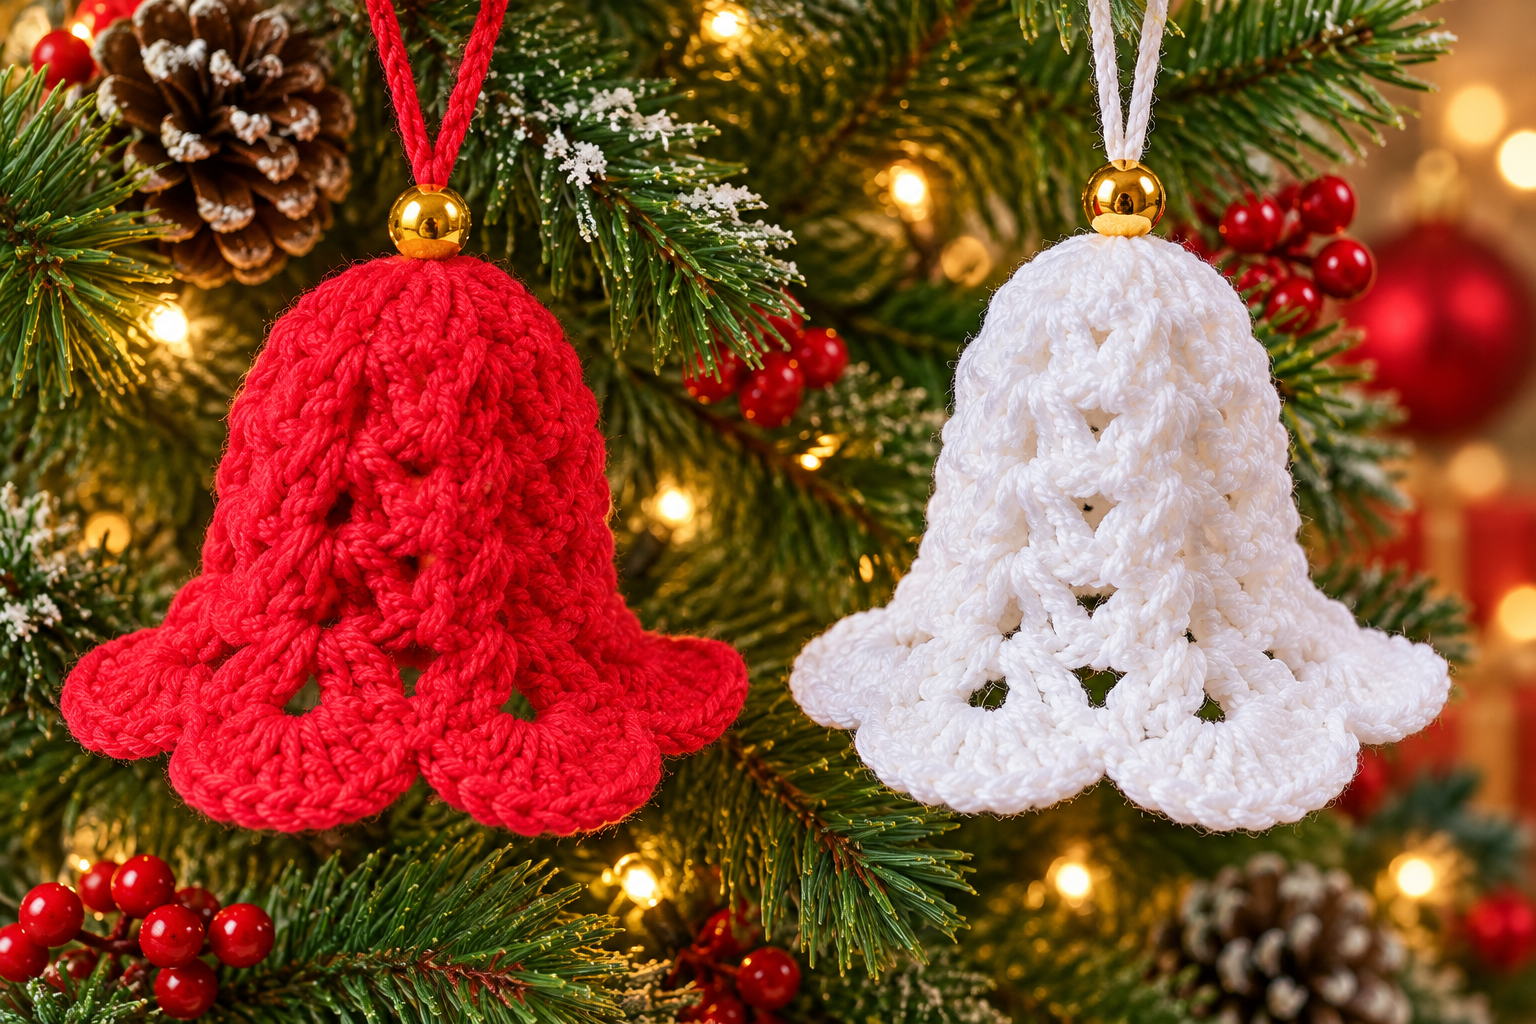
The Crochet Bells Pattern is a beautiful way to turn simple crochet stitches into elegant handmade Christmas ornaments that can be displayed on a tree, wreath, garland, mantel, or holiday centerpiece. The bell design shown in the inspiration image combines an airy textured body with a softly flared lower edge, giving each ornament the recognizable silhouette of a traditional Christmas bell. Red and white yarn create a classic holiday appearance, while a small decorative bead and hanging loop add a polished finishing touch. One of the nicest features of this project is that it looks detailed without requiring an extremely complicated construction. Once you understand how the openwork sections are formed, the pattern becomes pleasantly repetitive. The finished bell can also be customized with different yarn colors, decorative cords, ribbons, beads, or metallic accents.
This crochet Christmas bell project is particularly useful for crocheters who enjoy making small decorations because it requires relatively little yarn and can usually be completed much faster than a large garment or blanket. The body is worked from the top downward, gradually increasing until the lower portion is wide enough to create the bell shape. Open spaces created with chain stitches, double crochet, and decorative stitch groups give the ornament its lacy appearance. The final round creates a wider scalloped edge that helps the bell flare outward naturally. Because the finished piece is lightweight, it works especially well as a crochet tree ornament. A slightly firmer yarn or optional fabric stiffening can help the bell retain its shape for many holiday seasons.
The term Crochet Bells Pattern refers to the complete set of instructions used to create a bell-shaped decoration with crochet stitches. In this tutorial, the design is written using U.S. crochet terminology, making the directions easier to follow for crocheters familiar with American stitch names. The construction begins with a small circular top, continues through an openwork bell body, and finishes with decorative scallops around the bottom. The measurements can easily be adjusted by adding or removing rounds before working the border. Beginners who already know basic chains, slip stitches, single crochet, and double crochet should be able to follow the project with patience. More experienced crocheters can use the same structure as a foundation for creating their own variations.
Materials, Crochet Terms, Gauge, and Preparation
For one medium Crochet Bells Pattern, prepare approximately 20–30 yards (18–27 m) of lightweight or medium-weight yarn. Cotton yarn is an excellent choice because it creates clearly defined stitches and tends to hold the bell shape well. Acrylic yarn can also be used if you prefer a softer and slightly lighter ornament. A finished bell made with DK or light worsted yarn will generally measure approximately 3.5–4.5 inches (9–11.5 cm) tall, excluding the hanging loop. The width across the flared bottom will usually be around 4–5 inches (10–13 cm). These measurements can vary depending on yarn weight, hook size, and personal tension.
A crochet hook between 3.0 mm and 4.0 mm is suitable for most versions of this ornament. If the stitches feel loose and the bell collapses easily, use a slightly smaller hook. A tighter fabric helps the finished decoration maintain its shape while still allowing the openwork pattern to remain visible. You will also need scissors, a yarn needle, and optional decorative accessories. A wooden, acrylic, or metallic-look bead can be placed at the top of the bell as shown in the inspiration. Ribbon or crocheted cord can be used to create the hanging loop.
Several basic U.S. crochet stitches are used throughout the project. Ch means chain, sl st means slip stitch, sc means single crochet, dc means double crochet, and st means stitch. When the instructions say ch-space, work into the open area created by chains from the previous round instead of inserting the hook directly into a stitch. A shell in this pattern is a decorative group of double crochet stitches worked into the same space. These groups create the fuller lower border that gives the ornament its characteristic bell shape.
Gauge is not as critical for a Christmas ornament as it would be for clothing, but consistent tension is still important. Crochet a small sample with your selected hook and yarn if you are uncertain about the fabric density. You want stitches that are firm enough to hold their structure without becoming stiff or difficult to crochet. If your sample is extremely loose, move down one hook size. If it feels excessively rigid or the hook is difficult to insert, increase the hook size slightly.
Before beginning the actual crochet bell ornament, decide how large you want the finished project to be. A smaller ornament can be created with sport-weight or fingering yarn and a smaller hook. For a more noticeable decoration, use DK or worsted yarn with a slightly larger hook. Avoid extremely bulky yarn for this particular openwork design because the lacy details may become difficult to see. Keeping the yarn smooth rather than heavily textured also makes the stitch pattern more visible.
Color choice can completely change the appearance of the finished ornament. Bright red creates a traditional Christmas bell, while white produces a delicate snowy appearance like the ornaments in the photo. Gold, cream, emerald green, burgundy, silver gray, and icy blue are also attractive holiday options. You can make several bells in coordinating colors for a complete handmade ornament collection. Using one consistent yarn weight ensures that all bells in the set have approximately the same dimensions.
How to Crochet the Bell Body Step by Step
Begin the Crochet Bells Pattern at the top of the bell. Make a magic ring, or chain 4 and join the first chain with a slip stitch to create a small ring. Chain 3, which can count as the first double crochet, and work 11 additional double crochet stitches into the center of the ring. Join to the top of the beginning chain with a slip stitch. You should now have a compact circular foundation that will become the crown of the bell. Pull the center ring closed firmly if you used a magic ring.
For the second round, chain 3 and work one double crochet into the same general area. Work two double crochet stitches into each stitch around, then join with a slip stitch. This round expands the top while keeping the shape smooth. If your bell begins to ripple dramatically, the increases may be too frequent for your yarn and tension. A very slight curve is perfectly acceptable because the ornament will soon begin forming downward instead of remaining flat.
Now begin creating the open sections that give this crochet Christmas ornament its decorative look. Chain 4, skip one stitch, and work one double crochet into the following stitch. Continue with chain 2, skip one stitch, double crochet in the next stitch around. Join carefully at the end of the round. The chain spaces become important in the next rounds because they provide the foundation for the raised and crossing-looking stitch groups. Do not crochet the chains too tightly, or the body may narrow unexpectedly.
On the next round, slip stitch into the nearest chain space. Chain 3 and work two additional double crochet stitches into that same space. Chain 2 and work three double crochet stitches into the next chain space. Continue around with 3 dc, ch 2 in each chain space. Join with a slip stitch at the end. These small clusters create vertical columns of texture and begin giving the bell body more dimension.
Continue the decorative body by working into the chain spaces again. Slip stitch to the next chain space, chain 3, and create another group of two double crochets beside the beginning chain. Chain 3 before working three double crochet stitches into the next available chain space. Repeat around. The slightly longer chains help open the fabric and create the airy spaces visible between the raised crochet sections. After several rounds, the project should begin hanging downward like a small tube or cone.
Repeat this general cluster-and-chain pattern for approximately three to five additional rounds, depending on how tall you want your bell. For a medium ornament, the body before the flared border can measure approximately 2.5–3.5 inches (6.5–9 cm). You can occasionally increase by adding an extra chain between groups or by placing an additional cluster into selected spaces if more width is needed. The important goal is to create a gradual bell shape rather than a perfectly straight cylinder. Check the piece frequently by holding it upright and observing its silhouette.
Creating the Flared Bell Edge and Decorative Scallops
The lower border is one of the most recognizable parts of this Crochet Bells Pattern because it transforms the narrow body into a proper bell shape. Begin the border round by moving into the first chain space with a slip stitch. Chain 3 and work four more double crochet stitches into the same space. This creates a five-double-crochet shell. Work one single crochet into the next chain space. Continue alternating a five-double-crochet shell and a single crochet around the entire bell.
If your stitch count does not allow the shells to repeat perfectly, adjust the final section carefully rather than forcing the fabric. Handmade crochet projects can vary slightly because of tension and stitch placement. The goal is to distribute the shells evenly enough that the bottom edge remains balanced. A six-double-crochet shell can be used instead of five stitches if you want a fuller border. For a smaller or more delicate bell, four double crochet stitches per shell may be sufficient.
For an even more pronounced flare, add one preparation round before the shell border. Work two double crochet, chain two, two double crochet into each selected chain space, then chain one before moving to the next space. This creates additional fabric around the lower circumference. Follow with the shell round afterward. This variation is helpful when you want the wide, gently curved edge visible on the red and white bells from the inspiration image.
After completing the decorative edge, fasten off and cut the yarn, leaving a tail approximately 6 inches (15 cm) long. Thread the tail through a yarn needle and weave it securely through several stitches on the wrong side. Change direction at least once while weaving the end so it is less likely to work loose later. Trim the excess yarn carefully without cutting any structural stitches. Repeat the same process with the beginning tail at the top.
Shape the crochet bell with your fingers, opening each shell and gently stretching the body so the lace sections appear symmetrical. If you used cotton yarn, light blocking can significantly improve the appearance. Dampen the ornament slightly, shape it over a rounded object or suitable form, and allow it to dry completely. Another option is to use a removable form underneath while drying so that the bell retains its curved silhouette. Avoid excessive heat, especially when working with acrylic yarn.
For a firmer ornament, you can apply a small amount of appropriate craft fabric stiffener according to its instructions, but this step is completely optional. Many bells made with cotton yarn and a slightly tight gauge will hold their shape without additional treatment. If the ornament will be stored between holiday seasons, place it carefully in a box where the scalloped border will not be crushed. Gentle reshaping with your fingers is usually enough to restore the form after storage.
Adding the Hanging Loop, Decorations, and Custom Variations
To create the hanging loop for your Crochet Bells Pattern, attach yarn securely at the center top. Chain approximately 30–40 stitches, depending on the length you prefer, and join the final chain back near the starting point with a slip stitch. Fasten off and weave the ends securely. Another attractive option is to use satin ribbon or decorative cord. Red bells look especially festive with red cord, while white bells pair beautifully with white, gold, or silver hanging loops.
A decorative bead can be threaded onto the hanging loop before it is secured, creating the polished appearance shown in the reference image. Choose a bead with an opening large enough for the cord or crochet chain to pass through easily. Gold-tone beads add warmth and contrast particularly well against white or bright red yarn. Make sure the bead sits directly above the crochet bell instead of sliding freely along the entire hanging loop. Secure it with a small knot or stitch if necessary.
You may also add a small crocheted or decorative clapper inside the bell. Crochet a tiny ball, use a wooden bead, or make a short chain ending in a yarn tassel. Attach it securely to the center inside the crown. This feature is primarily decorative and does not need to create an actual ringing sound. If the decoration may be accessible to very young children or pets, avoid loose beads and other small detachable pieces and keep the ornament securely out of reach.
One advantage of this easy crochet bell pattern is how easily it can be personalized. Alternate red and white rounds for a striped holiday effect, add a narrow metallic yarn edge around the scallops, or crochet the final border in a contrasting color. A white bell with gold edging creates an elegant traditional look. Red with white trim feels cheerful and classic, while green with gold can coordinate beautifully with other Christmas decorations.
You can also modify the finished size without changing the overall style. For miniature bells, use finer yarn, a 2.0–2.75 mm hook, and fewer body rounds. For larger hanging decorations, use worsted yarn, a 4.0–4.5 mm hook, and additional cluster rounds before creating the border. Keep in mind that adding width and height may require additional increases so the bell does not become too narrow. Always compare the width of the lower body with the height before beginning the final scallops.
Once you have completed one ornament, making several becomes much faster because the stitch rhythm becomes familiar. A collection of handmade crochet bells can decorate an entire Christmas tree, be attached to gift packages, added to a holiday garland, or arranged around a seasonal centerpiece. They also make thoughtful handmade gifts because each bell can be customized for a particular color scheme. Creating a coordinated set in red, white, and gold gives the decorations a traditional festive appearance while keeping the project manageable and economical.
Frequently Asked Questions About the Crochet Bells Pattern
Is the Crochet Bells Pattern suitable for beginners?
Yes. A confident beginner who understands chain stitches, slip stitches, single crochet, and double crochet can complete this pattern. The decorative appearance comes mainly from repeating groups of familiar stitches rather than using highly advanced techniques. Beginners may want to make the first bell slowly while checking the stitch placement after every round.
What is the best yarn for crochet Christmas bells?
Cotton is one of the best options because it offers clear stitch definition and good structure. DK cotton and light worsted cotton are especially suitable for medium ornaments. Acrylic also works and can produce a softer decoration. Whatever fiber you choose, a smooth yarn usually displays the openwork pattern more clearly than a fuzzy yarn.
How large should a finished crochet bell be?
A typical ornament can measure approximately 3.5–4.5 inches (9–11.5 cm) tall and about 4–5 inches (10–13 cm) wide across the flared bottom. There is no required size. Smaller bells are ideal for small trees and gift decorations, while larger bells can be used on wreaths and garlands.
Why is my crochet bell too flat?
A flat bell usually needs fewer increases near the top and more vertical rounds through the center. Once the crown is established, the pattern should grow downward instead of continuing to expand like a flat circle. Work several rounds with approximately the same number of stitch groups before increasing again near the lower border.
Why is the bottom edge not flaring enough?
Increase the number of stitches in each shell or add an increase round immediately before the decorative border. For example, working two double crochet, chain two, and two double crochet into several spaces creates more circumference. The additional fabric allows the lower edge to curve outward naturally.
Can I make these crochet bells without stiffener?
Absolutely. A firm cotton yarn combined with a slightly smaller crochet hook can provide enough structure for the bell to maintain its shape naturally. Blocking may be all that is necessary. Stiffener is simply an optional finishing method for crocheters who prefer a more rigid ornament.
Can the hanging loop be crocheted instead of using ribbon?
Yes. A simple chain loop works very well and keeps the entire ornament crocheted. Chain enough stitches to create the desired hanging length, attach the chain securely to the top, and weave in both ends. You can also work slip stitches back along the chain if you want a thicker and stronger cord.
How many bells can I make from one skein of yarn?
The exact number depends on yarn weight, skein size, hook, and ornament dimensions. Because each bell generally uses only a small amount of yarn, one standard skein can usually produce several ornaments. This makes the project particularly useful for using leftover yarn from larger crochet projects.
Can I use this Crochet Bells Pattern for colors other than Christmas red and white?
Yes. Although red and white create the traditional look shown in the inspiration, the pattern can be made in practically any color. Gold, silver, cream, green, burgundy, blue, pink, and multicolored yarn can all produce beautiful results. Color choice is one of the easiest ways to personalize the design.
How can I make the stitches look more professional?
Maintain consistent tension, count your stitches carefully, avoid making chain spaces too tight, and block the finished ornament. Take time to arrange the scallops evenly around the lower edge. Properly weaving in the yarn tails also contributes to a cleaner finish.
Can the Crochet Bells Pattern be made larger?
Yes. Continue repeating the body rounds before starting the border, while adding occasional increases when necessary. Using thicker yarn and a larger crochet hook will also increase the overall size. Just remember that significantly larger bells may need additional shaping or stiffening to maintain their structure.
Conclusion
The Crochet Bells Pattern combines traditional holiday style with enjoyable crochet techniques that can be adapted for many skill levels. Throughout this tutorial, you learned how to create the circular crown, develop the openwork body using double crochet clusters and chain spaces, gradually shape the piece into a bell, and finish it with a decorative scalloped border. You also learned how hook size, yarn weight, tension, blocking, and optional stiffening influence the appearance and structure of the finished ornament.
The final steps, including the hanging loop, decorative bead, optional clapper, and color variations, allow each crochet Christmas bell to feel unique. Whether you make a bright red bell, a snowy white version, or an entire coordinating collection, the same basic construction can be repeated and personalized in many ways. These small projects are especially useful for Christmas trees, garlands, wreaths, gifts, and handmade seasonal displays.