
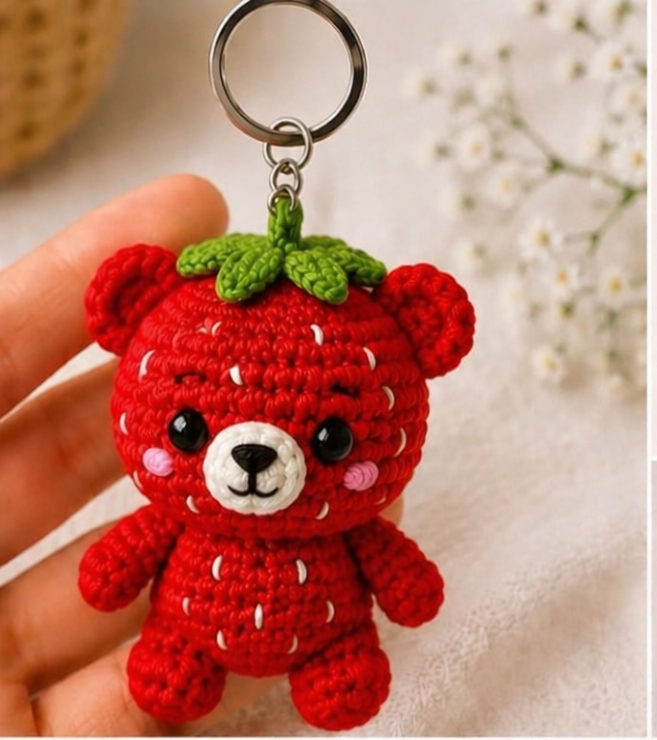
Overview & Design Inspiration
Hello, my wonderful crochet family! If you are looking for a project that brings an instant smile to your face, you are going to fall completely in love with today’s featured make. The Crochet Strawberry Bear Pattern combines the cozy, comforting charm of a classic teddy bear with the playful, vibrant aesthetic of fresh summer berries.
Crafters everywhere are obsessed with this sweet design because it hits that perfect sweet spot between trendy and timeless. Whether you are crafting for a nursery, preparing for a craft fair, or simply treating yourself to a joyful weekend project, this delightful amigurumi bear offers endless creative satisfaction.
Materials & Recommended Supplies
Gathering your supplies is half the fun of any new crochet adventure! Here is everything you need to bring your very own strawberry bear to life with a professional, huggable finish.
- Yarn: Soft cotton yarn or plush chenille yarn in bright red, pastel pink, leafy green, and cream or white.
- Crochet Hook: Appropriate size for your chosen yarn (commonly 2.5mm to 4.0mm / US B-1 to G-6) to ensure tight, even stitches.
- Stuffing: Lightweight polyester fiberfill for a plush, cuddly shape without feeling overly heavy.
- Notions: Safety eyes (glossy or embroidered), embroidery thread for facial details, yarn needle, stitch markers, and scissors.
Essential Techniques & Stitch Highlights
Creating amigurumi is such a meditative journey, and this project uses foundational techniques that every crocheter loves to practice. You will work primarily in continuous rounds, mastering the magic ring, single crochet stitches, and gradual increases and decreases to build those adorable rounded shapes.
Color changes are another exciting feature of this design, allowing you to seamlessly transition from the bear’s cozy fur to the textured, seed-speckled strawberry hood. The clever combination of simple stitches creates a wonderfully tactile finish that feels just as amazing as it looks.
Construction & Assembly Highlights
Bringing a stuffed animal to life is truly magical! The project begins by working from the bottom up or crafting individual pieces—like the head, body, arms, and legs—separately before bringing them together into one cohesive cutie.
Next comes the strawberry-inspired hood and leaf details, which frame the bear’s face with whimsical charm. Taking your time to pin all the components in place before securing your final stitches ensures a balanced, symmetrical, and completely professional-looking handmade treasure.
Customization & Styling Ideas
One of the absolute best parts of handmade amigurumi is making it your own! You can easily swap out traditional red for pastel pinks, mint greens, or even a rainbow palette to match any nursery theme or personal aesthetic.
Elevate your creation even further by adding tiny embroidered hearts, a miniature crocheted flower tucked behind an ear, or a sweet little bow. These personalized touches make wonderful keepsakes for baby showers, birthdays, and holiday gifts.
Pro Tips for Flawless Results
- Maintain Even Tension: Keep your stitches nice and tight to ensure the polyester fiberfill never peeks through the gaps.
- Stuff Gradually: Add your fiberfill in small amounts as you go to sculpt an even, lump-free shape.
- Use Stitch Markers: Always mark the first stitch of your round so you never lose your place in continuous spirals.
- Pin Before Sewing: Use locking stitch markers or pins to test your placement for ears, arms, and hoods before attaching them permanently.
Frequently Asked Questions
Is this crochet pattern beginner-friendly?
Yes, absolutely! While it involves shaping and assembly, the core stitches rely heavily on basic single crochets, increases, and decreases, making it accessible for adventurous beginners.
What type of yarn works best for a plush texture?
Plush chenille yarn creates an ultra-soft, velvety toy that everyone loves to cuddle, while lightweight cotton yarn offers crisp stitch definition and a classic amigurumi look.
How do I access the full step-by-step tutorial?
You can easily grab our comprehensive downloadable PDF pattern and follow along with the complete video tutorial linked at the top and bottom of this page!
Watch the Full Step-by-Step Video Tutorial
Prefer visual guidance? Follow along with the complete video tutorial below at your own pace: