
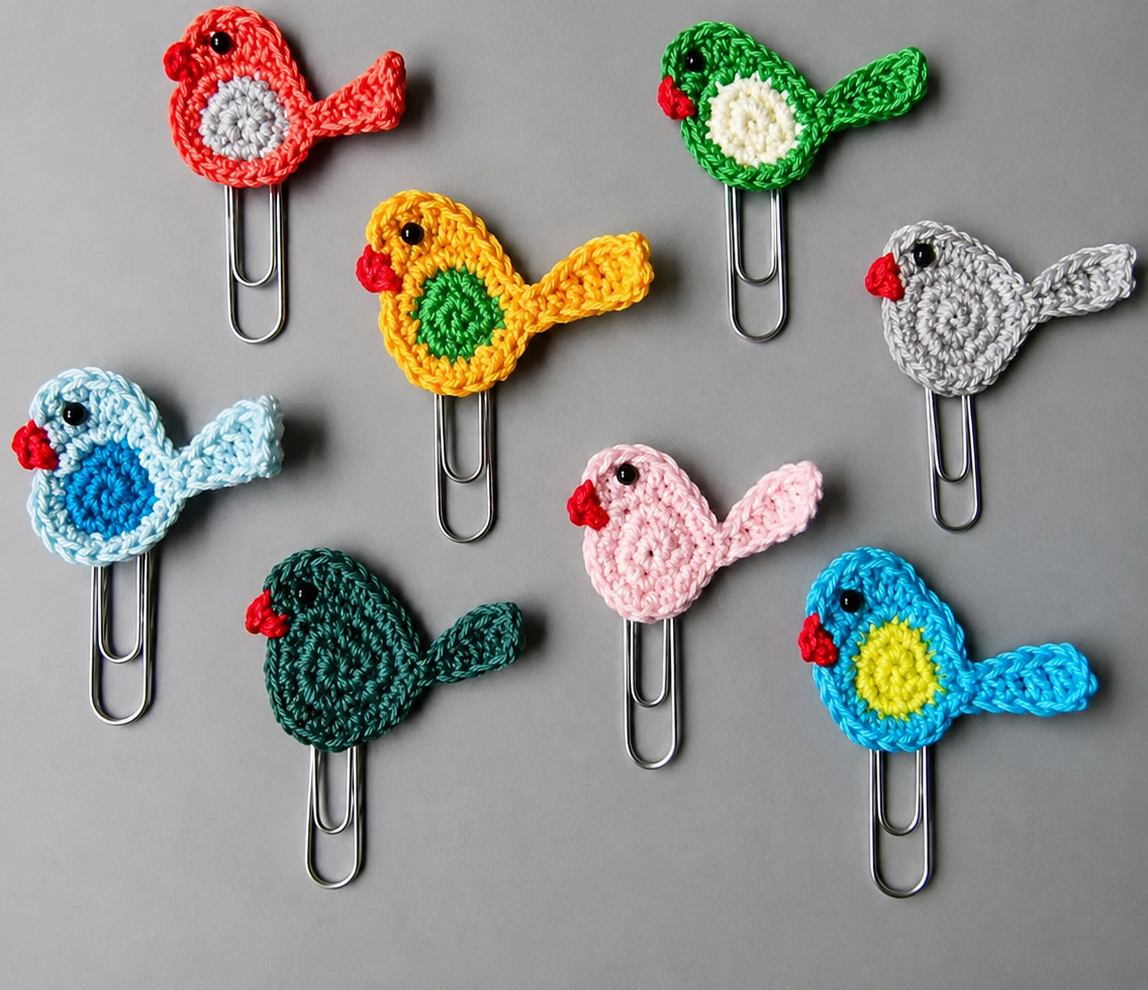
Overview & Design Inspiration
Welcome, fiber friends! If you are looking for your next quick-fix crochet obsession, the Crochet Bird Paper Clip Pattern is about to steal your heart. These charming little creatures bring an explosion of handmade joy to your everyday stationery and planning routines.
Crafters everywhere are falling head over heels for this project because it perfectly balances speed, utility, and absolute cuteness. Whether you are marking your favorite page in a novel or jazzing up your office planner, these tiny birds add a warm, personal touch that mass-produced accessories simply cannot match.
Materials & Recommended Supplies
- Yarn: Lightweight cotton yarn (Sport or Fingering weight). It provides gorgeous definition and helps your little bird keep its crisp shape.
- Crochet Hook: 2.25 mm (US B/1) or 2.5 mm hook to ensure tight, neat stitches without gaping holes.
- Notions: Standard or decorative colored paper clips (gold, silver, or pastel hues work wonders!).
- Extras: Tapestry needle for weaving ends, tiny scraps of embroidery floss for facial features, and optional lightweight fiberfill for minimal stuffing.
Essential Techniques & Stitch Highlights
This delightful project relies on basic, accessible stitches like the single crochet, slip stitch, and chain stitch. Because it is a miniature project, maintaining neat foundations through foundational techniques like the magic ring is key to achieving that clean, professional finish.
Instead of complex structural shaping, the pattern utilizes clever decreases and strategic folding to create the bird’s profile. Working with tighter-than-usual tension ensures your stitches lock together smoothly around the metal frame, keeping everything secure and sturdy for everyday handling.
Construction & Assembly Highlights
The journey begins by crocheting the flat or lightly stuffed body panels of the bird using your chosen cotton yarn. The clever construction allows you to work right around or securely attach the metal paper clip during the final assembly phase.
Once your crochet bird body is complete, you will carefully position it over the top loop of the paper clip. Using matching yarn or durable sewing thread, whipstitch the pieces closed around the wire spine, hiding all structural anchors neatly inside the bird’s silhouette.
Customization & Styling Ideas
The sky is truly the limit when it comes to styling your crochet birds! Swap out yarn colors to match seasonal themes—think soft pastels for spring journals and rich jewel tones for cozy winter reading.
Use these versatile little clips as thoughtful additions to greeting cards, gift wrap bows, or party favors. They also make incredible, budget-friendly appreciation gifts for teachers, students, and coworkers who love a splash of handmade whimsy.
Pro Tips for Flawless Results
- Control Your Tension: Keep your stitches tight and uniform so the metal paper clip underneath remains completely hidden from view.
- Embrace the Scraps: This pattern is a brilliant stash-buster; use up those tiny leftover yarn balls from larger amigurumi projects!
- Secure Those Ends: Weave in all yarn tails meticulously before final assembly to keep your miniature project looking polished and professional.
- Personalize the Details: Add extra character with tiny French knots for eyes or contrasting embroidery for little wing accents.
Frequently Asked Questions
Is the Crochet Bird Paper Clip Pattern beginner-friendly?
Absolutely! Because it uses basic stitches and requires very little time to complete, confident beginners can easily master this project and enjoy instant crafting satisfaction.
Do I need to use stuffing for these tiny birds?
Stuffing is completely optional. Many crafters prefer keeping them flat for a sleek profile in planners, while others add a tiny pinch of fiberfill for a delightful 3D effect.
How do I access the full step-by-step pattern?
You can easily grab the complete printable pattern and watch our in-depth video tutorial by downloading the PDF and following along with our guided resources!
Watch the Full Step-by-Step Video Tutorial
Prefer visual guidance? Follow along with the complete video tutorial below at your own pace: