
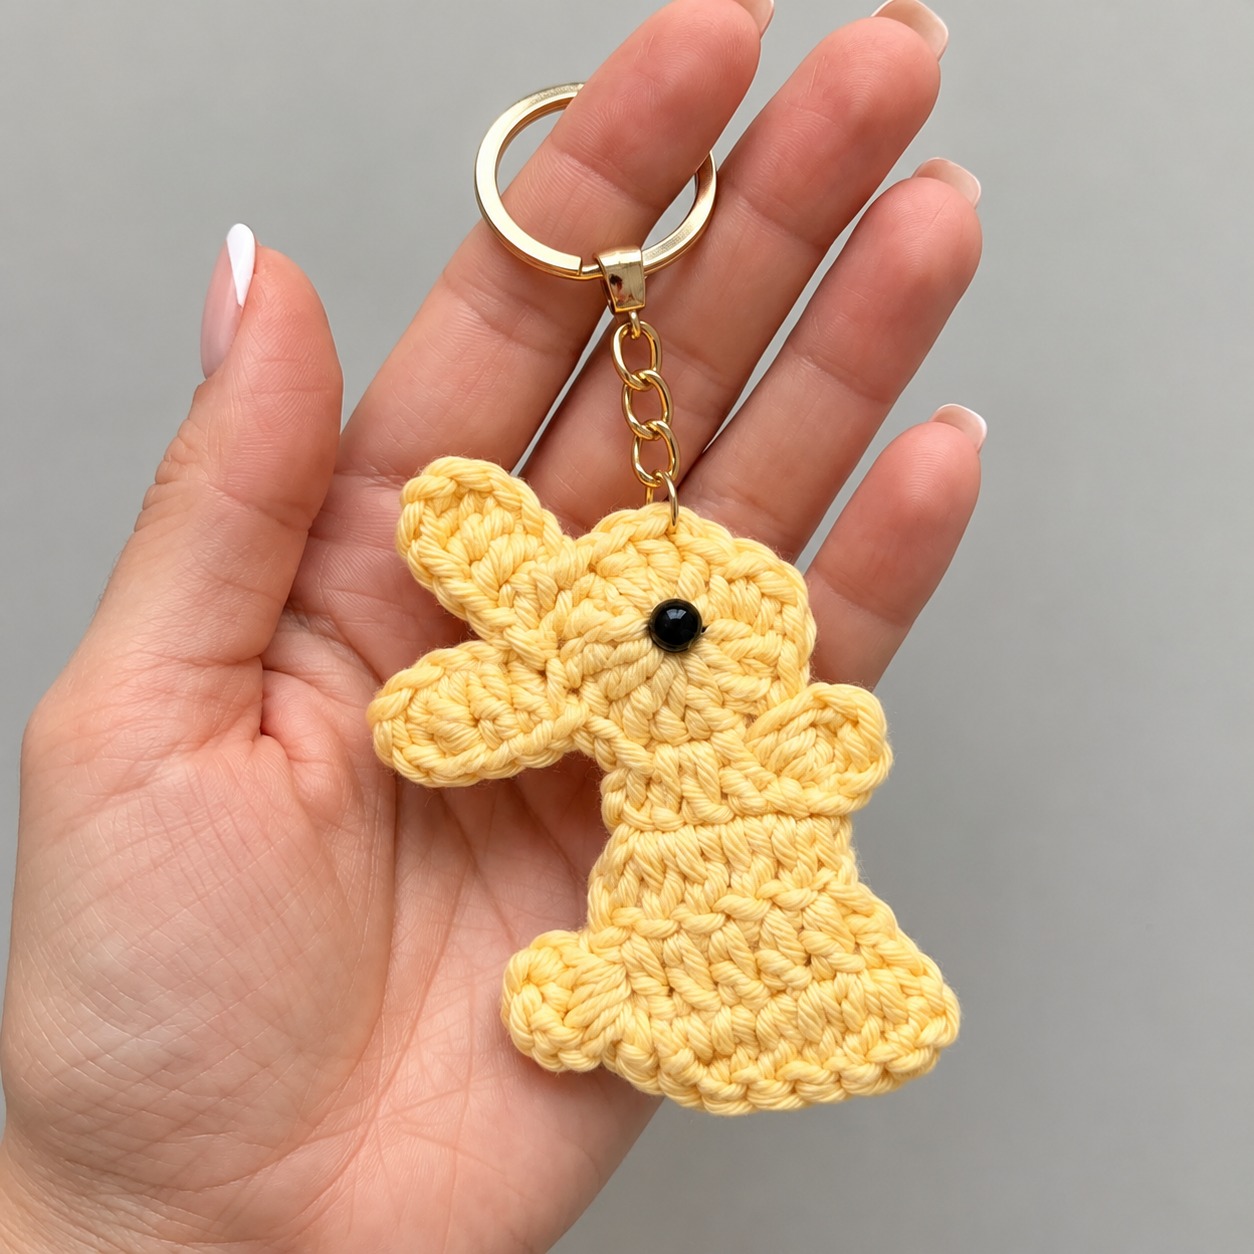
Hello, wonderful makers! Are you ready for a project that’s utterly charming, surprisingly quick, and perfectly portable? Today, we’re diving into a crochet design that promises to capture your heart: the adorable Crochet Bunny Keychain.
This little gem transforms a small amount of yarn into a delightful accessory, perfect for adding a touch of handmade sweetness to your everyday life. Whether you’re a seasoned hooker looking for instant gratification or a beginner eager to master new skills, this sweet bunny is your next must-make project.
Overview & Design Inspiration
The Crochet Bunny Keychain isn’t just a pattern; it’s an invitation to create a tiny piece of joy. Imagine a delicate bunny shape, complete with long, expressive ears, a soft, textured body, and a sweet little eye, all crafted by your own hands. This charming design is perfect for anyone who loves making cute, practical accessories that bring a smile.
What makes this bunny so special is its unique, mostly flat construction, which gives it a distinct character unlike traditional amigurumi. It highlights the bunny’s graceful ears, rounded head, and gently shaped body with elegant simplicity. The flat profile makes it ideal for attaching to keys, handbags, backpacks, or even as a delightful tag on a handmade gift, bringing a pop of handmade charm wherever it goes.
Materials & Recommended Supplies
Gathering the right tools is the first step to creating your perfect bunny. Here’s what you’ll need to bring this charming creature to life:
- **Yarn:** Approximately 15–25 grams of DK or light worsted-weight cotton yarn. Cotton is fantastic for stitch definition and holding shape, making it ideal for small accessories. You can choose a soft yellow like our featured bunny, or pastels like pink, cream, lavender, baby blue, or even neutral beige.
- **Crochet Hook:** A 2.5 mm to 3.5 mm crochet hook, depending on your yarn and desired tension.
- **Tapestry Needle:** Essential for weaving in ends and assembling your bunny’s features neatly.
- **Scissors:** For snipping yarn with precision.
- **Keychain Ring:** A metal keychain ring with a short chain to transform your bunny into a practical accessory.
- **Eye Detail:** A small black embroidered stitch is recommended for the eye, especially if it might be handled by children, ensuring safety and durability.
- **Optional:** A stitch marker can be incredibly helpful when working on small, intricate sections to keep track of your rounds. A small amount of matching thread can be used to reinforce attachment points.
Essential Techniques & Stitch Highlights
This project is a fantastic way to build your crochet repertoire, utilizing fundamental US crochet terms that are common in decorative accessories and amigurumi. You’ll work with familiar stitches like chain (ch), single crochet (sc), half double crochet (hdc), and double crochet (dc), which form the varied textures and shapes of the bunny.
A key technique you’ll master is the magic ring (MR), which creates a tightly closed center for the bunny’s head, giving it a polished look. Don’t worry if it feels tricky at first; practice makes perfect, and it’s an invaluable skill for many small crochet projects. You’ll also become proficient in increasing (inc) and decreasing (dec) stitches, which are crucial for shaping the bunny’s distinct silhouette, from its rounded head to its gently flaring body and elegant ears.
Construction & Assembly Highlights
Crafting your Crochet Bunny Keychain is a delightful process of bringing individual components together. You’ll begin by crocheting the bunny’s sweet, rounded head, working in the round to create a flat circular piece that forms the foundation of its face. This is where your magic ring skill truly shines, ensuring a neat start.
Next, you’ll fashion the two elongated ears, giving them that signature bunny look with a combination of different stitch heights to create a soft, slightly pointed curve. The body is then worked as a separate flat piece, starting narrow and gradually widening with strategic increases to create a lovely, organic shape. A thoughtful edging around the body’s lower edge refines its silhouette, making it appear wonderfully finished and adding a soft flare.
Finally, you’ll bring all these charming pieces together, carefully attaching the head, ears, and any small paw or foot details to create a cohesive bunny form. The finishing touch involves securely attaching your tiny embroidered eye and the elegant metal keychain ring, transforming your crafted pieces into a functional and adorable accessory ready for its debut.
Customization & Styling Ideas
One of the most exciting aspects of this pattern is the endless possibility for personalization! While the soft yellow bunny with its simple black eye offers a sweet, minimalist aesthetic, you can truly make it your own. Imagine a collection of bunnies in pastel pink, cream, serene lavender, or even a soft baby blue, each with its own unique personality.
Consider embroidering tiny rosy cheeks or a small nose for extra charm. A minuscule decorative bow or a contrast stitch on the inner ear could also add delightful detail. These bunnies make perfect handmade gifts, seasonal decorations (think spring wreaths!), or delightful additions to your own craft collection. They’re fantastic for decorating keys, adding flair to handbags or backpacks, or even as charming adornments for gift packages.
Pro Tips for Flawless Results
- **Mind Your Tension:** Since this bunny is quite small, even stitch tension is crucial for maintaining its cute proportions. Aim for firm but not overly tight stitches to create a structured fabric without gaps.
- **Hook Size Matters:** If your stitches tend to be loose, try going down a hook size from what the yarn label recommends. This can help create a neater, more robust fabric that stands up well to being carried around.
- **Neat Edging for Definition:** When working the edging around the body, adjust your stitch count to prevent puckering or ruffling. This step is key to achieving a beautifully defined and professional-looking shape.
- **Secure Assembly:** Use your tapestry needle to securely attach all components, leaving long tails for sewing. Take your time to align pieces carefully, ensuring your bunny looks perfectly put together and durable for daily use.
Frequently Asked Questions
What kind of yarn is best for a small keychain project like this?
Soft cotton yarn, particularly DK or light worsted weight, is highly recommended. It provides excellent stitch definition, helps the bunny maintain its shape, and is durable enough for an accessory that will see regular use.
Is this pattern suitable for complete beginners?
While the pattern introduces a few basic techniques like the magic ring, it’s written to be accessible. If you’re familiar with fundamental stitches like single crochet and chain, this is a wonderful project to expand your skills and build confidence with shaping and assembly.
How can I make sure my bunny keychain is safe for children?
For young children, it’s best to use an embroidered black stitch for the eye rather than a plastic safety eye, which could be a choking hazard. Also, ensure all yarn tails are securely woven in and components are firmly sewn to prevent anything from coming loose.
Watch the Full Step-by-Step Video Tutorial
Prefer visual guidance? Follow along with the complete video tutorial below at your own pace: