
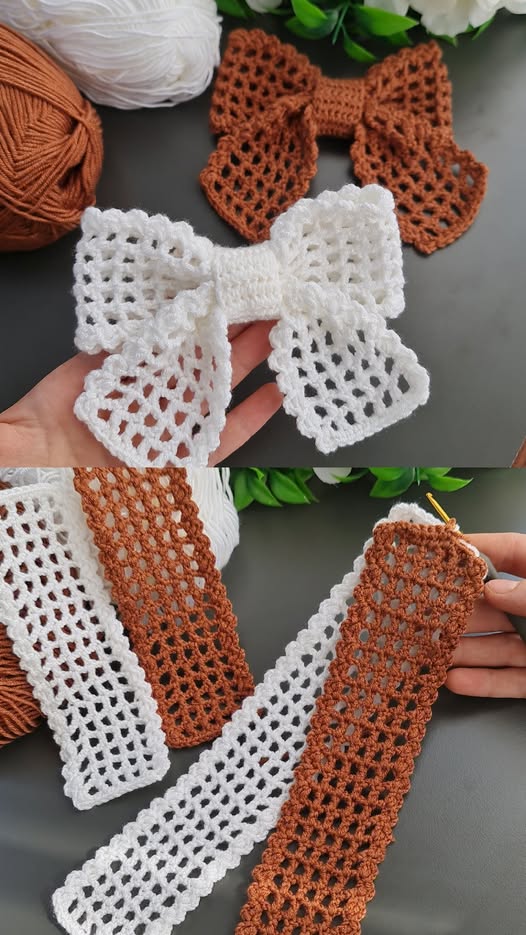
Overview & Design Inspiration
Welcome, fiber friends, to your new favorite quick-make obsession! There is something deeply satisfying about creating a charming accessory with your own two hands, and this project captures that joy in every single stitch.
Whether you are dressing up a casual outfit, crafting a sweet gift, or building inventory for your handmade shop, these delightful bows bring instant style and warmth to any wardrobe.
Materials & Recommended Supplies
Gathering your supplies is half the fun! Keeping your materials simple allows you to dive right into the creative process without any fuss.
- Yarn: Sport, DK, or worsted weight yarn. Smooth fibers work best to showcase crisp stitch definition.
- Fibers: Cotton for a crisp, structured look, or soft acrylic for gentle comfort against everyday wear.
- Crochet Hooks: 3.5 mm (US E/4) to 4.5 mm (US 7) depending on your yarn choice. A slightly smaller hook helps the bow hold its gorgeous shape.
- Notions: Yarn needle, sharp scissors, and your choice of hair clips, headbands, or elastic hair ties.
- Embellishments (Optional): Buttons, pearls, or tiny appliqués for a personalized touch.
Essential Techniques & Stitch Highlights
One of the best things about this design is how approachable the techniques are while still delivering stunning, professional-looking results. You will primarily work with foundational crochet techniques that build confidence and rhythm.
Simple chains, single crochets, and double crochets form the backbone of the structure, allowing beginners to practice even tension while letting advanced makers play with delightful textures. Working in the round or creating neat rectangular panels gives you plenty of room to experiment with subtle ribbing, edge details, or classic smooth finishes.
Construction & Assembly Highlights
Bringing your accessory together is wonderfully straightforward and deeply rewarding. The process generally begins by crafting the main body of the bow, which is often shaped as a neat rectangle or worked in continuous rounds depending on your preferred style.
Once your main piece is ready, a simple cinching method around the center creates that iconic, elegant hourglass silhouette. A separate, narrow band is then wrapped and secured tightly around the middle to hide the gathers and give your piece a polished, boutique-ready finish before attaching it to your favorite clip or band.
Customization & Styling Ideas
The true magic of this pattern lies in its endless versatility. You can easily adapt the size, color palette, and texture to fit any season, holiday, or special celebration throughout the year.
Try working up soft pastels for springtime, vibrant brights for summer adventures, cozy earth tones for autumn, or rich jewel tones and metallics for the winter holidays. Layering contrasting sizes or adding a dainty crochet flower right to the center takes your finished accessory to an entirely new level of handmade charm.
Pro Tips for Flawless Results
- Maintain Consistent Tension: Keeping your stitches relatively snug ensures the bow retains its crisp shape without flopping.
- Weave Ends Securely: Because hair accessories get handled and styled frequently, weave in your yarn tails meticulously to secure all joins.
- vBlock If Needed: A light steam or gentle blocking for cotton pieces can instantly straighten edges and elevate your final presentation.
Frequently Asked Questions
Are these bows beginner-friendly?
Absolutely! They require only basic stitches and minimal yarn, making them one of the fastest and most encouraging projects for new crocheters.
What is the best yarn to use for structured bows?
Cotton or a sturdy cotton-blend yarn is ideal because it naturally holds its shape exceptionally well without needing heavy stiffeners.
How do I attach the finished bow to a hair clip?
You can easily secure your crochet bow to an alligator clip or snap clip using a strong fabric adhesive or by securely sewing it on with matching sewing thread.
Watch the Full Step-by-Step Video Tutorial
Prefer visual guidance? Follow along with the complete video tutorial below at your own pace: