
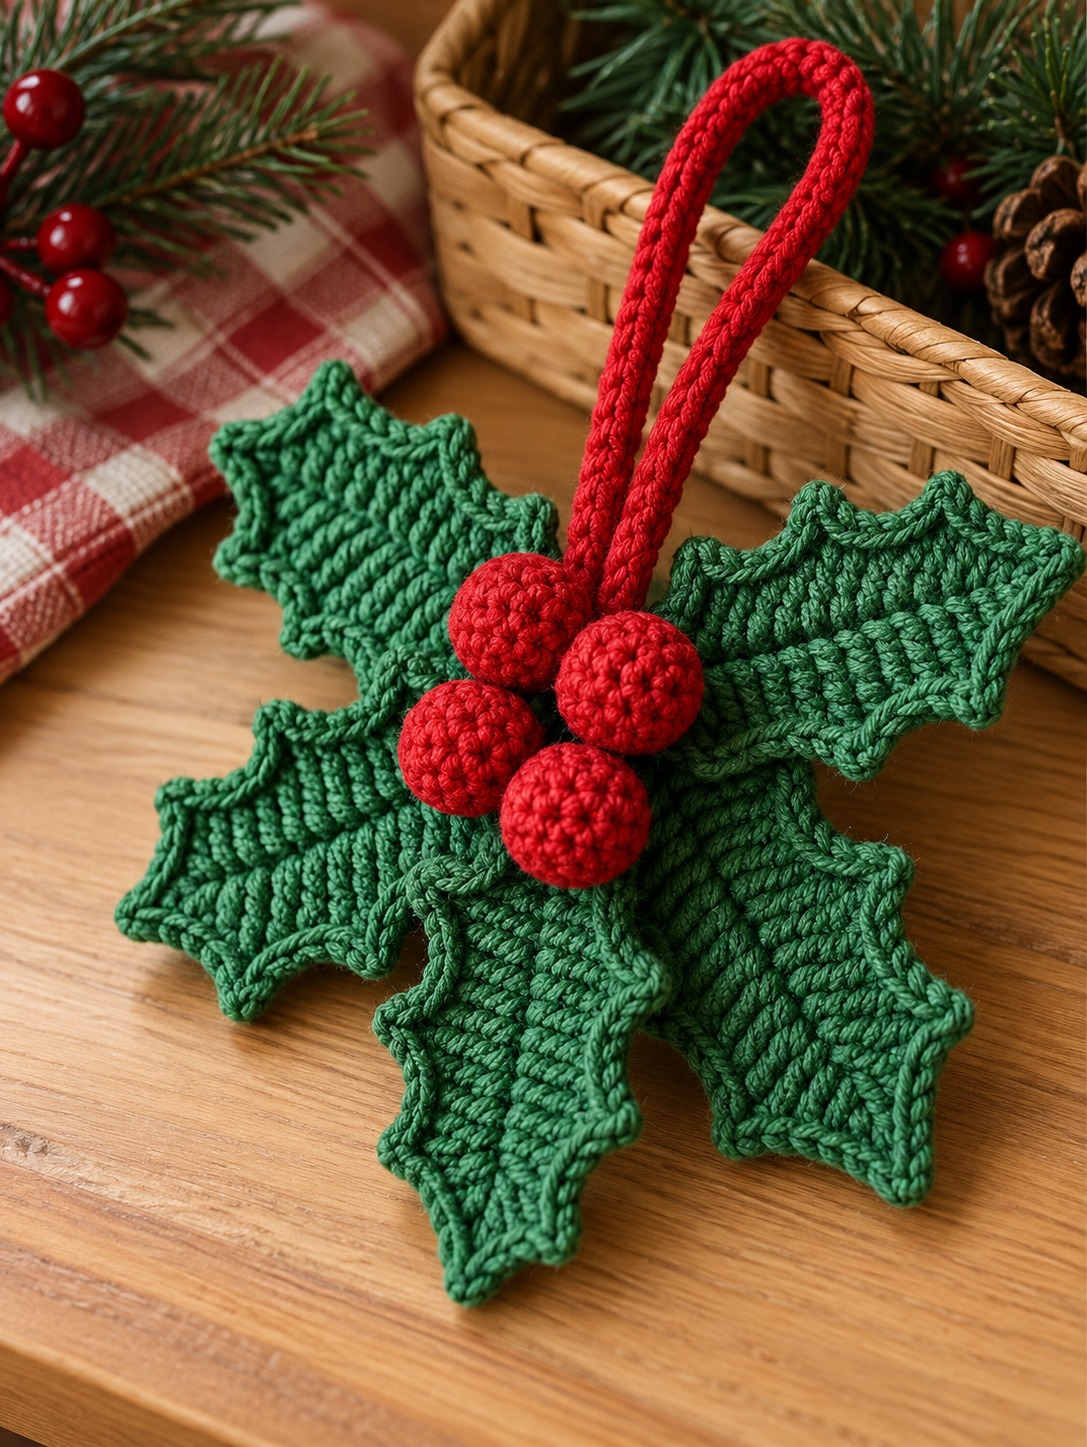
Hello, cherished members of our warm crochet community! As the days grow shorter and a crisp, festive scent fills the air, my heart turns to the magical joy of handmade holiday decorations. There’s nothing quite like adorning our homes with items crafted with love, stitch by stitch. Today, I’m absolutely thrilled to share a project that embodies all that wonderful holiday spirit: our Crochet Christmas Holly Ornament Pattern!
This exquisite little ornament is a timeless way to infuse your Christmas decor with handmade warmth and traditional charm. Inspired by the iconic green leaves and bright red berries of classic holly, this project captures the essence of the festive season in a beautifully compact design. Whether you envision it glistening on your Christmas tree, nestled into a festive garland, or adding a personal touch to a thoughtful gift, this holly ornament is a delightful celebration of creativity and holiday cheer. It’s truly a treasure that marries traditional aesthetics with modern crafting joy, appealing to styles from rustic farmhouse to elegant classic.
Overview & Design Inspiration
Imagine the cozy glow of twinkling lights reflecting off handmade treasures, each carrying a story of mindful creation. Our Crochet Christmas Holly Ornament is more than just a decoration; it’s a small piece of art that brings meaningful warmth to your holiday season. Its design is a heartfelt nod to the traditional beauty of Christmas, featuring beautifully textured green leaves cradling a cluster of vibrant red berries, all finished with a neat hanging loop. This charming accessory seamlessly blends into any festive setting, making it an instant classic for your holiday repertoire.
What makes this ornament truly special is its inviting blend of sophisticated detail and approachable techniques, making it a perfect project for confident beginners and intermediate crocheters alike. Forget mass-produced decorations; here’s your chance to craft pieces that resonate with your personal style and holiday traditions. Working on these ornaments is a relaxing creative activity, often using up those precious small balls of yarn from your stash. Prepare to fall in love with the process of making something truly personal and wonderfully festive!
Materials & Recommended Supplies
Gathering your supplies is the first exciting step toward creating these charming holly ornaments. Here’s what you’ll need to begin:
- Yarn: Medium-weight (DK/Worsted) cotton yarn in forest green and Christmas red. Cotton yarn is highly recommended for its excellent stitch definition, which beautifully showcases the leaf texture and berry shape.
- Crochet Hook: 3.0 mm or 3.5 mm crochet hook (US C/2 or E/4 equivalent). A slightly smaller hook helps create tighter stitches, ensuring the berries are firm and the stuffing doesn’t show through.
- Yarn Needle: Essential for weaving in ends and assembling your ornament neatly.
- Scissors: For cutting yarn tails.
- Stitch Markers: Helpful for marking the beginning of rounds or key stitches, especially for the berries.
- Polyester Fiberfill: A small amount for lightly stuffing the berries, giving them their lovely dimensional shape.
Essential Techniques & Stitch Highlights
Despite its intricate appearance, this holly ornament is built upon a foundation of familiar and enjoyable crochet stitches. You’ll be working with essential US terminology, including chain (ch), slip stitch (sl st), single crochet (sc), half double crochet (hdc), double crochet (dc), and treble crochet (tr). These stitches are the building blocks, skillfully employed to craft both the flat, textured leaves and the rounded, three-dimensional berries.
A few special techniques really make this ornament shine! The berries begin with a magic ring (MR), a wonderful way to create a tightly closed center for a neat, professional finish. For the distinctive ribbed texture on the holly leaves, you’ll be crocheting through the back loops only (BLO) for several rows. This simple method creates subtle raised lines, adding depth and interest without complicated post stitches. Increases (inc) and decreases (dec) are also used to shape the berries, ensuring they have that perfectly rounded, charming form. Together, these techniques transform simple yarn into a truly elegant handcrafted decoration.
Construction & Assembly Highlights
Crafting your Crochet Christmas Holly Ornament is a delightful journey of creating individual components that come together to form a beautiful whole. You’ll begin by crocheting the pointed green holly leaves. Each leaf starts as a small ribbed rectangle, created using back-loop-only stitches for that lovely texture, then shaped with a decorative border that forms the iconic pointed edges. You’ll typically make five of these leaves for a full, lush arrangement, or three for a slightly smaller, more delicate look.
Next, you’ll craft the bright red berries. These charming spheres are worked in the round, starting with a magic ring, and gently shaped with increases and decreases before being lightly stuffed with polyester fiberfill. Once all your leaves and berries are complete, the magic of assembly begins! You’ll carefully arrange the leaves around the cluster of berries, using your yarn needle to securely stitch everything together. The final touch is crocheting a simple, yet sturdy, hanging loop, which will allow your beautiful handmade ornament to dangle gracefully from your tree or anywhere else you wish to display it.
Customization & Styling Ideas
The beauty of handmade items lies in their endless potential for personalization! While the traditional forest green and Christmas red are undeniably charming, don’t hesitate to explore different color palettes for your Crochet Christmas Holly Ornament. Imagine soft sage green with muted burgundy berries for a vintage feel, or even frosty white leaves with silver berries for a modern, whimsical touch. You could also experiment with variegated yarns for a unique, painterly effect.
Beyond color, consider how you can integrate these delightful ornaments into your broader holiday decor. Create a collection to adorn your Christmas tree, craft a festive garland by stringing several together, or use them as elegant embellishments for gift wrapping. They make thoughtful, handmade gifts for teachers, hostesses, or beloved friends and family. You could even sew a pin back onto one for a festive brooch! The possibilities are as endless as your imagination, allowing each ornament to reflect your unique holiday style.
Pro Tips for Flawless Results
- Maintain Consistent Tension: Especially when working the berries, aim for firm but not overly tight stitches. This helps the berries keep their shape and prevents the fiberfill from showing through. For the leaves, consistent tension ensures their pointed edges and ribbed texture are well-defined.
- Leave Long Yarn Tails for Assembly: When fastening off your leaves and berries, leave a generous tail (around 6-8 inches). These tails can be used directly for sewing the components together, saving you from re-attaching yarn and making assembly much neater.
- Organize Your Workspace: Since this project involves several separate components, it’s helpful to make all your leaves first, then all your berries, and finally the hanging loop. This allows you to compare sizes and ensure uniformity before you begin assembly, making the final construction smoother and more enjoyable.
- Gentle Shaping is Key: After completing your leaves, gently flatten and shape them with your fingers to enhance their pointed edges and ribbed texture. This simple step can make a big difference in the finished appearance of your ornament, giving it a polished, handcrafted look.
Frequently Asked Questions
Can I use different yarn types for this ornament?
While medium-weight cotton yarn is highly recommended for its excellent stitch definition and crisp texture, you can certainly experiment with other fibers like acrylic or wool. Just be aware that the drape and appearance of the ornament may vary. If you choose a different yarn, consider making a swatch first to check the gauge and ensure you’re happy with how the stitches look.
How many holly leaves should I make for one ornament?
The ornament shown in the photograph typically features five overlapping green holly leaves for a full, lush arrangement around the berries. However, if you prefer a smaller or more minimalist design, you can absolutely opt to make and arrange just three leaves. It’s all about personal preference and the visual effect you desire!
Is this pattern suitable for complete beginners?
This pattern is best suited for “confident beginners” and intermediate crocheters. While it uses familiar stitches, combining multiple components and assembling them neatly does require a bit more experience than a very basic single-piece project. However, with patience and by following the detailed instructions, a determined beginner can absolutely create a beautiful ornament!
Watch the Full Step-by-Step Video Tutorial
Prefer visual guidance? Follow along with the complete video tutorial below at your own pace: