
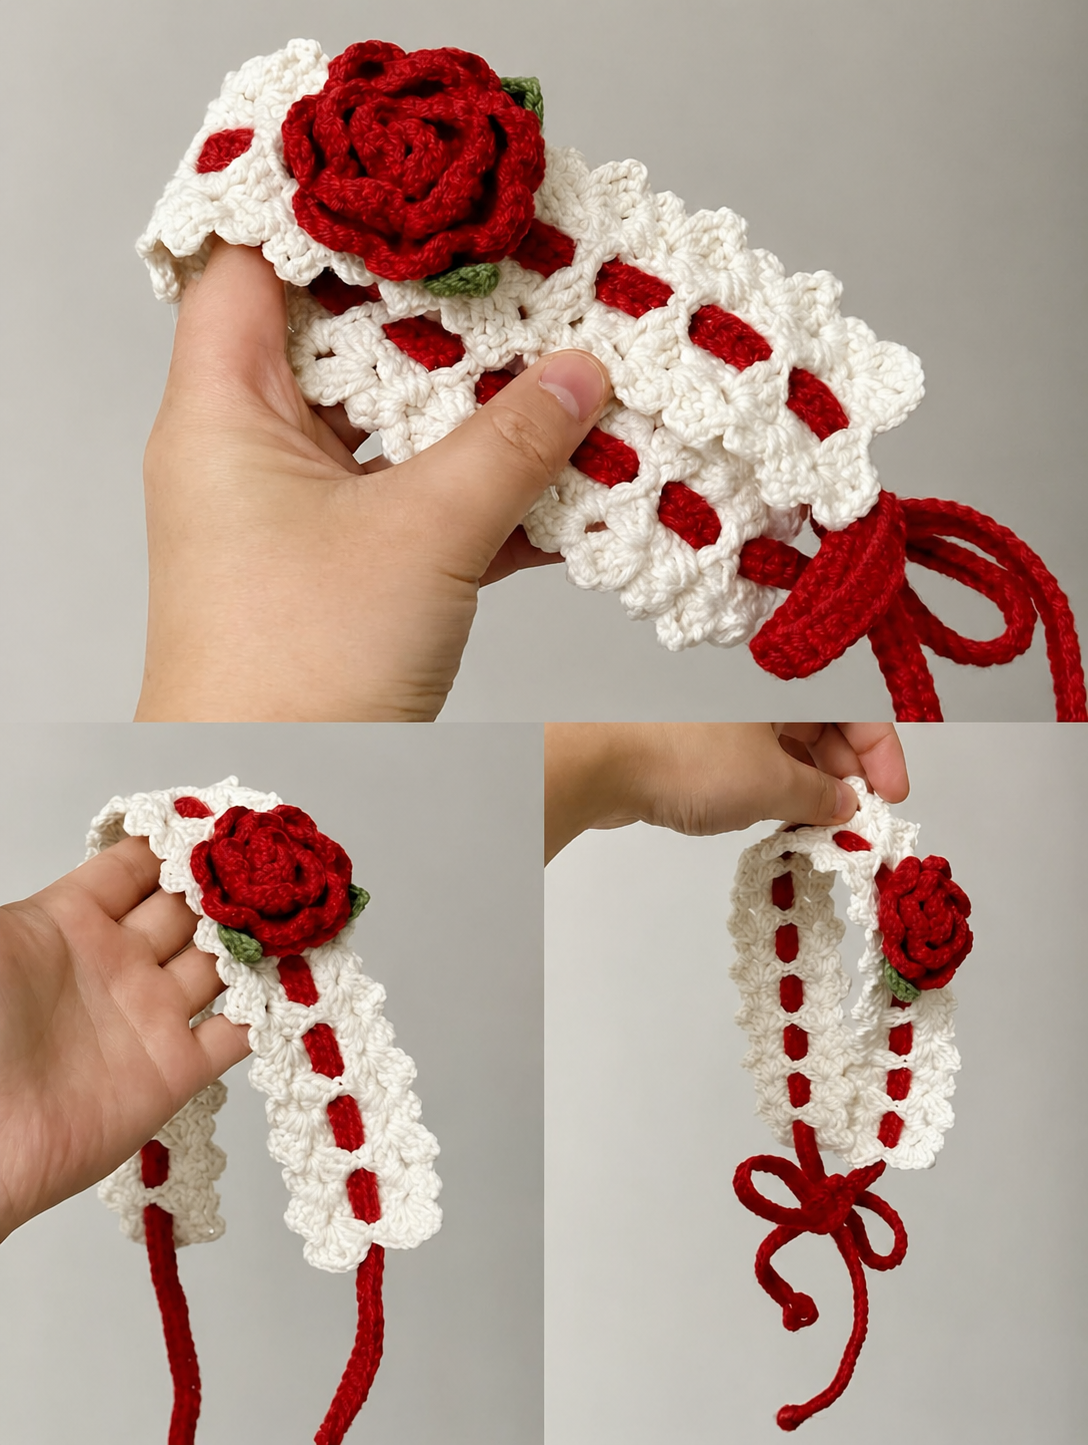
Overview & Design Inspiration
Welcome back to the cozy corner of our crafting community, fellow yarn enthusiasts! There is something utterly magical about transforming a simple ball of yarn into a wearable piece of art, and the Crochet Rose Flower Headband Pattern is one of those timeless projects that always brings a smile to my face.
Whether you are crafting a sweet accessory for a little one, whipping up a thoughtful handmade gift, or adding a floral touch to your own wardrobe, this project strikes that elusive balance between effortless beauty and pure joy. It uses basic techniques to deliver high-end, boutique-quality results that will have everyone asking, “Where did you ever buy that?!”
Materials & Recommended Supplies
Gathering your supplies is half the fun, and this project is wonderfully forgiving when it comes to your stash! Here is what you will need to bring your floral headband to life:
- Yarn: Sport weight or DK cotton yarn is ideal for crisp stitch definition, though worsted-weight acrylic also works wonderfully for a softer, squishier texture. It is also a fantastic stash-buster for leftover yarn scraps!
- Crochet Hook: A 3.5 mm (US E/4) or 4.0 mm (US G/6) hook, depending on your personal tension and the yarn weight you select.
- Notions: A yarn needle for weaving in ends, precision scissors, and a flexible measuring tape to check your sizing.
- Fasteners: Hair-safe elastic bands or adjustable closures if you prefer a customizable stretch fit.
- Embellishments (Optional): Tiny seed beads, pearls, or crochet leaves to elevate your floral centerpiece.
Essential Techniques & Stitch Highlights
The beauty of this design lies in how accessible it is while still incorporating wonderfully engaging techniques. You will work primarily with foundational stitches like single crochet and half double crochet to build a sturdy, reliable headband base that holds its shape gracefully.
The crown jewel of the project—the rose itself—is crafted by working a simple, elongated strip of stitches designed to naturally ruffle. As you roll and secure the strip, the magic happens right before your eyes, forming a stunning, dimensional blossom without any complicated intermediate shaping.
Construction & Assembly Highlights
Building your headband is a wonderfully satisfying, quick-gratification process. You will begin by creating a foundational chain matched to your target head circumference, working steady, even rows to establish a comfortable band.
Next comes the fun part: crocheting your rose strip, rolling it into its signature spiral, and securing it firmly at the center seam. You can stitch the rose directly to the band for a permanent fixture, or attach it via a snap or button so you can mix and match your flower colors depending on your outfit.
Customization & Styling Ideas
One of the best reasons to fall in love with this pattern is its endless versatility. Swap out soft pastels for a dreamy spring aesthetic, or switch to rich jewel tones and velvet yarn when the autumn and winter holidays roll around.
You can easily play with scale by adjusting your initial chain length to fit anyone from newborns to adults. Feel free to cluster multiple small roses together for a dramatic statement crown, or tuck a few delicate crocheted leaves underneath the blossom for an ultra-realistic botanical finish.
Pro Tips for Flawless Results
- Keep Your Tension Even: Consistent hand tension ensures your headband band lies flat and your rose spirals form a balanced, symmetrical shape.
- Block Your Finished Pieces: A light steam or wet blocking session on your finished rose and band will relax the fibers and give your accessories a professional, polished finish.
- Weave Ends Securely: Because hair accessories experience a bit of pull and wear, take an extra minute to anchor and weave your yarn tails securely into the stitches.
Frequently Asked Questions
What skill level is required for this pattern?
This project is wonderfully suited for confident beginners who know their basic stitches, yet it offers plenty of creative satisfaction for experienced crocheters looking for a quick, charming make.
How long does it take to complete one headband?
Most makers can easily whip up one of these floral headbands in just an hour or two, making them ideal last-minute gifts or quick market-prep items.
Can I easily adjust the size of the headband?
Absolutely! Because you start with a simple foundational chain, you can easily wrap it around the intended wearer’s head to customize the exact length for a snug, comfortable fit.
Watch the Full Step-by-Step Video Tutorial
Prefer visual guidance? Follow along with the complete video tutorial below at your own pace: