
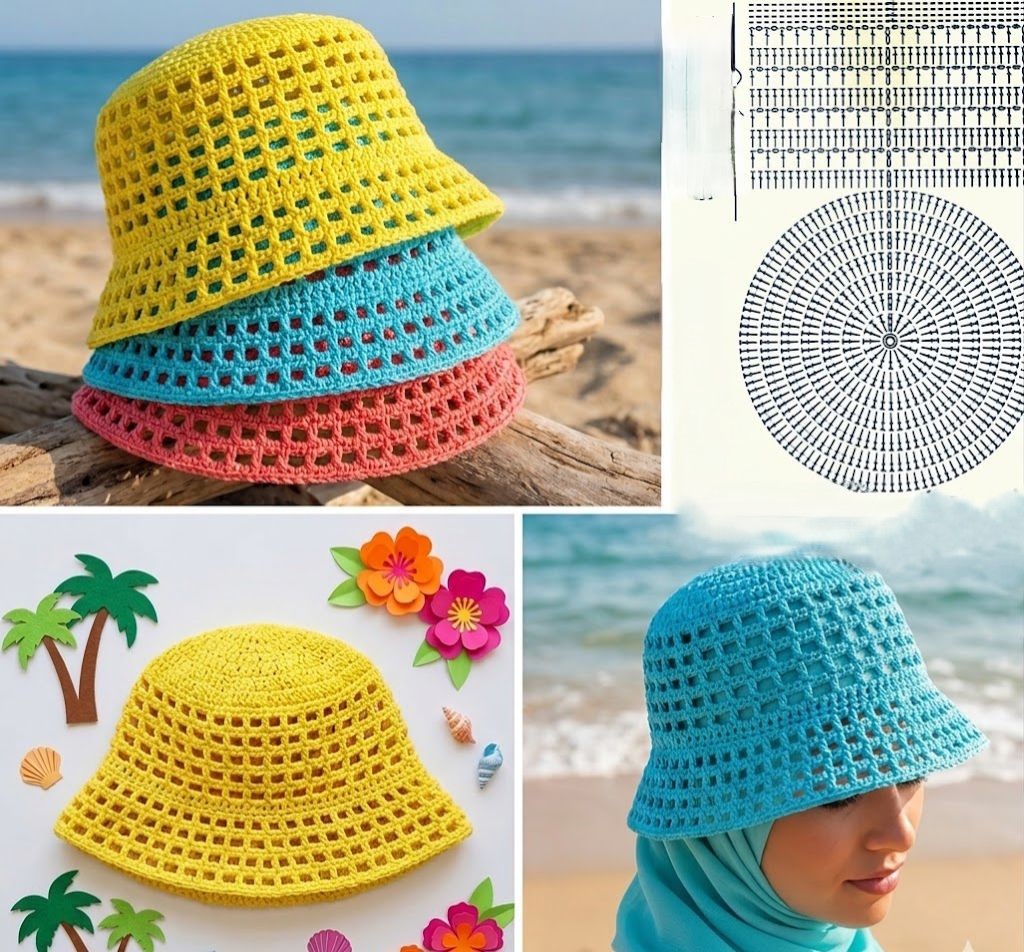
Overview & Design Inspiration
Welcome back to the cozy corner of our crafting community, yarn lovers! Today, we are diving headfirst into one of the most beloved, trendy, and wonderfully versatile accessories in the handmade wardrobe: the ultimate crochet bucket hat.
Whether you are sipping iced coffee on a sun-drenched beach or chasing crisp autumn leaves, this project strikes that elusive balance between effortless style and everyday practicality. Best of all, it is entirely beginner-friendly, portable, and custom-tailored to let your unique creativity shine!
Materials & Recommended Supplies
Gathering your supplies is half the fun! To bring your dream hat to life, you will want to keep a few key recommendations in mind regarding yarn, hooks, and notions:
- Yarn Weight: Worsted weight or cotton blend yarns work wonderfully. Cotton is breathable for summer warmth, while acrylic or wool blends offer cozy structure for cooler months.
- Crochet Hook: A standard US G/6 (4.0 mm) or H/8 (5.0 mm) hook, depending on your personal tension and desired fabric drape.
- Essential Notions: A trusty pair of embroidery scissors, a yarn needle for weaving in those final ends, and a stitch marker to keep your rounds perfectly tracked.
Essential Techniques & Stitch Highlights
Before diving into your hookwork, it helps to brush up on the foundational stitches that make this design sing. Most bucket hat patterns rely heavily on approachable favorites like the single crochet, half double crochet, or classic double crochet.
You will begin with a neat magic ring or chain loop to establish the center crown, then build confidence as you master even stitch increases. For those looking to add extra flair, incorporating textured stitches like the puff stitch or playing with gorgeous color-blocking will elevate your handmade accessory into a true statement piece.
Construction & Assembly Highlights
One of the joys of crafting a bucket hat is watching its distinct architectural shape emerge organically right before your eyes. The construction flows intuitively through three main phases: the flat crown, the straight-sided body, and the flared brim.
You start at the very top, working in continuous or joined rounds while expanding your diameter evenly. Once the crown reaches the desired width, you transition smoothly into the body of the hat, working even stitches downward to achieve your preferred slouch or snug fit. Finally, you increase stitches around the edge to create that iconic, sun-shielding brim, finishing off by weaving in your ends for a crisp, professional-grade polish.
Customization & Styling Ideas
The true magic of making your own accessories lies in personalization! Experiment with vibrant summer gradients, earthy neutral tones, or playful contrasting stripes to match your favorite seasonal outfits.
Need to resize the project for a little one or a thoughtful handmade gift? Simply adjust your initial crown increase rounds or tweak the length of the body to fit any head size comfortably. You can even pin on a vintage button, sew a cute fabric patch, or add delicate embroidery to make your hat completely one-of-a-kind.
Pro Tips for Flawless Results
- Check Your Gauge: Don’t skip the gauge check! Taking a few minutes upfront ensures your hat fits snugly and comfortably without unwanted gaps or tightness.
- Count Your Stiches: Prevent the dreaded wavy-edge or cone shape by consistently counting your stitches at the end of each round.
- Maintain Even Tension: Keep your hand tension steady and relaxed so the fabric of your hat drapes smoothly and uniformly.
- Secure Your Ends: Always weave in your loose ends meticulously and securely to ensure your hat holds up brilliantly through countless wears and adventures.
Frequently Asked Questions
What skill level is required for this crochet bucket hat?
This project is wonderfully beginner-friendly! If you know how to work basic stitches like single crochet and double crochet, you have all the skills you need to succeed.
How long does it take to crochet a bucket hat?
Most crafters can easily whip up a bucket hat in just a single weekend or a few cozy evenings, making it the ultimate instant-gratification project.
Can I wash my handmade bucket hat?
Absolutely! Just check the care label on your chosen yarn. Cotton hats can typically be machine washed on gentle or hand-washed, while wool blends may require special gentle care to keep them looking pristine.
Watch the Full Step-by-Step Video Tutorial
Prefer visual guidance? Follow along with the complete video tutorial below at your own pace: