
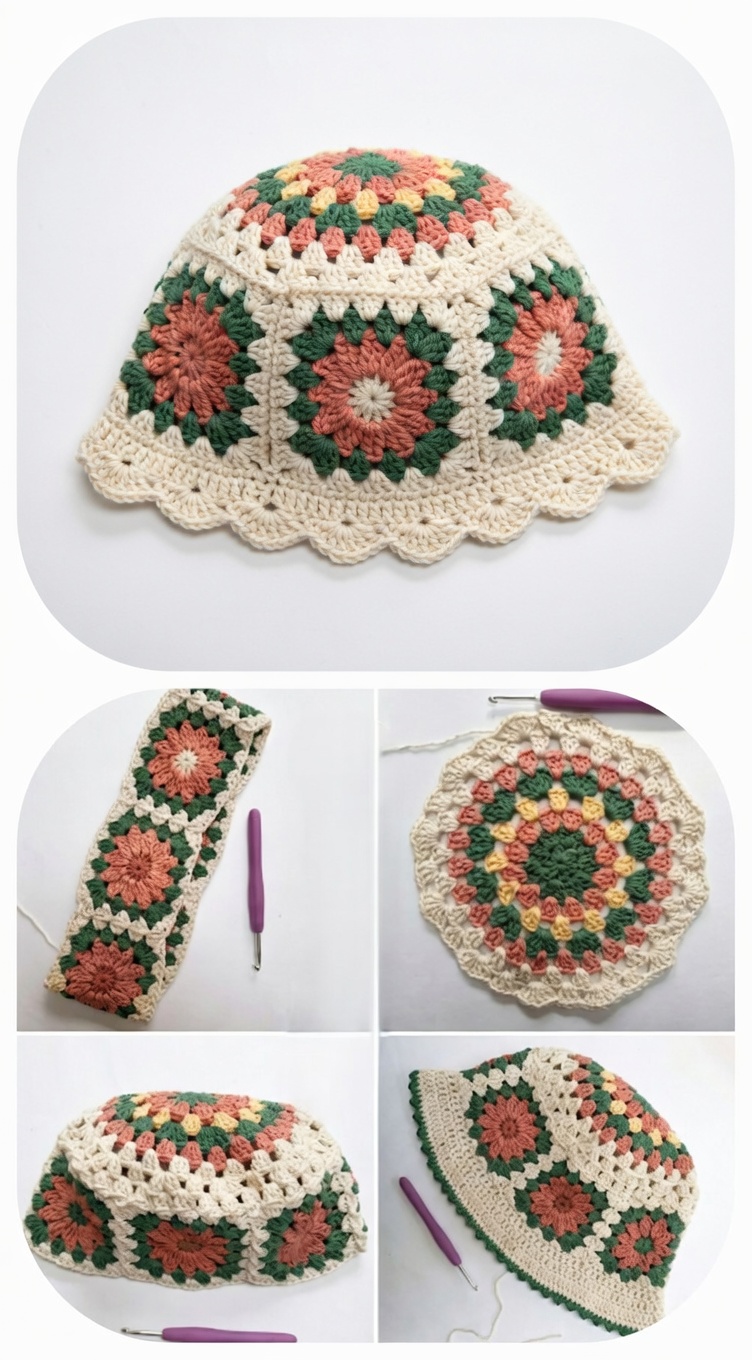
Overview & Design Inspiration
Welcome to your next favorite handmade obsession! The Crochet Granny Square Bucket Hat Pattern combines the nostalgic, comforting appeal of traditional granny squares with the effortlessly cool silhouette of a modern bucket hat.
Whether you are looking to bust through your yarn stash or want to craft a bold, patchwork statement piece for your wardrobe, this project strikes the ultimate balance between mindful simplicity and creative freedom.
Materials & Recommended Supplies
To bring your dream bucket hat to life, gathering the right tools is the first step toward a polished, professional finish. Here is everything you need to have ready in your craft basket:
- Yarn: Lightweight to medium-weight cotton yarn (DK or Worsted weight) is highly recommended for breathability and crisp stitch definition. It also helps your hat maintain its structural shape!
- Crochet Hook: 4.0 mm (US G/6) or 4.5 mm (US 7) hook, depending on your natural tension and how structured you want your hat to feel.
- Notions: Yarn needle for weaving in ends, sharp scissors, and stitch markers to keep your rounds perfectly aligned.
- Blocking Tools: Blocking mats and T-pins (optional, but a game-changer for squaring up your motifs).
Essential Techniques & Stitch Highlights
The foundation of this hat rests upon mastering the classic granny square, which is typically worked in rounds from the center out. Utilizing familiar stitches like double crochets (dc), chains (ch), and slip stitches (sl st) keeps the process approachable yet deeply satisfying.
Because the design relies on joining multiple motifs together, maintaining a consistent gauge is your secret weapon. Working in cotton yarn with a slightly smaller hook ensures your stitches stay nice and snug, giving the finished hat a durable, boutique-quality structure.
Construction & Assembly Highlights
Your journey begins by crafting a series of identical granny squares—typically between five and eight, depending on your head size and desired layout. Taking the time to block these squares before joining will make the assembly process a breeze.
Once your squares are stitched together to form the crown and side bands, you will transition into working continuous rounds to build out the signature flared brim. Trying on your hat as you go allows you to customize the fit effortlessly before fastening off for good.
Customization & Styling Ideas
One of the absolute best parts of this project is how endlessly customizable it is. Play with a vibrant, retro color palette for festival season, or keep things minimal and earthy with creamy neutrals and sage greens.
Feel free to experiment with the arrangement of your squares, or try adding a contrasting border to make your patchwork design pop. You can even pair your finished hat with a matching granny square tote bag for the ultimate handmade summer set!
Pro Tips for Flawless Results
- Block Your Motifs: Never skip blocking! Pinning your granny squares to uniform dimensions makes assembly infinitely smoother and cleaner.
- Watch Your Tension: Keep your yarn tension even across all squares to prevent any unwanted warping or gaps in your hat’s structure.
- Count Your Stitches: Regularly check your stitch counts when working the brim to ensure an even, beautiful flare all the way around.
- Weave As You Go: Tackling your loose ends as you finish each square will save you from a massive, tedious weaving session at the very end.
Frequently Asked Questions
What skill level is required for this pattern?
This project is wonderfully beginner-friendly! If you already know how to chain and double crochet, you have all the essential skills needed to succeed.
Can I adjust the size of the bucket hat?
Absolutely! You can easily alter the size by adjusting your hook size, modifying the number of rounds in your squares, or tweaking the stitch count on the brim.
How do I care for my finished cotton bucket hat?
We recommend hand washing your hat in cool water with mild soap, then laying it flat to dry in its natural shape to ensure it lasts for years to come.
Watch the Full Step-by-Step Video Tutorial
Prefer visual guidance? Follow along with the complete video tutorial below at your own pace: