
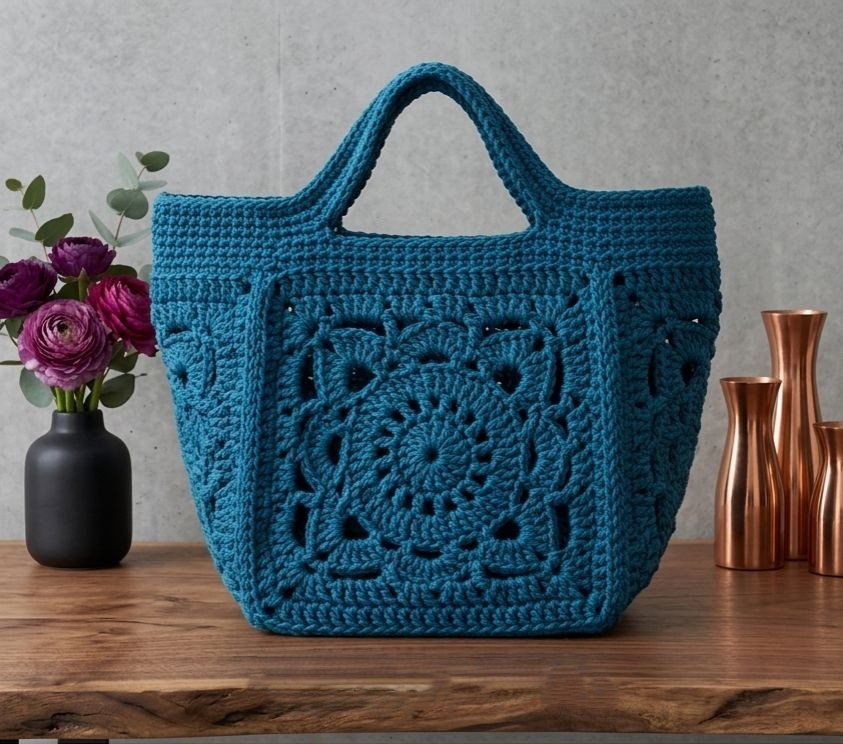
Overview & Design Inspiration
Welcome, my fellow yarn lovers, to a project that completely captures the magic of handmade elegance! The Crochet Willow Square Bag Pattern is one of those rare, delightful designs that brings together classic floral-inspired motifs with a thoroughly modern, functional silhouette.
Whether you are a confident beginner looking to stretch your skills or an experienced crafter seeking a soothing, portable project, this timeless beauty will quickly steal your heart. Its repetitive, rhythmic structure makes it an absolute joy to stitch while sipping your favorite morning coffee or unwinding in the evening.
Materials & Recommended Supplies
- Yarn: 100% Mercerized Cotton or Cotton Blend (Sport or DK weight recommended for crisp stitch definition and durability).
- Crochet Hook: 4.0 mm (US G/6) or size needed to obtain correct gauge.
- Notions: Yarn needle for weaving in ends, sharp embroidery scissors, and locking stitch markers.
- Optional Additions: Fabric for lining, pre-made leather or woven handles, and magnetic bag snaps.
Essential Techniques & Stitch Highlights
At the heart of this design is the iconic willow square, worked seamlessly in rounds from the center out. By blending simple chains, classic double crochets, and tactile cluster stitches, the motif creates an exquisite, openwork floral texture that feels delightfully light yet holds its shape wonderfully.
The genius of this motif lies in the harmonious balance between open spaces and solid stitches. This clever construction ensures your finished accessory remains airy and elegant without sacrificing the everyday sturdiness you need in a handmade bag.
Construction & Assembly Highlights
Creating your bag follows a modular, approachable rhythm where you craft multiple individual squares one at a time. This bite-sized approach keeps the project endlessly engaging and completely eliminates the intimidation of tackling a massive piece all at once.
Once your lovely squares are completed, you will arrange them into your preferred layout before joining them together. Folding and seaming the assembled panel gives the bag its structural body, which is then finished with sturdy handles and optional lining for a polished, professional look.
Customization & Styling Ideas
One of the absolute best parts of this project is how effortlessly you can make it your own. Play with a crisp, monochrome palette for everyday sophistication, or dive into a vibrant stash-busting patchwork of joyful colors for a bohemian summer vibe.
You can easily scale the finished size by adding extra squares to create a roomy market tote, or keep it compact for a chic evening purse. Adding a custom fabric lining and structured leather handles takes your creation from handmade to high-end boutique quality!
Pro Tips for Flawless Results
- Keep Consistent Tension: Uniform stitch tension ensures every square matches in size, making the final assembly process wonderfully smooth.
- Block Your Motifs: Take the time to wet or steam block your finished squares before joining them to straighten edges and pop the floral details.
- Secure Your Seams: Choose a joining method, such as the flat braid or whip stitch through the back loops, that provides enough strength to handle daily wear and tear.
Frequently Asked Questions
What is a Crochet Willow Square Bag Pattern?
It is a gorgeous crochet project that uses repeating square motifs—featuring delicate floral textures—joined together to form a stylish, highly functional everyday bag.
Is this project beginner-friendly?
Yes, absolutely! Because the project is broken down into making individual, repetitive squares, confident beginners can easily master the pattern at their own pace.
Can I adjust the size of the finished bag?
Definitely! You can easily customize the dimensions of your bag by adjusting the number of squares you create or by using a heavier yarn weight with a larger hook.
Watch the Full Step-by-Step Video Tutorial
Prefer visual guidance? Follow along with the complete video tutorial below at your own pace: