
Overview & Design Inspiration
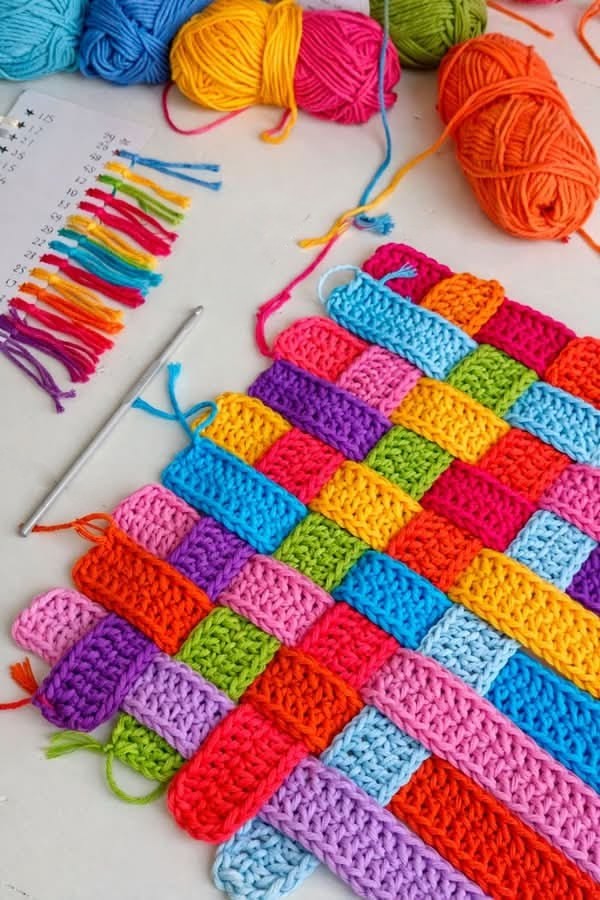
Welcome, my crafty friends! If you are looking for a project that completely transforms simple crochet into a breathtaking work of art, you are going to fall head over heels for the Crochet Interlaced Strips Pattern. This captivating technique blends stunning texture, modern structure, and pure creativity into one gorgeous design that looks remarkably intricate yet is wonderfully approachable.
Whether you are an ambitious beginner wanting to level up your skills or an experienced maker searching for your next mesmerizing challenge, this pattern opens up endless creative possibilities. The unique interwoven effect mimics a traditional woven fabric while remaining entirely crocheted, making it a true showstopper for blankets, stylish bags, cozy scarves, and striking home decor.
Materials & Recommended Supplies
- Yarn: Medium-weight (Worsted / Aran) yarn is ideal for providing great structure without being too stiff. Cotton creates a crisp, modern look, while acrylic and wool offer lovely warmth and flexibility.
- Crochet Hook: Match your hook to your yarn weight (typically a US J/10 or 6.0 mm hook) to ensure proper tension and beautiful stitch clarity.
- Stitch Markers: Essential for keeping your rows accurate and counting your stitches uniformly across multiple individual strips.
- Tapestry Needle: Perfect for weaving in your ends and securing any final assembly touches.
- Blocking Tools: Mats and T-pins are highly recommended to straighten your strip edges and ensure even sizing before the weaving process.
Essential Techniques & Stitch Highlights
The magic of this design begins with mastering simple, foundational stitches like single crochet or double crochet. Because you will be working these basic stitches in repetitive rows to create individual strips, the technique remains accessible even if you are relatively new to crochet. The true secret to success here is all about building muscle memory for consistent stitch height and even edges.
As you transition from individual strips to the over-and-under weaving process, you will develop a deeper understanding of fabric structure and tension control. This tactile method teaches you patience and precision, rewarding your efforts with a striking, professional-grade result that truly stands out in any handmade collection.
Construction & Assembly Highlights
The construction journey starts by crocheting multiple individual strips of identical lengths and widths using your favorite basic stitches. Regular stitch counting during this phase is your best friend, ensuring that every strip matches up seamlessly for the assembly stage. Once your strips are ready, laying them out flat helps you visualize the magic before it happens.
Next comes the fun part: interlacing the strips in an over-and-under basket-weave formation. As you gently adjust the strips to maintain even, balanced spacing, the flat pieces transform into a rich, textured fabric. Finally, securing the edges with a neat crochet border locks your gorgeous creation into place and provides a wonderfully polished finish.
Customization & Styling Ideas
One of the most thrilling aspects of this technique is how endlessly customizable it is. By playing with strip widths—choosing wider strips for a bold, chunky aesthetic or narrow strips for a delicate look—you can completely alter the vibe of your finished project. It is also a phenomenal stash-busting project, allowing you to use up leftover yarn scraps for an eclectic, vibrant, multi-colored masterpiece.
If you prefer a more subtle, elegant approach, try using a gorgeous color gradient or shades from the same monochromatic color family to create a modern ombré effect. These striking panels look incredible when fashioned into functional everyday items like statement throw pillows, chic market bags, or eye-catching table runners for your home.
Pro Tips for Flawless Results
- Maintain Consistent Tension: Keeping your tension steady across every single strip ensures they match in size and makes the final weaving process smooth and frustration-free.
- Do Not Skip Blocking: Blocking your strips before you begin interlacing is a game-changer that straightens edges and guarantees an even, symmetrical final layout.
- Work Patiently: Take your time during the weaving stage to avoid twisting your strips, adjusting gently as you go to keep the spacing picture-perfect.
- Anchor Your Edges: Always finish your piece with a sturdy border to reinforce the overall structure and give your handmade treasure a professional touch.
Frequently Asked Questions
What is the Crochet Interlaced Strips Pattern?
It is a captivating crochet technique where you first create individual strips of fabric and then weave them together in an over-and-under pattern, resulting in a rich, textured design that mimics woven cloth.
Is this pattern suitable for beginners?
Yes, absolutely! Because the individual strips rely on basic stitches like single and double crochet, it is very accessible. The weaving technique just takes a little patience and practice to master.
Do I really need to block my strips before weaving?
While optional, blocking is highly recommended. It straightens your edges and ensures all strips are uniform in size, making the assembly process much neater and easier.
Watch the Full Step-by-Step Video Tutorial
Prefer visual guidance? Follow along with the complete video tutorial below at your own pace: