
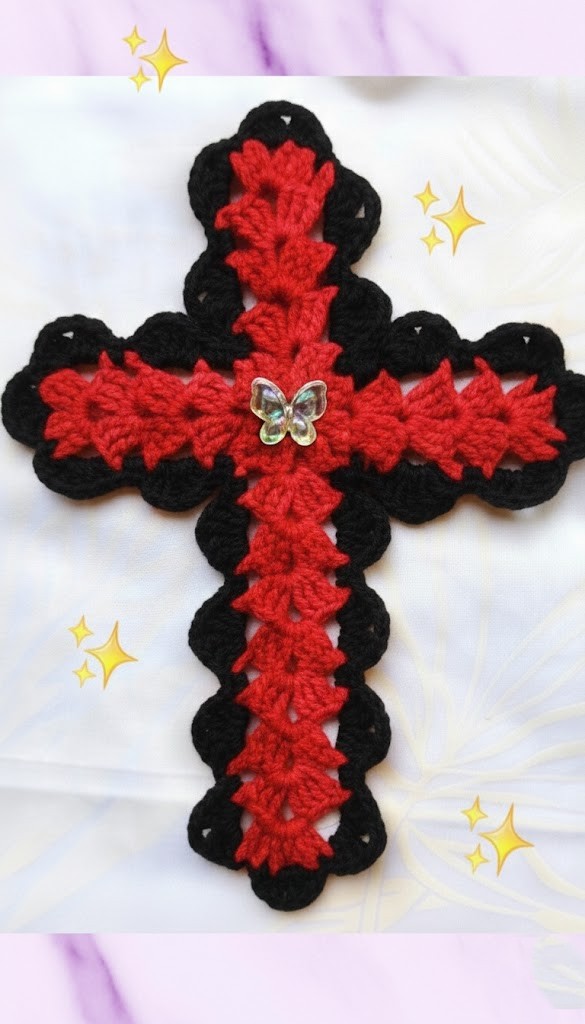
Overview & Inspiration
Welcome, my wonderful crafty friends! There is something deeply therapeutic about working on a project that holds both personal and emotional meaning, and our featured design captures that exact magic.
Whether you are crafting for personal devotion, lovely home décor, or heartfelt charity gifts, this versatile pattern opens the door to gorgeous handmade pieces. It is wonderfully beginner-friendly yet easily adaptable for advanced makers who love experimenting with textures and finishes!
Materials & Supplies Needed
- Yarn Weight: DK or Worsted Weight (Category 3 or 4)
- Fiber Content: 100% Cotton for crisp stitch definition, or soft Acrylic
- Color: Your favorite solid shade or a cheerful contrast color
- Hook Size: 4.0 mm (US G/6) crochet hook
- Tapestry Needle for weaving in ends
- Stitch Markers to help keep your stitch counts and symmetry balanced
- Sharp Scissors
- Optional: Blocking pins and mat for shaping
Stitches & Abbreviations
- ch = chain
- st = stitch
- sts = stitches
- sl st = slip stitch
- sc = single crochet
- dc = double crochet
- rep = repeat
- RS = right side
Step-by-Step Pattern Instructions
We will build this cross by first creating the long vertical base, then working the horizontal arms outward from the center.
Step 1: The Vertical Pillar
Ch 21. Working in the back bumps of the chain for a clean edge, work 1 sc in the 2nd ch from hook and in each ch across. [20 sc]
Fasten off if working in joined sections, or follow your specific row count to establish the height of your central column.
Step 2: The Horizontal Arms
Locate the exact midpoint of your vertical pillar (around row 10 or st 10). Join your yarn with a sl st to the side of the vertical base.
Ch 6, work 1 sc in the 2nd ch from hook and across the chain (5 sc), sl st securely back into the center base st.
Repeat this exact process on the opposite side of the vertical pillar to form the second arm, ensuring both sides have an equal number of stitches for perfect symmetry.
Step 3: Edging and Borders
To give your cross a polished look, work a round of sl st or sc evenly around the entire perimeter of the cross shape, placing an extra stitch in the outer corners to keep them lying flat.
Assembly & Finishing Touches
Once your crochet cross is complete, take a moment to inspect all your connection points and outer edges.
Use your tapestry needle to weave in any remaining yarn tails securely along the back of the stitches, ensuring your piece holds up well to handling or washing.
For a truly professional finish, lightly mist your finished cross with water, pin it flat onto a blocking mat, and let it dry completely to crisp up the edges.
Pro Tips for Flawless Results
- Maintain a consistent hand tension throughout your stitching to prevent the arms of the cross from curling or distorting.
- Always count your stitches carefully when forming the horizontal arms so that both sides match in length and width.
- Choose cotton yarn if you prefer a stiff, structured decorative piece that holds its shape without extra stiffeners.
- Take your time during the finishing phase; proper blocking transforms a simple crochet motif into an heirloom-quality treasure.
Frequently Asked Questions
What skill level is required for this pattern?
This design is wonderfully beginner-friendly! As long as you are comfortable making a chain, a single crochet, and a double crochet, you will have no trouble completing this project.
How long does it take to make one cross?
Due to its small size, a single cross typically takes less than an hour to complete, making it a fantastic quick-gratification project or weekend gift idea.
Can I wash my finished crochet cross?
Yes, absolutely! Just be sure to follow the specific care instructions for the yarn fiber you chose. Most cotton and acrylic versions can be gently hand washed and laid flat to dry.
Watch the Full Step-by-Step Video Tutorial
Prefer visual guidance? Follow along with the complete video tutorial below at your own pace: