
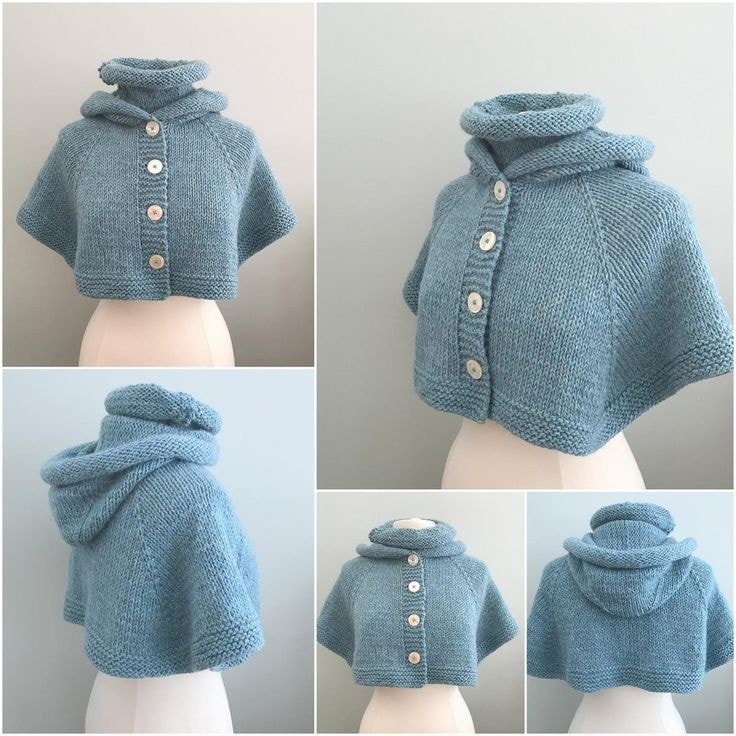
Overview & Inspiration
Welcome, fellow yarn lovers! There is nothing quite like the magic of wrapping yourself in a handmade garment when the temperature drops, and the Crochet Wynter Chill Hooded Cape Pattern is here to bring ultimate comfort and timeless winter style to your handmade wardrobe.
Whether you are looking to level up your garment-making skills or simply want a cozy, functional layering piece for chilly morning walks, this design is an absolute joy to stitch. Let’s grab our hooks, settle into our favorite crafting spots, and dive into this wonderful winter project together!
Materials & Supplies Needed
- Yarn: Worsted weight yarn (approx. 1,200–1,500 yards depending on desired length).
- Fiber Content: Acrylic for easy care, or a wool blend for superior winter warmth.
- Colors: Neutral shades (gray, cream, deep brown) or rich jewel tones (burgundy, forest green).
- Crochet Hook: 5.5 mm (US Size I/9).
- Notions: Stitch markers, tapestry needle for weaving in ends, sharp scissors, and optional buttons or wooden toggles for closure.
Stitches & Abbreviations
- ch: Chain
- st(s): Stitch(es)
- sl st: Slip stitch
- sc: Single crochet
- hdc: Half double crochet
- dc: Double crochet
- inc: Increase (work 2 sts in the same st)
- dec: Decrease (work 2 sts together)
Step-by-Step Pattern Instructions
We will begin working our cape from the top down, starting at the neckline. This top-down construction allows you to easily customize the final length of your garment.
Neckline Foundation
Begin by leaving a 6-inch yarn tail. Chain 72 loosely to form the neckline circumference.
- Row 1: Working into the back bumps of the chain, hdc in the 3rd ch from hook (skipped chs count as hdc), hdc in each ch across, turn. [70 sts]
- Row 2: Ch 2 (does not count as st here and throughout), hdc in first st, *hdc in next 4 sts, inc in next st; repeat from * across to last st, hdc in last st, turn. [84 sts]
Body Shaping and Increases
Now we will establish the classic flare that drapes effortlessly over the shoulders.
- Row 3: Ch 2, hdc in each st across, turn. [84 sts]
- Row 4: Ch 2, hdc in first st, *hdc in next 5 sts, inc in next st; repeat from * across to last st, hdc in last st, turn. [98 sts]
- Rows 5–25: Continue repeating the pattern of working one plain hdc row followed by an increase row every alternate row until the cape reaches your desired length over the shoulders. [175 sts at final body row]
Hood Construction
We will now build the cozy hood directly from the unworked stitches of the initial neckline foundation.
- Hood Row 1: Attach yarn to the opposite side of the starting chain. Ch 2, work hdc evenly across the 70 neckline stitches, turn. [70 sts]
- Hood Rows 2–22: Ch 2, hdc in each st across, turn. [70 sts]
- Hood Shaping: Fold the final row in half matching stitch for stitch. Seam the top edge together using a mattress stitch or a simple whip stitch to form the crown of the hood, then fasten off.
Assembly & Finishing Touches
With your main body and hood securely joined, take your tapestry needle and weave in all remaining yarn tails securely along the wrong side of the fabric.
If you have chosen to add wooden toggles or decorative buttons, sew them securely onto the front neckline edges. Finally, wet or steam block your cape to relax the stitches, define the drape, and give your finished piece a crisp, professional look.
Pro Tips for Flawless Results
- Check Your Gauge: Always swatch before starting to ensure your cape matches the intended dimensions and drapes correctly.
- Maintain Consistent Tension: Keep your hand tension even, especially during the increase rows, to ensure a symmetrical cape silhouette.
- Choose the Right Fiber: Select a wool blend if you live in a freezing climate, or a soft acrylic if you prefer a machine-washable everyday garment.
Frequently Asked Questions
What skill level is required for this pattern?
This pattern is ideal for confident beginners to intermediate crocheters. As long as you are comfortable with basic stitches like chains, single crochets, half double crochets, and double crochets, you will find this project smooth and rewarding.
Can I adjust the length of the cape?
Yes, absolutely! Because the cape is worked top-down, you can simply add or subtract rows in the body shaping section to make your cape shorter or longer depending on your personal style preference.
How do I care for my finished hooded cape?
Care instructions depend entirely on the yarn fiber you choose. Always check your yarn ball band; wash handmade garments according to the manufacturer’s directions, and lay flat to dry to preserve your stitching structure.