
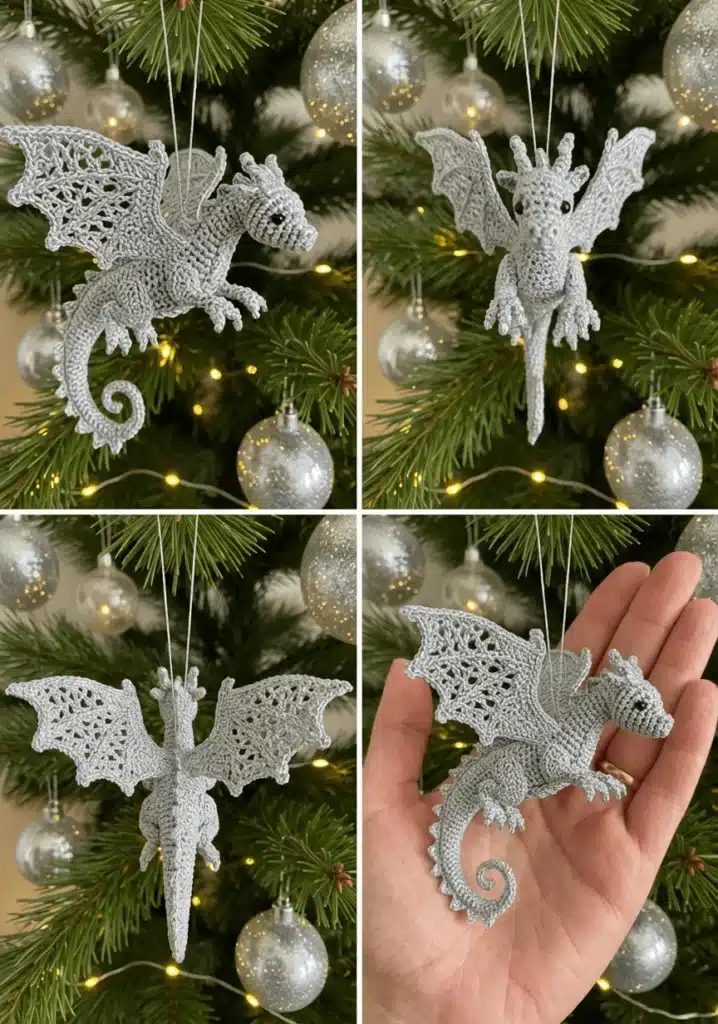
Overview & Inspiration
Hello, fellow yarn lovers and magical makers! If you are looking to bring a touch of fantasy, charm, and handmade warmth into your home, you are in the exact right place.
Working on a crochet dragon ornament is a deeply rewarding adventure that lets you slow down, embrace your creativity, and transform simple string into a mythical masterpiece.
Materials & Supplies Needed
- Sport or DK weight cotton yarn (Color A for body, Color B for wings/accents)
- Crochet hook: 2.5 mm (US Steel hook size C/2 or equivalent ergonomic hook)
- Stitch markers
- Tapestry needle for weaving ends and assembly
- Sharp embroidery scissors
- Fiberfill stuffing (light amount)
- 6mm safety eyes or black embroidery floss for facial features
Stitches & Abbreviations
- ch: chain
- sl st: slip stitch
- sc: single crochet
- hdc: half double crochet
- dc: double crochet
- inc: single crochet increase (work 2 sc in the same stitch)
- dec: single crochet decrease (invisible sc decrease recommended)
- st(s): stitch(es)
- Rnd: round
- FO: fasten off
Step-by-Step Pattern Instructions
Head and Body (Worked in continuous rounds)
We will start from the snout and work our way down to the base of the body. Grab your main color and let us dive right in!
- Rnd 1: Magic ring with 6 sc [6 sts]
- Rnd 2: (1 sc, inc) x 3 [9 sts]
- Rnd 3: (2 sc, inc) x 3 [12 sts]
- Rnd 4: Sc in each st around [12 sts]
- Rnd 5: (3 sc, inc) x 3 [15 sts]
- Rnd 6-7: Sc in each st around [15 sts]
- Rnd 8: (3 sc, dec) x 3 [12 sts]. Insert safety eyes between Rnds 5 and 6, about 3 stitches apart. Add a tiny pinch of stuffing.
- Rnd 9: (2 sc, dec) x 3 [9 sts]
- Rnd 10: (1 sc, dec) x 3 [6 sts]. FO and leave a tail for closing.
Wings (Make 2)
Using your accent color, we will whip up a pair of dainty wings to give our little dragon flight.
- Row 1: Ch 5, starting in 2nd ch from hook, work 4 sc, ch 1, turn [4 sts]
- Row 2: Sc2tog, sc2tog, ch 1, turn [2 sts]
- Row 3: Sc2tog, ch 1, work 2 sc down the side edge to smooth the contour, FO leaving a long tail for sewing.
Assembly & Finishing Touches
Lay out all your crocheted pieces on a clean flat surface to check your symmetry before grabbing your tapestry needle. Pin the wings securely to the upper back of the body, making sure they angle upward for a lively, energetic look.
Use the remaining yarn tails to whip-stitch the parts firmly in place, weaving all loose ends cleanly inside the hollow cavities. Finally, give your little dragon a gentle squeeze with your hands to sculpt its shape and attach a loop of yarn or metallic cord to the head for hanging.
Pro Tips for Flawless Results
- Keep your yarn tension slightly snug to prevent the fiberfill stuffing from peeking through your stitches.
- Always use a stitch marker at the start of every continuous round so you never lose your place.
- Play around with metallic threads or variegated yarns for the wings to give your dragon an extra magical, shimmering holiday look.
Frequently Asked Questions
What skill level is required for this pattern?
This project is best suited for intermediate crocheters, though confident beginners who are comfortable working in the round and reading basic amigurumi instructions can easily succeed.
How long does it take to complete one ornament?
On average, you can easily whip up one of these charming little dragons in just a couple of hours, making them fantastic quick gifts.
Can I sell items made from this pattern?
Yes, you are welcome to sell finished items on a small scale, provided you credit the designer and use your own original photographs of your handmade work.