
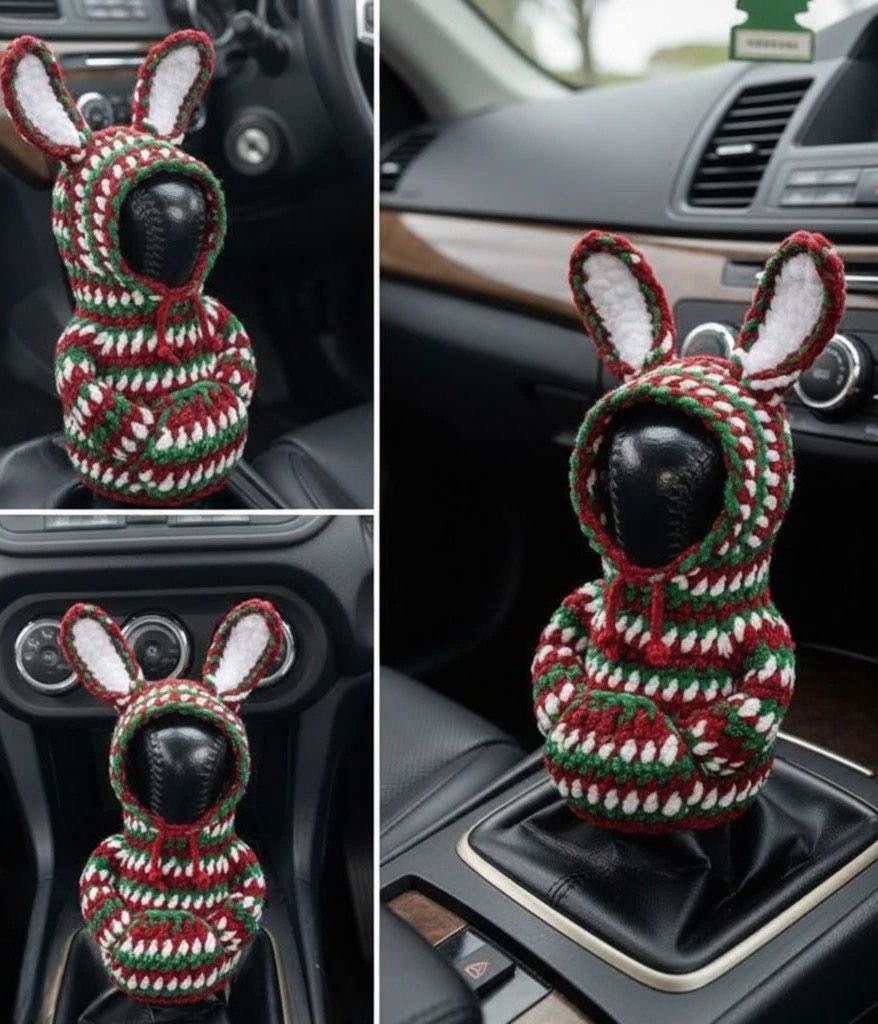
Overview & Inspiration
Welcome, fellow yarn enthusiasts! There is nothing quite like the joy of bringing a touch of handmade whimsy into our everyday routines, and this charming project does just that.
The adorable bunny hoodie car accessory combines amigurumi-style shaping with practical daily use, turning your ordinary gear shift into a cozy, smiling companion that brightens up your entire commute.
Materials & Supplies Needed
- Medium-weight (Worsted / #4) cotton or acrylic yarn in main bunny color and hoodie accent color
- Crochet hook: 4.0 mm (US G/6) to ensure a nice, snug fabric
- Tapestry needle for weaving in ends and embroidering facial features
- Stitch markers (2) to keep track of your rounds
- Sharp scissors
- Small amount of polyester fiberfill stuffing for the bunny ears (optional)
Stitches & Abbreviations
- ch = chain
- sl st = slip stitch
- sc = single crochet
- inc = single crochet increase (work 2 sc in the same stitch)
- dec = single crochet decrease (sc 2 stitches together)
- st(s) = stitch(es)
- Rnd = round
Step-by-Step Pattern Instructions
We will work this project from the bottom up, starting with the cylindrical base that fits snugly over your vehicle’s gear shift, then flowing right into the hoodie and ears!
The Base Cylinder
Rnd 1: Using your main yarn color, make a magic ring, and work 6 sc into the ring. Pull tight to close. [6 sts]
Rnd 2: Work an inc in every st around. [12 sts]
Rnd 3: (1 sc, inc) repeat around. [18 sts]
Rnd 4 to Rnd 18: Sc in each st around. [18 sts]
Fasten off your main color and weave in the starting tail.
The Hoodie Addition
Rnd 1: Join your hoodie accent color to the back of the cylinder roughly 4 rows down from the top edge. Work 1 sc in each st across the front half (9 sts), leaving the back open for the hoodie shaping rows. [9 sts]
Rnd 2: Ch 1, turn, work an inc in the first st, sc across to the last st, work an inc in the last st. [11 sts]
Rnd 3 to Rnd 6: Ch 1, turn, sc in each st across. [11 sts]
Fold the top edge of the hoodie back slightly to create a cute brim, securing it with a few stitches if necessary.
Bunny Ears (Make 2)
Rnd 1: Using main color, make a magic ring and work 4 sc. [4 sts]
Rnd 2: (1 sc, inc) repeat twice. [6 sts]
Rnd 3 to Rnd 6: Sc in each st around. [6 sts]
Fasten off, leaving a long tail for sewing. Flatten the ears slightly and attach them securely to the top of the hoodie.
Assembly & Finishing Touches
Use your tapestry needle to anchor any remaining yarn tails securely on the inside of the piece.
Embroider a sweet little nose and sleeping or blinking eyes onto the front face using contrasting thread or leftover yarn.
Slip your finished bunny hoodie over your car gear shift and adjust it so the face shines proudly forward.
Pro Tips for Flawless Results
- Maintain a slightly tighter tension than usual to ensure the cover hugs the gear shift snugly without sagging.
- Use locking stitch markers to easily keep count of your rounds on the cylindrical base.
- Choose a durable, washable cotton yarn so your handmade creation stays fresh despite daily handling and changing car temperatures.
Frequently Asked Questions
What skill level is required for this pattern?
This project is perfectly suited for confident beginners who already know basic stitches like single crochet, increases, and working in the round.
Can this pattern fit all cars?
Yes! You can easily customize the fit by adding or subtracting stitches in Rnd 3 of the base to match your specific gear shift circumference.
Is the finished gear shift cover washable?
Most pieces made with medium-weight cotton or acrylic yarn can be gently hand washed and laid flat to dry.