
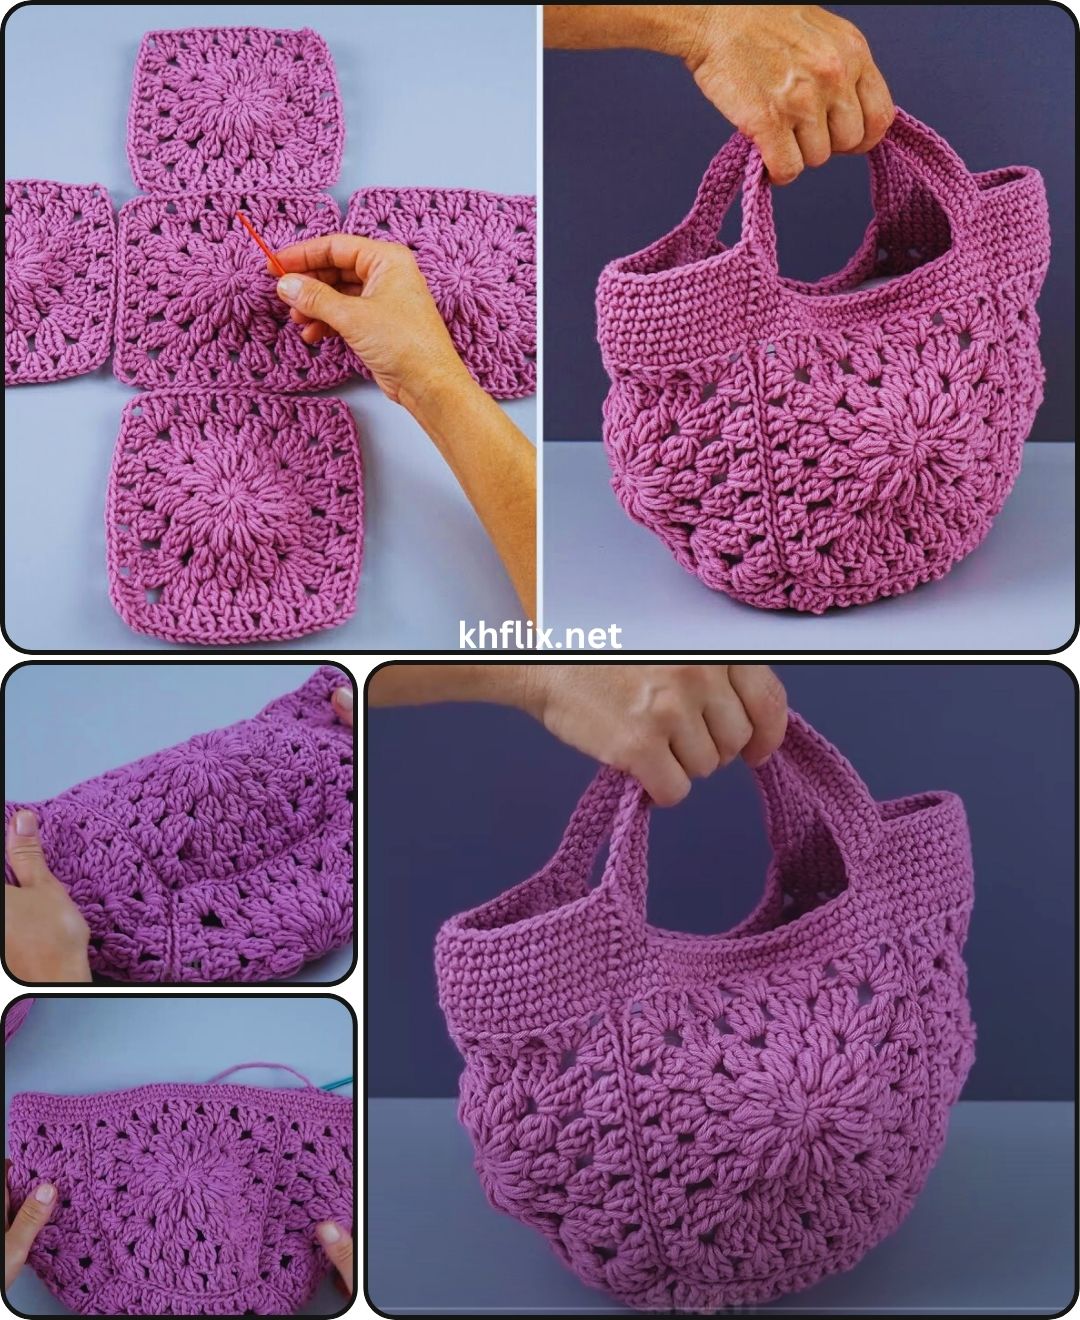
Overview & Inspiration
Welcome, fellow yarn lovers! Learning how to crochet a square handbag for beginners is one of the most exciting, rewarding projects you can dive into as a new maker.
This stylish yet practical accessory is entirely beginner-friendly, helping you build core crochet skills while creating something you can proudly wear every single day. Whether you gift it to a dear friend or keep it for your own handmade wardrobe, this project is pure joy from the very first stitch!
Materials & Supplies Needed
- Medium-weight cotton yarn (choose a solid color for a classic look or multiple colors for a fun patchwork style).
- Crochet hook size 3.5 mm to 4.5 mm (matching your yarn weight).
- Yarn needle (tapestry needle) for weaving in ends.
- Sharp scissors for cutting yarn.
- Stitch markers to keep track of your rounds and corners.
- Optional: Lightweight cotton fabric, needle, and thread or sewing machine for bag lining.
- Optional: Pre-made or crocheted bag handles and straps.
Stitches & Abbreviations
- ch = chain
- sl st = slip stitch
- dc = double crochet
- st/sts = stitch/stitches
Step-by-Step Pattern Instructions
To start your first square, make a slip knot on your hook and chain 4 stitches. Join the last chain to the first with a slip stitch to form a ring.
Round 1: Chain 3 to count as your first double crochet. Work 11 double crochets into the center of the ring, then join with a sl st to complete your first round [12 sts].
Round 2: Chain 3, make one double crochet in the same stitch, then chain 2 for the corner. Continue working (2 double crochets, chain 2) around the circle four times to form four corners. Join the round with a sl st [24 sts and 4 corner spaces].
Round 3 and beyond: Continue expanding your square by adding more rounds. In each new round, work 2 double crochets in each corner chain space, followed by chain 2. Between corners, make one double crochet in each stitch. Repeat this process until your square reaches about 4 to 5 inches across, then fasten off.
Make four identical squares for a small handbag, or more if you prefer a larger tote. Weave in all loose ends securely with your yarn needle before moving on to assembly.
Assembly & Finishing Touches
Lay out your finished squares on a flat surface and arrange them into your preferred handbag design. Place two squares side by side for the front panel and two for the back panel.
Join the squares using a slip stitch join or a whip stitch method with right sides facing together. Seam the front and back panels along the sides and bottom edges, leaving the top open, and reinforce the bottom with an extra row of single crochet stitches if desired.
Attach your crocheted chains or pre-made handles securely to the top edge. Finally, block your bag by lightly wetting and shaping it to even out your stitches and give it a crisp, professional finish.
Pro Tips for Flawless Results
- Choose a sturdy cotton yarn rather than stretchy acrylic so your handbag maintains its structural shape over time.
- Use stitch markers in your corner chain spaces to easily spot where your increases go in every round.
- Weave in your yarn tails as you go to make the final assembly process much quicker and cleaner.
Frequently Asked Questions
What type of yarn is best for a crochet square handbag?
Cotton yarn is highly recommended because it is strong, durable, and holds its structure well. Acrylic yarn can also work, but it tends to stretch out over time under heavy use.
How many squares do I need to make a crochet handbag?
It depends entirely on the size of the bag you want. Usually, 4 to 8 squares are plenty for a small to medium-sized handbag, while larger tote styles may require up to 12 squares.
Can I add a fabric lining to my finished handbag?
Yes, absolutely! Adding a fabric lining protects your stitches from stretching, keeps small items from slipping through the gaps, and gives your handmade handbag a polished, professional interior.
Watch the Full Step-by-Step Video Tutorial
Prefer visual guidance? Follow along with the complete video tutorial below at your own pace: