
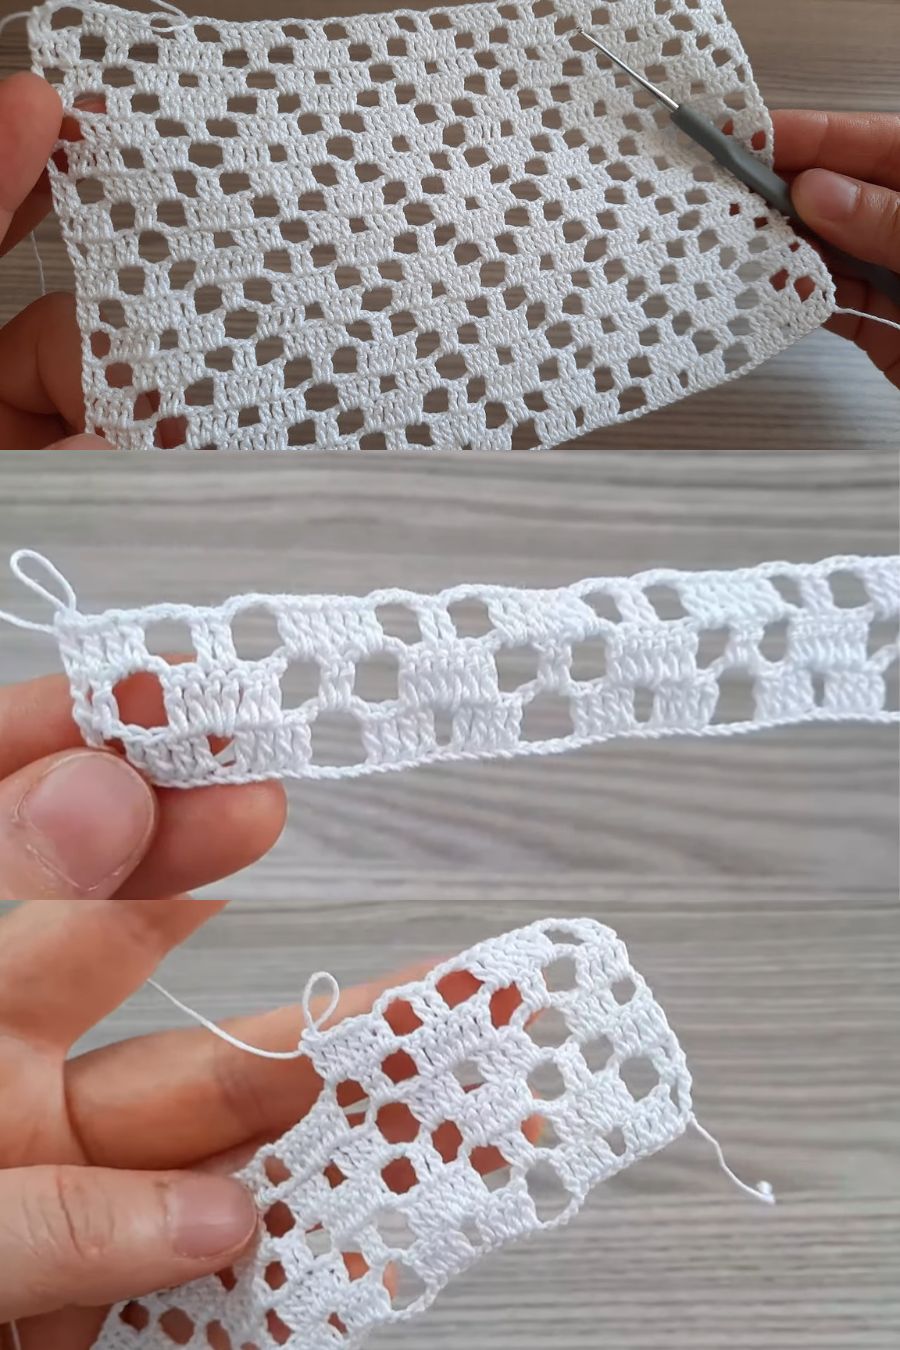
Overview & Inspiration
Welcome to one of the most mesmerizing stitch patterns in the crochet world! The Ribbon Lace Crochet Pattern combines delicate openwork with structured solid stitches, creating the charming visual effect of woven satin ribbons gliding across your fabric.
Whether you are dreaming of a light spring scarf, an heirloom baby blanket, or an elegant drape for a summer shawl, this pattern offers a relaxing, rhythmic sequence that makers of all skill levels will adore. Get ready to fall in love with lacework all over again!
Materials & Supplies Needed
- Yarn: Fine/Fingering (Category 1) or Sport weight (Category 2) yarn in cotton, bamboo, or silk blend for optimal drape.
- Crochet Hook: 3.5 mm (US E-4) or hook size appropriate for your selected yarn weight.
- Tapestry Needle: Blunt-ended steel yarn needle for weaving in tails neatly.
- Stitch Markers: Locking stitch markers to identify edge stitches and pattern repeats.
- Scissors: Sharp yarn snips or embroidery scissors.
- Blocking Equipment: Blocking mats, stainless steel T-pins, and a spray bottle for wet blocking lace.
Stitches & Abbreviations
- ch: chain
- sc: single crochet
- dc: double crochet
- sl st: slip stitch
- ch-sp: chain space
- st(s): stitch(es)
- sk: skip
- RS: right side
- WS: wrong side
Step-by-Step Pattern Instructions
This pattern is worked in a multiple of 10 + 7 starting chains. For this sample swatch, we begin with a foundation chain of 27.
Foundation Row: Ch 27. Dc in 4th ch from hook (skipped 3 chs count as first dc) and in each ch across. Turn. [25 dc]
Row 1 (RS): Ch 3 (counts as dc here and throughout), dc in next 3 sts. *Ch 3, sk 2 sts, sc in next st, ch 3, sk 2 sts, dc in next 5 sts.* Repeat from * across until 6 sts remain, ch 3, sk 2 sts, sc in next st, ch 3, sk 2 sts, dc in last 4 sts (including top of turning ch). Turn. [13 dc, 2 sc, 4 ch-3 sps]
Row 2 (WS): Ch 3, dc in next 3 dc. *Ch 5, sk (ch-3 sp, sc, ch-3 sp), dc in next 5 dc.* Repeat from * across, ending with dc in last 4 dc. Turn. [13 dc, 2 ch-5 sps]
Row 3 (RS): Ch 3, dc in next 3 dc. *Work (2 dc, ch 1, 2 dc) directly into the center of the ch-5 sp, dc in next 5 dc.* Repeat from * across, ending with dc in last 4 dc. Turn. [21 dc, 2 ch-1 sps]
Row 4 (WS): Ch 3, dc in next 3 dc. *Ch 3, sk 2 dc, sc in ch-1 sp, ch 3, sk 2 dc, dc in next 5 dc.* Repeat from * across, ending with dc in last 4 dc. Turn. [13 dc, 2 sc, 4 ch-3 sps]
Repeat Rows: Repeat Rows 2 through 4 until your project reaches your desired length, ending on a Row 3 repeat. Fasten off yarn.
Assembly & Finishing Touches
Cut your working yarn, leaving a 6-inch tail. Pull the tail through the final loop on your hook and weave it securely through the back of your solid double crochet columns using your tapestry needle.
Lace stitches naturally curl and tighten while on the hook. To fully reveal the graceful ribbon structure, pin your work flat onto blocking mats, spray generously with water, and allow it to air dry completely.
Pro Tips for Flawless Results
- Choose Plant-Based Fibers: Mercerized cotton and shiny bamboo yarn accentuate stitch definition and give the “ribbon” arches a luxurious sheen.
- Keep Chain Spaces Relaxed: Maintain loose, uniform tension on your chain arches so your side edges remain straight and supple.
- Embrace Wet Blocking: Never skip blocking lace! Pinning opens up the openwork sections and transforms your project from raw stitches into a high-end masterpiece.
Frequently Asked Questions
Is the Ribbon Lace Crochet Pattern suitable for beginners?
Yes! If you know how to work basic chains, single crochets, and double crochets, you can easily master this design. The counting sequence is simple to memorize after just a few rows.
What yarn weight works best for this pattern?
Lightweight yarns such as fingering, lace, or sport weight create the airiest drape. However, you can use worsted weight yarn with a larger hook for a warm, textured throw blanket.
How do I make my project wider or narrower?
Simply adjust your initial chain by adding or subtracting multiples of 10 chains. Remember to add 7 extra chains at the very end to complete your foundation count.
Watch the Full Step-by-Step Video Tutorial
Prefer visual guidance? Follow along with the complete video tutorial below at your own pace: