
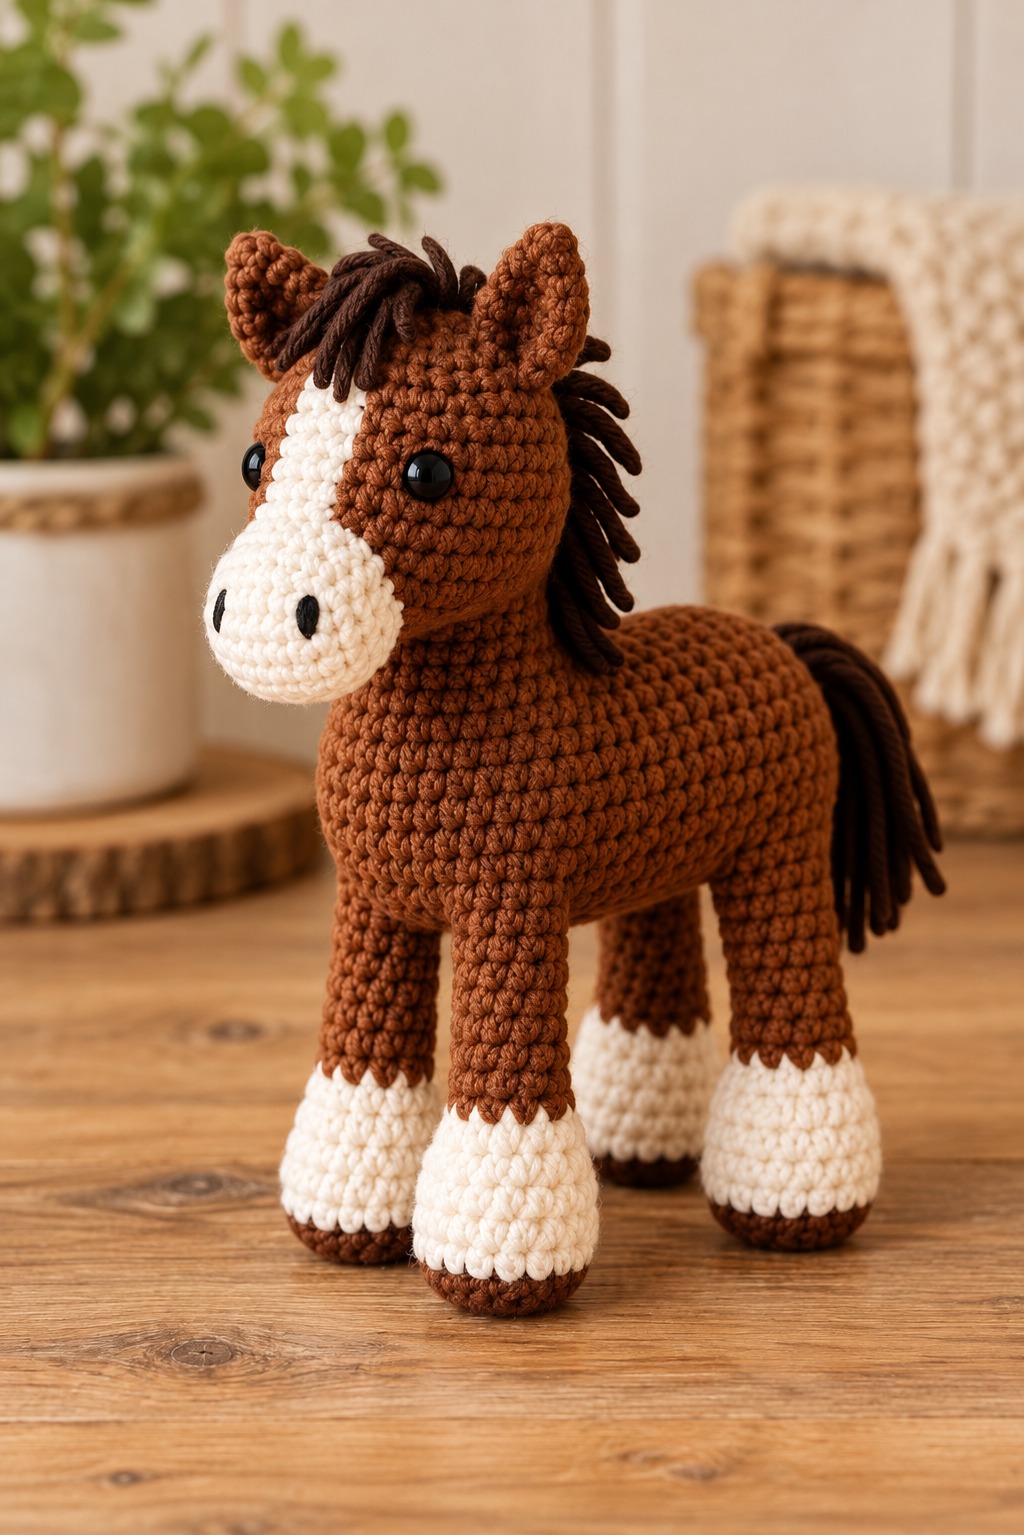
Overview & Design Inspiration
Welcome back, yarn-loving friends! There is truly nothing quite like the magic of amigurumi—taking a simple ball of yarn and transforming it, stitch by stitch, into a charming, huggable character with a personality all its own.
Our featured Crochet Horse Amigurumi Pattern captures all the sweetness and grace of these magnificent animals in a wonderfully portable, cuddly package. Whether you are crafting a heartfelt keepsake for a nursery or simply expanding your handmade menagerie, this project offers an endlessly rewarding stitching adventure.
Materials & Recommended Supplies
Gathering your supplies is the official starting line of any great crochet journey! Here is everything you need to bring your friendly amigurumi horse to life:
- Yarn: Medium-weight (DK or Worsted) cotton or acrylic yarn. You’ll need approximately 150–200g of warm brown for the body, 40–60g of cream for the muzzle and lower legs, and 30–50g of dark brown for the flowing mane and tail.
- Crochet Hook: 3.0 mm or 3.5 mm hook (choose a slightly smaller hook than your yarn label recommends to keep your stitches tight and secure).
- Notions: Polyester fiberfill for stuffing, a yarn needle, sharp scissors, stitch markers, and sewing pins.
- Eyes: Two 10–12 mm black safety eyes (substitute with secure embroidered French knots if crafting for babies or toddlers).
Essential Techniques & Stitch Highlights
Amigurumi crochet relies on a handful of foundational techniques that work together to create a dense, professional-looking fabric. By working in continuous spiral rounds rather than joined rows, you eliminate unsightly seams and achieve a smooth, seamless finish.
You will lean heavily on the magic ring technique to kick off your individual shapes, laying down a neat, closed center for heads, muzzles, and limbs. Mastering invisible decreases is another game-changer, allowing you to taper shapes smoothly without leaving gaps where your fiberfill could peek through. Combined with simple single crochet stitches, these reliable methods build the structural integrity every great stuffed toy needs.
Construction & Assembly Highlights
Building an amigurumi horse is much like piecing together a delightful 3D puzzle! The process begins by crocheting the individual components—the rounded head, the elongated body, four sturdy legs, and the perky, pointed ears—in continuous, spiraling rounds.
Once every piece is firmly stuffed and shaped to perfection, the real magic happens during assembly. Pins become your best friend here, allowing you to audition different placements for the head, limbs, and facial features before stitching them securely in place. Finally, adding the dark, flowing yarn mane and tail ties the entire character together, giving your handmade horse its distinctively friendly and spirited expression.
Customization & Styling Ideas
One of the absolute best parts of handmade amigurumi is making the design entirely your own! While a rich chestnut brown with cream accents creates a classic look, feel free to experiment with caramel, heather gray, stark black, or even whimsical pastel shades.
You can easily play with scale by adjusting your yarn weight and hook size to whip up anything from a tiny, pocket-sized keychain companion to a wonderfully oversized cuddle buddy. Add embroidered facial expressions, tiny felt blankets, or custom-colored manes to give your finished horse a one-of-a-kind personality.
Pro Tips for Flawless Results
- Maintain Consistent Tension: Keep your stitches tight and even so your fiberfill stays securely hidden inside the fabric.
- Stuff as You Go: Pack your pieces firmly—especially the head and neck—to ensure your horse stands proud and holds its shape over time.
- Pin Before You Sew: Always use plenty of sewing pins to test the positioning of ears, muzzles, and legs before attaching them permanently.
- Anchor Your Yarn Tails: Securely knot and weave your ends deep inside the body pieces to prevent any unraveling down the road.
Frequently Asked Questions
Is this crochet horse pattern suitable for beginners?
Yes, absolutely! While it involves shaping and assembly, the pattern relies primarily on basic single crochet stitches, increases, and invisible decreases, making it a fantastic confidence-builder for adventurous beginners.
Can I use safety eyes if I am making this toy for a baby?
For toys intended for infants and young children, it is always safest to embroider the eyes using dark yarn and simple stitches to eliminate any potential choking hazards from plastic components.
What is the finished size of the amigurumi horse?
Using medium-weight yarn and a 3.0–3.5 mm hook, your finished horse will typically measure around 23–28 cm tall, though exact dimensions will vary slightly depending on your individual stitching tension.
Watch the Full Step-by-Step Video Tutorial
Prefer visual guidance? Follow along with the complete video tutorial below at your own pace: