
Overview & Design Inspiration
Welcome, fellow yarn lovers, to your next favorite handmade obsession! There is something deeply satisfying about creating a miniature work of art that you can carry with you everywhere you go.
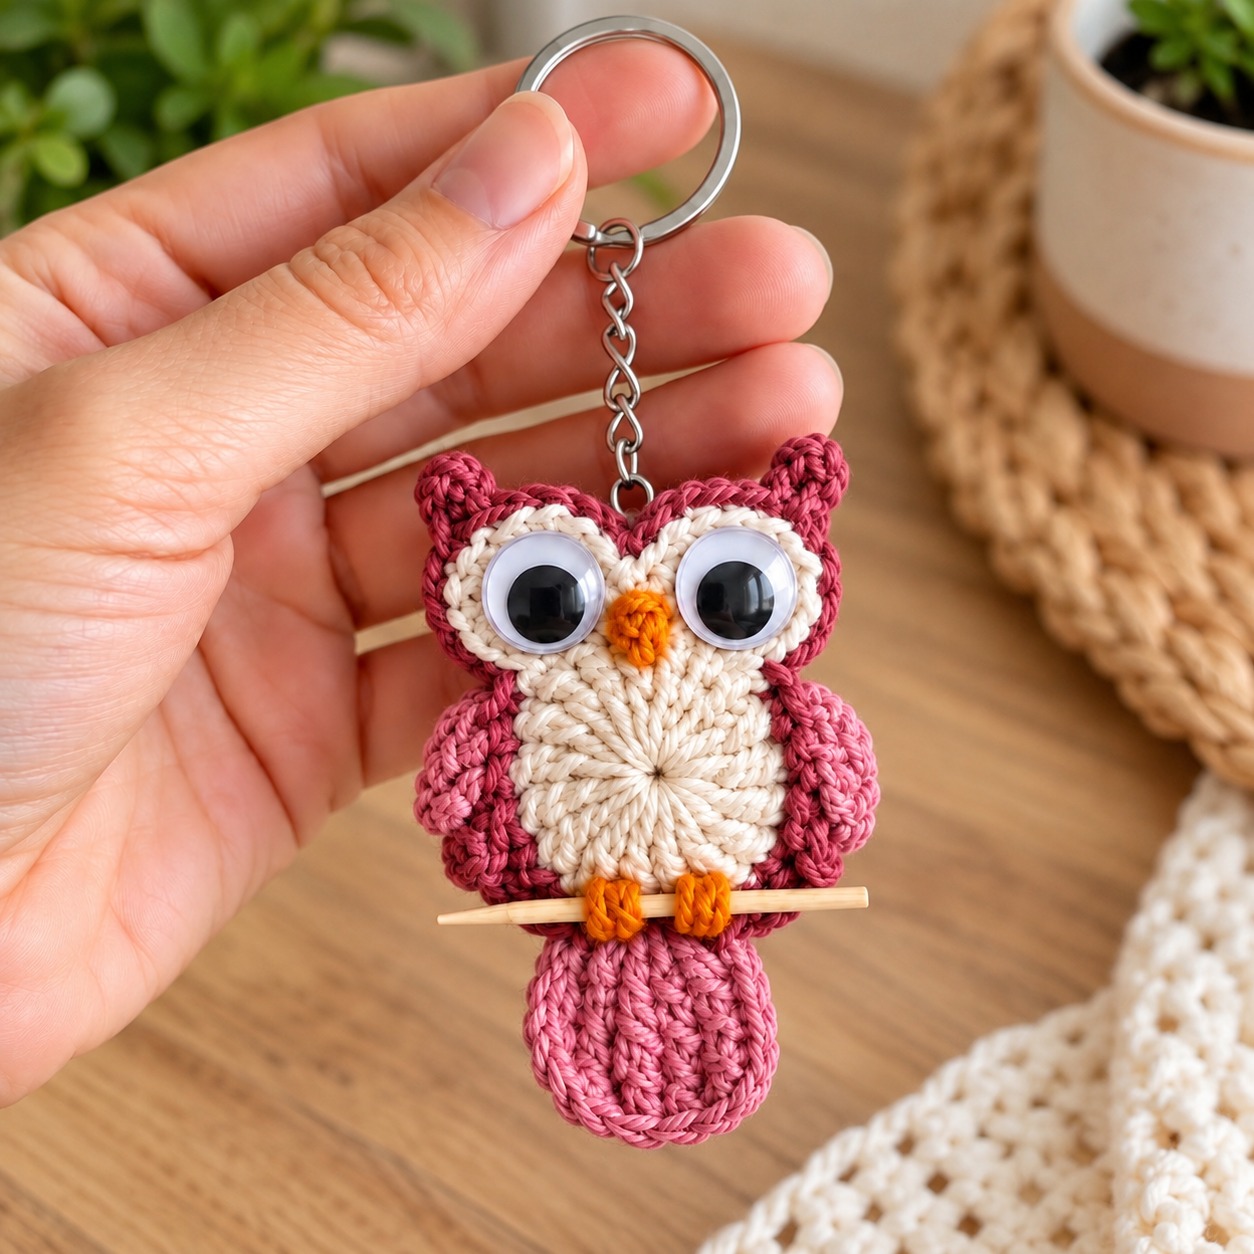
Our featured Crochet Owl Keychain brings together oversized eyes, delicate wings, colorful feathers, and tiny orange feet into one irresistibly charming accessory. Whether it is dangling from your favorite backpack or keeping your keys company, this little hoot-owl is guaranteed to bring a smile to your face every single day.
Materials & Recommended Supplies
- Yarn: Lightweight cotton yarn in four complementary colors (burgundy for the outer body, dusty pink for the wings, cream for the face and belly, and orange for the beak and feet).
- Crochet Hook: 2.5 mm crochet hook (or size needed to match your personal tension).
- Eyes: Two plastic googly eyes, approximately 10–12 mm in diameter.
- Hardware: Metal keychain ring with a short chain.
- Notions: Tapestry needle, scissors, stitch markers, and a small amount of polyester stuffing.
- Perch: Miniature wooden dowel or smooth craft stick (3–3.5 inches long) for a charming natural display.
Essential Techniques & Stitch Highlights
This delightful project lets you practice a wonderful variety of basic stitches while building structural integrity. Working primarily in continuous rounds with single crochet creates a firm, gap-free fabric that holds its shape beautifully over time.
You will also explore magic rings for seamless circular beginnings, half double and double crochets for delicate shaping, and clever back-loop-only (BLO) techniques. These texture variations create subtle, feather-like ridges that give the owl its incredible depth and personality.
Construction & Assembly Highlights
Bringing your owl to life is a journey of making individual, manageable pieces before putting the puzzle together. You will start by crafting the rounded lower body and shaping the wider head before adding tiny, perky pointed ears.
Next, you will layer on the contrasting cream belly and expressive facial features, finishing with playful wings and tail feathers. Finally, secure your hardware and mount your finished creation onto its miniature wooden branch for an authentic, woodland-inspired masterpiece.
Customization & Styling Ideas
One of the best parts about this pattern is how wonderfully stash-friendly it is! Because it requires only modest amounts of yarn, it is the ultimate way to use up leftover cotton scraps from past projects.
Play around with your color palette to match the seasons or personal tastes. Try rich browns and beiges for a classic barn owl, calming lavenders and whites for a pastel dream, or festive greens and golds for the holidays.
Pro Tips for Flawless Results
- Maintain Consistent Tension: Keep your stitches nice and firm so the polyester stuffing doesn’t peek through the gaps.
- Use Stitch Markers: Since you will be working in continuous rounds, a stitch marker is your absolute best friend for keeping count.
- Secure Your Hardware: Make sure the keychain ring is anchored securely through the upper body stitches using reinforced yarn loops.
- Embrace Scrap Yarn: Don’t be afraid to mix and match different cotton yarn brands as long as they share a similar lightweight gauge.
Frequently Asked Questions
Is this crochet project beginner-friendly?
Yes, absolutely! While it has wonderful details, the project relies on basic stitches like single crochet, increases, and decreases, making it approachable for confident beginners.
Can I wash my crochet owl keychain?
Because it contains plastic googly eyes, wooden components, and metal hardware, spot-cleaning with a damp cloth and mild soap is always recommended over machine washing.
Are these keychains suitable as toys for young children?
Due to the small plastic eyes, metal hardware, and wooden perch, this design is intended strictly as a decorative accessory rather than a toy for little ones.
Watch the Full Step-by-Step Video Tutorial
Prefer visual guidance? Follow along with the complete video tutorial below at your own pace: