
Overview & Design Inspiration
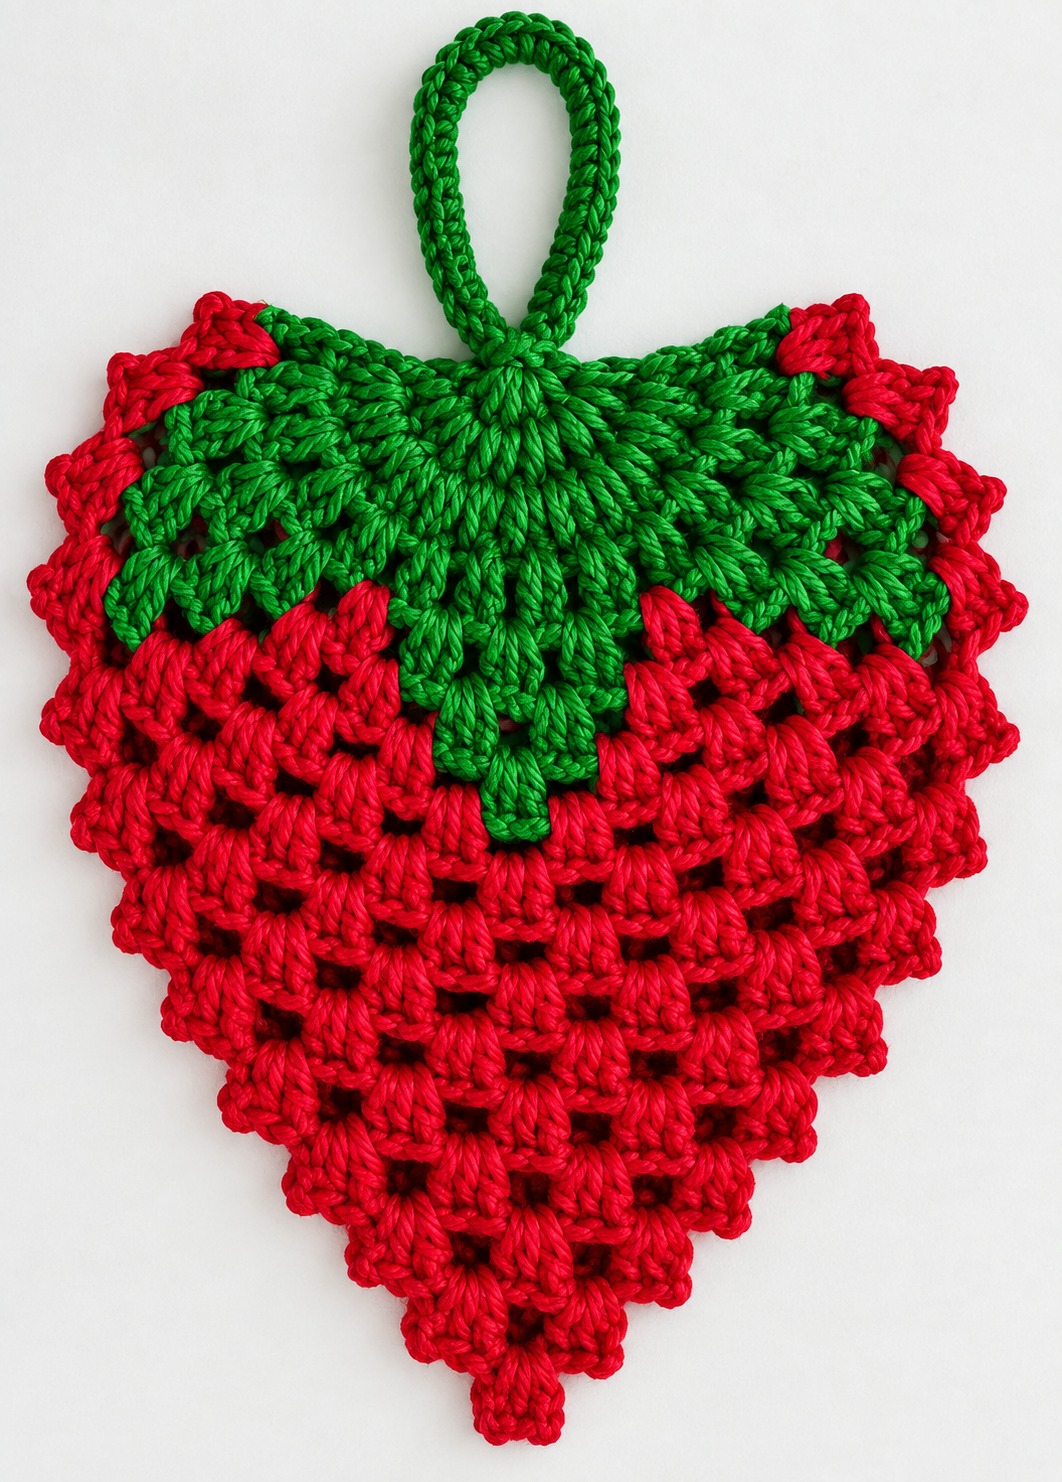
Hello, my wonderful crochet family! There is something so utterly joyful about bringing a touch of sweet, handmade summer charm into our crafting spaces, and today’s featured project does just that. Inspired by the natural, lush beauty of fresh garden berries, this delightful design combines vibrant reds and leafy greens into a decorative piece that feels instantly cheerful and inviting.
Unlike traditional stuffed toys, this flat-construction ornament features a gorgeous openwork texture and a distinctive triangular silhouette. It makes a stunning hanging accent for your kitchen, craft room, or seasonal display, adding a burst of handmade color wherever it goes.
Materials & Recommended Supplies
- Yarn: Medium-weight (Worsted/Aran) cotton yarn. You will need approximately 40–60 yards of bright strawberry red and 20–30 yards of rich leaf green.
- Crochet Hook: 4.0 mm (US G/6) or 4.5 mm (US 7) hook to ensure wonderful stitch definition without excessive stiffness.
- Notions: Yarn needle for weaving ends, sharp scissors, and stitch markers to keep your rows symmetrical.
- Optional: Measuring tape to check your proportions as you grow the piece.
Essential Techniques & Stitch Highlights
This charming project relies on a few key stitches to achieve its signature texture. The main body utilizes decorative crochet cluster stitches—specifically three-double-crochet-together (dc3tog) groups—worked into open chain spaces. This creates a raised, tactile surface that wonderfully mimics the seeds of a ripe strawberry.
Working with chain-space construction allows the piece to expand gracefully from a narrow point into a wide, balanced triangle. Clean color transitions from the red body to the green leafy cap ensure the finished ornament looks polished and professional from every single angle.
Construction & Assembly Highlights
The construction journey begins at the very bottom tip of the berry. Using your red yarn, you will start with a small foundation and gradually increase the number of decorative clusters row by row. This bottom-up approach gives you total control over the widening silhouette of your strawberry.
Once the red body reaches your desired width, you will transition to the rich green yarn to craft the leafy crown. The final steps include shaping a decorative hanging loop, seamlessly weaving in all your yarn tails, and admiring your fresh new handmade creation!
Customization & Styling Ideas
One of the best parts of this project is how easily you can customize it to match your personal aesthetic. Try swapping traditional red for dusty rose, coral, or pastel pink for a modern, cottagecore-inspired palette.
Make a whole garland of strawberries to string across a window, hang a single statement berry on a doorknob, or pair them with handmade blossoms for a sweet kitchen wall hanging. They also make unforgettable, heartfelt gifts for friends who adore handmade decor.
Pro Tips for Flawless Results
- Maintain Consistent Tension: Keep your chain spaces uniform so your triangular strawberry shape stays perfectly symmetrical and free from distortion.
- Size Down Your Hook: If you prefer a firmer decorative piece that holds its shape effortlessly, drop down half a hook size from your yarn’s recommendation.
- Secure Your Tails Well: Because this ornament hangs freely and remains visible from both sides, weave your color-change tails securely through nearby stitches to keep the reverse side looking pristine.
Frequently Asked Questions
Is this project suitable for ambitious beginners?
Absolutely! While it features textured cluster stitches and openwork lace, the construction is broken down into simple, repetitive rows. If you are comfortable with basic US crochet stitches, you will do wonderfully.
Can I use acrylic yarn instead of cotton?
Yes, you can! However, medium-weight cotton yarn is recommended because it provides superior stitch definition and helps the textured clusters hold their crisp shape much better than acrylic.
How do I access the full step-by-step pattern and video?
You can easily grab the complete printable PDF pattern and follow along with our comprehensive video tutorial via the download links provided at the bottom of this page!
Watch the Full Step-by-Step Video Tutorial
Prefer visual guidance? Follow along with the complete video tutorial below at your own pace: