
Overview & Design Inspiration
Welcome, my wonderful crafty friends, to one of the most magical holiday projects of the season! There is nothing quite like filling your home with handmade decor, and this festive crochet centerpiece brings an undeniable charm to any room.
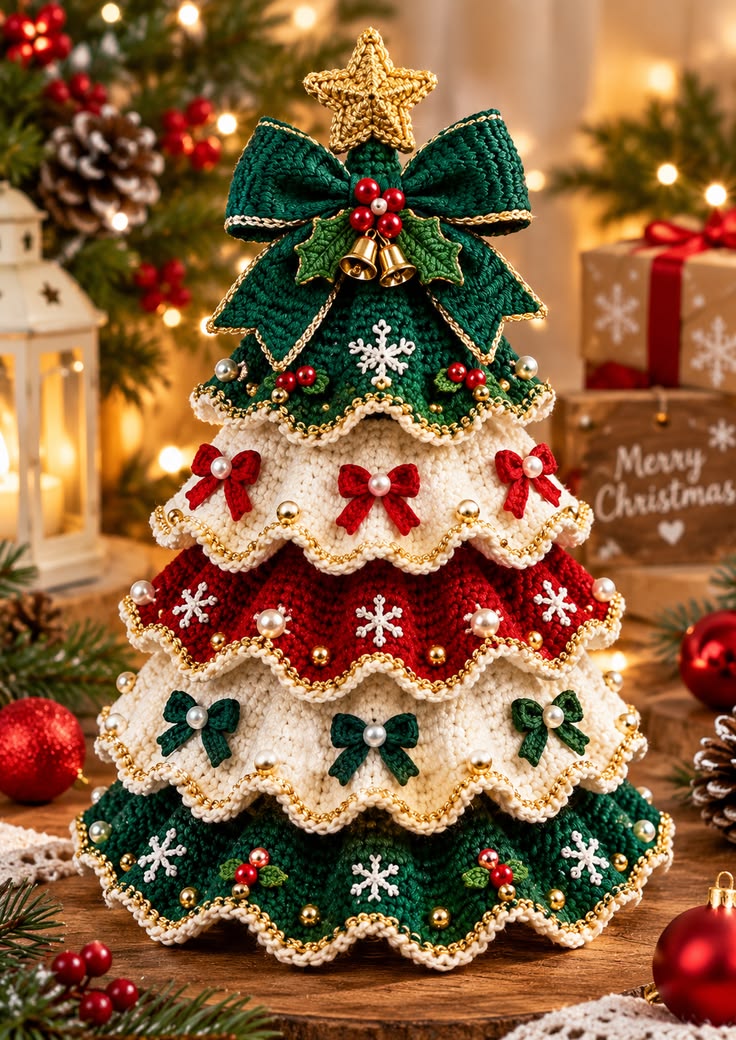
Featuring cascading layers of textured ruffles, delicate snowflakes, and golden accents, this design captures the timeless elegance of a traditional winter wonderland. Whether you are crafting a cozy focal point for your mantel or searching for a truly meaningful holiday gift, this project transforms simple yarn into an heirloom-quality treasure.
Materials & Recommended Supplies
Bringing this stunning holiday tree to life is all about choosing the right palette and tools to ensure your design holds its gorgeous, structured shape throughout the season. Here is everything you will need to gather before you begin:
- Yarn: Medium-weight (Worsted weight / Aran) acrylic or cotton-blend yarn. You will need dark forest green, Christmas red, and warm ivory for the main body, plus a small amount of metallic gold for the star and finishing touches.
- Crochet Hook: 3.5 mm or 4.0 mm hook (US E/4 or G/6) to create a firm, professional fabric that supports the ruffles.
- Notions: Yarn needle, stitch markers, sharp scissors, and polyester fiberfill if you are shaping it without a rigid insert.
- Support & Embellishments: A lightweight craft cone (approx. 30–35 cm tall), small pearl beads, miniature golden bells, and decorative red berries for that final magical sparkle.
Essential Techniques & Stitch Highlights
This pattern is a wonderful playground for mastering versatile crochet techniques while creating something truly spectacular. Working in continuous spiral rounds helps build a seamless, smooth structural base without those pesky seam lines.
You will utilize foundational stitches like single crochets, half double crochets, and double crochets, combined with smart increases to shape the tapered cone. The real magic happens when you work into the back loops only (BLO) and introduce textured scalloped borders, giving each cascading tier that signature ruffled movement.
Construction & Assembly Highlights
Constructing this delightful tree is all about working in manageable, satisfying stages that let you watch your holiday creation bloom. You begin from the pointed top of the structural base and work downward in spiral rounds, gradually increasing your stitch count until you reach a wide, stable foundation.
Next comes the fun part: crocheting the five individual ruffled tiers separately! Each colorful section—featuring alternating shades of deep forest green, warm ivory, and rich red—is pinned and layered over the cone, overlapping slightly to create lush, voluminous branches before being securely attached and topped with a handmade star.
Customization & Styling Ideas
One of the best things about handmade holiday decor is how easily you can tailor it to match your personal aesthetic and home interior. If traditional red and green aren’t your style, try a modern Scandinavian look using monochromatic creams, silvers, and icy blues.
You can easily scale the project down by stopping your base rounds early to create miniature tabletop trees, or scale them up for a dramatic floor display. For homes with curious pets or toddlers, simply swap out loose pearls and bells for firmly stitched-down crochet alternatives to keep your holiday decorating safe and stress-free.
Pro Tips for Flawless Results
- Maintain Consistent Tension: Keep your stitches nice and firm so the structural base holds its shape and proudly supports the heavy, ruffled layers without sagging.
- Test Your Fit: If you are using a pre-made craft cone, slip your crocheted base over it periodically as you work to ensure a snug, smooth fit.
- Pre-Plan Your Ruffles: Pin all your completed tiers in place before sewing them down so you can easily adjust the spacing and fullness of the overlapping layers.
- Secure Embellishments Carefully: If you choose to add beads or bells, double-knot your sewing thread or yarn securely to ensure everything stays put all season long.
Frequently Asked Questions
Is this project suitable for adventurous beginners?
Absolutely! While the finished tree looks wonderfully elaborate, the construction is broken down into simple, manageable steps using basic stitches like single and double crochet, making it entirely achievable if you take your time.
Can I wash the finished crochet tree?
If you use a removable craft cone and synthetic yarn, spot-cleaning is always recommended to protect your delicate embellishments, beads, and dimensional ruffles. If your tree is stuffed entirely with fiberfill, gentle hand washing and air drying flat will keep it looking fresh.
What is the best way to make sure the tree stands up straight?
Using a sturdy, weighted internal craft cone or filling the base generously with polyester fiberfill alongside a weighted disc (like a small bag of dried beans at the very bottom) will provide fantastic stability for freestanding displays.
Watch the Full Step-by-Step Video Tutorial
Prefer visual guidance? Follow along with the complete video tutorial below at your own pace: