
Overview & Design Inspiration
Hello, my wonderful crafty friends! The holiday season is fast approaching, and there is nothing quite like handmade decor to make your home feel warm, cozy, and bursting with festive cheer.
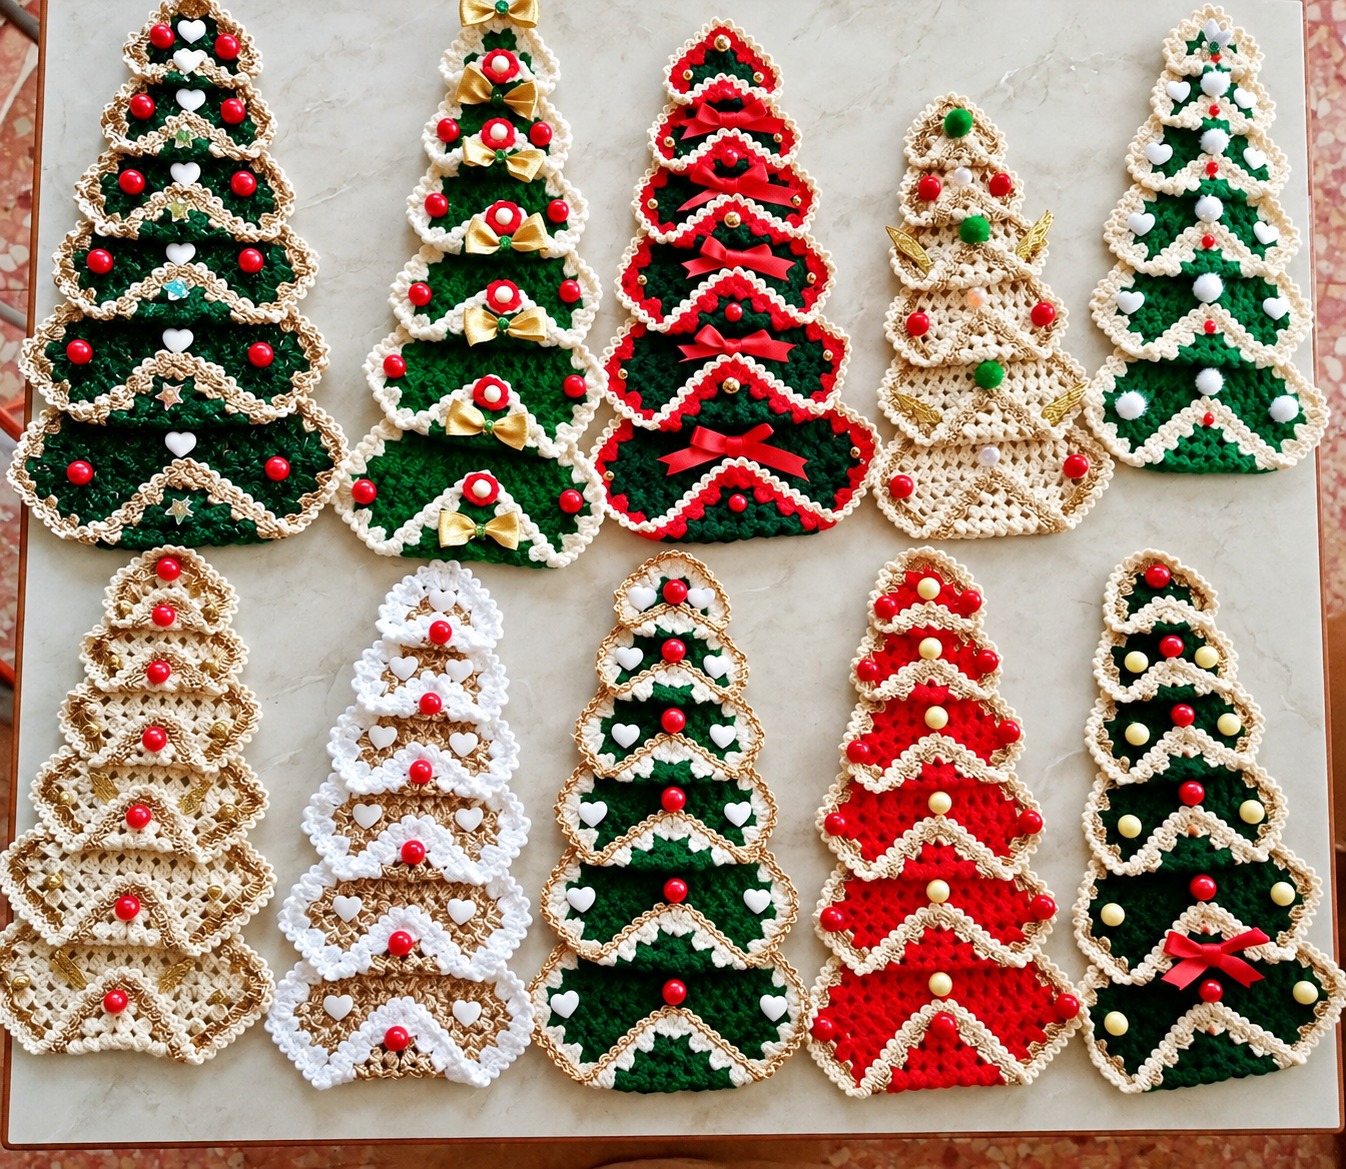
If you are looking for a project that captures that magical Christmas spirit, you are going to fall completely in love with our featured design. This clever layered creation swaps out the traditional single-piece tree for a stunning stack of graduated motifs, resulting in a rich, textured silhouette that looks incredible hanging on an entryway door, wall, or festive cabinet.
Materials & Recommended Supplies
Gathering your supplies is half the fun of any holiday make! Here is everything you need to bring your festive display to life:
- Medium-weight yarn in traditional holiday shades (rich forest greens, snowy whites, creamy ivories, or cozy farmhouse beiges).
- Contrasting yarn for that gorgeous statement border (think gold, red, or crisp white).
- Crochet hook sized between 4.0 mm and 5.0 mm, depending on your personal tension and chosen yarn thickness.
- Yarn needle for weaving in ends and securing the overlapping layers.
- Scissors and stitch markers to keep your rows organized.
- Optional decorative elements like miniature bows, buttons, bells, beads, or tiny crocheted appliqués.
Essential Techniques & Stitch Highlights
This project relies on friendly, approachable stitches that work up quickly while creating gorgeous texture. Working primarily in double crochets allows the body of the tree to build height and create a light, open fabric reminiscent of classic holiday lace.
We also lean on reliable single crochets to build firm, structured edges that hold their shape beautifully. By incorporating simple increases across the rows, you effortlessly transform a basic ring foundation into a series of charming, sweeping fan shapes that stack together like a dream.
Construction & Assembly Highlights
The true magic of this pattern lies in its modular construction rather than working in one intimidating solid piece. You will crochet approximately five to seven separate graduated sections, starting with the widest fan at the bottom and gradually decreasing in size toward the top.
Once your individual motifs are ready, lay them out flat on a table to find the perfect overlapping balance. A few strategic, hidden stitches along the overlapping areas secure the layers firmly in place, allowing you to finish the entire perimeter with a gorgeous contrasting border and optional picot points.
Customization & Styling Ideas
One of the best things about this holiday pattern is how easily you can adapt it to match your personal home decor style. Go for a traditional vibrant green with a cream border, or opt for a rustic Scandinavian vibe using neutral oatmeal and beige tones.
You can also personalize your tree by pinning on vintage buttons, tiny pom-poms, or handmade bows. It makes a breathtaking statement piece on a front door, a lovely wall hanging above a mantel, or even a thoughtful, handmade holiday gift for a dear friend.
Pro Tips for Flawless Results
- Keep your foundation chains relaxed to prevent the lower edges of your fan motifs from curling upward.
- Do a dry layout of all your completed sections before sewing them together so you can check your proportions and symmetry.
- Maintain a consistent hook size and tension across all sections to ensure your tree grows in a straight, balanced line.
- Add a dab of fabric-safe glue or secure knots when attaching your final embellishments so they stay put all season long.
Frequently Asked Questions
Is this project suitable for ambitious beginners?
Absolutely! Because the tree is built from smaller, repetitive sections rather than one massive pattern, beginners can practice basic shaping on the smaller layers and master the techniques by the time they reach the larger base.
Can I change the size of the tree?
Yes, changing the size is as simple as adjusting your yarn weight and hook size, or simply adding and subtracting a few rows from each graduated motif to make your tree taller or more compact.
How do I hang the finished tree securely?
You can easily attach a small loop of yarn or matching ribbon securely to the top point of the uppermost motif, making it lightweight and simple to hang from a decorative wreath hook or wall pin.
Watch the Full Step-by-Step Video Tutorial
Prefer visual guidance? Follow along with the complete video tutorial below at your own pace: