
Overview & Design Inspiration
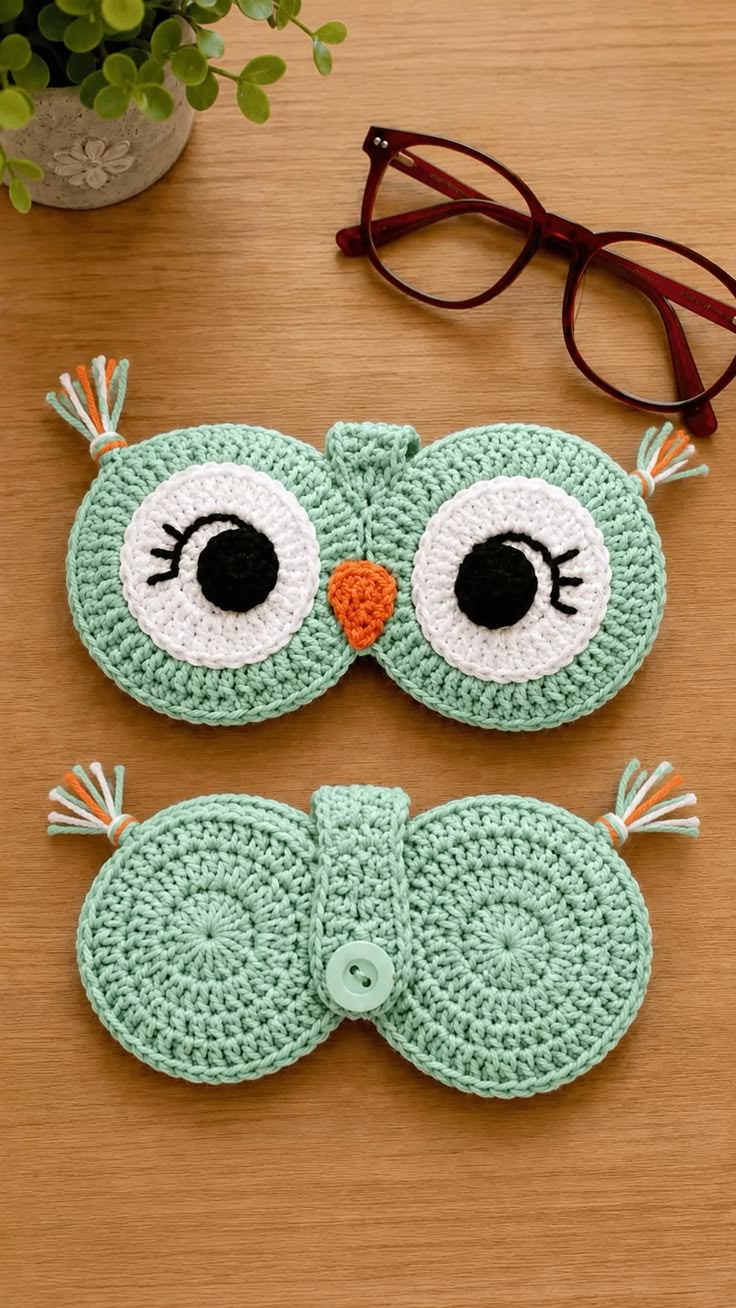
Welcome back to the studio, my fiber-loving friends! If you are anything like me, your eyeglasses or reading glasses live a bit of a nomadic lifestyle, migrating from the bedside table to the desk and tumbling into the depths of your tote bag. That is why I am so thrilled to share our latest obsession: the Crochet Owl Glasses Case! This delightful project combines everyday functionality with the irresistible, wide-eyed charm of our favorite feathered woodland creature.
Crocheting practical accessories is one of the most rewarding ways to elevate your craft, transforming simple yarn into a piece you will use and cherish every single day. The best part? This design uses basic shaping and sweet decorative details to turn two simple crocheted circles into a gorgeous, protective pouch that keeps your glasses safe from scratches while showing off your handmade flair.
Materials & Recommended Supplies
Gathering your supplies is half the fun, and this project is a wonderful stash-busting opportunity for your cotton yarn collection! Here is everything you need to bring your wise little owl to life:
- Medium Weight (#4) Cotton Yarn in royal blue (main body), white, black, orange, and optional accent colors
- 4.0 mm (G/6) crochet hook
- Yarn needle and sewing needle with matching thread
- Stitch markers and sharp scissors
- One medium decorative button
- Flexible measuring tape
- Polyester fiberfill (optional, for adding a bit of dimension to the eyes)
Essential Techniques & Stitch Highlights
This pattern is wonderfully approachable for ambitious beginners while remaining engaging for seasoned crocheters. The foundation of the project relies on working in the round, starting with a classic magic ring and utilizing steady increases to build identical circular panels. Mastering these foundational rounds ensures your finished piece has clean, symmetrical lines.
Beyond basic single crochets and increases, the magic of this project lies in its textural contrast and embroidered accents. Working tight, dense stitches creates a sturdy fabric that naturally shields your glasses without needing a separate padded lining. Simple embroidery stitches for the eyelashes and securely anchored appliques for the eyes and beak bring incredible personality and polish to the final design.
Construction & Assembly Highlights
Constructing your glasses case is a satisfying exercise in symmetry and thoughtful assembly. The body begins with two identical circular panels that form the front and back of the pouch. Once these panels are blocked to perfection, you will craft the charming owl face—featuring oversized white eye circles, expressive black pupils, and a neat orange beak—and sew them securely onto the front panel.
Next comes the satisfying join: placing the wrong sides of the circles together and working a sturdy single crochet seam around three-quarters of the circumference, leaving the top open for easy access. Finally, a custom-crafted button closure strap is stitched to the back panel, folding neatly over the top opening and securing over a carefully placed button to keep your glasses safely tucked inside.
Customization & Styling Ideas
One of the greatest joys of handmade crafting is making a project uniquely your own! Here are a few fun ways to customize your owl glasses case:
- Color Play: Swap the royal blue for vibrant teal, soft heather gray, or rich autumn rust to match your personal style or seasonal mood.
- Playful Tassels: Add cheerful yarn tufts or mini tassels to the top corners of the case to mimic tufted owl ears.
- Oversized Adjustments: Easily accommodate chunky sunglasses or larger reading frames by simply adding an extra increase round to your initial circular panels.
- Gift Giving: Whip up a batch of these adorable cases in your friends’ favorite colors for birthdays, teacher gifts, or holiday stocking stuffers.
Pro Tips for Flawless Results
- Maintain Even Tension: Practice consistent stitch sizing so your front and back panels match up effortlessly during the final edge-joining step.
- Check Your Fabric Density: Aim for a dense, sturdy fabric to protect your lenses; if your stitches feel too loose, drop down a hook size.
- Pin Before You Sew: Always use pins to temporarily position the eyes, beak, and closure strap before stitching them permanently to ensure perfect symmetry and placement.
- Test the Fit: Slip your favorite glasses into the pouch before finishing the button placement to guarantee a snug, secure fit.
Frequently Asked Questions
Can I use acrylic yarn instead of cotton?
While you can use acrylic yarn, medium-weight cotton yarn is strongly recommended because it offers superior stitch definition, resists stretching out over time, and provides a sturdier, more protective structure for your eyeglasses.
How do I adjust the case for larger sunglasses?
Adjusting the size is wonderfully simple! Just continue working additional increase rounds on your main circular panels until the diameter matches the width of your oversized frames before joining the front and back pieces together.
Do I need to line the inside of the case?
No lining is necessary! When worked with a standard 4.0 mm hook and #4 cotton yarn, the single crochet fabric is naturally dense and protective, keeping your glasses safe from everyday dust and light scratches without any extra sewing steps.
Watch the Full Step-by-Step Video Tutorial
Prefer visual guidance? Follow along with the complete video tutorial below at your own pace: