
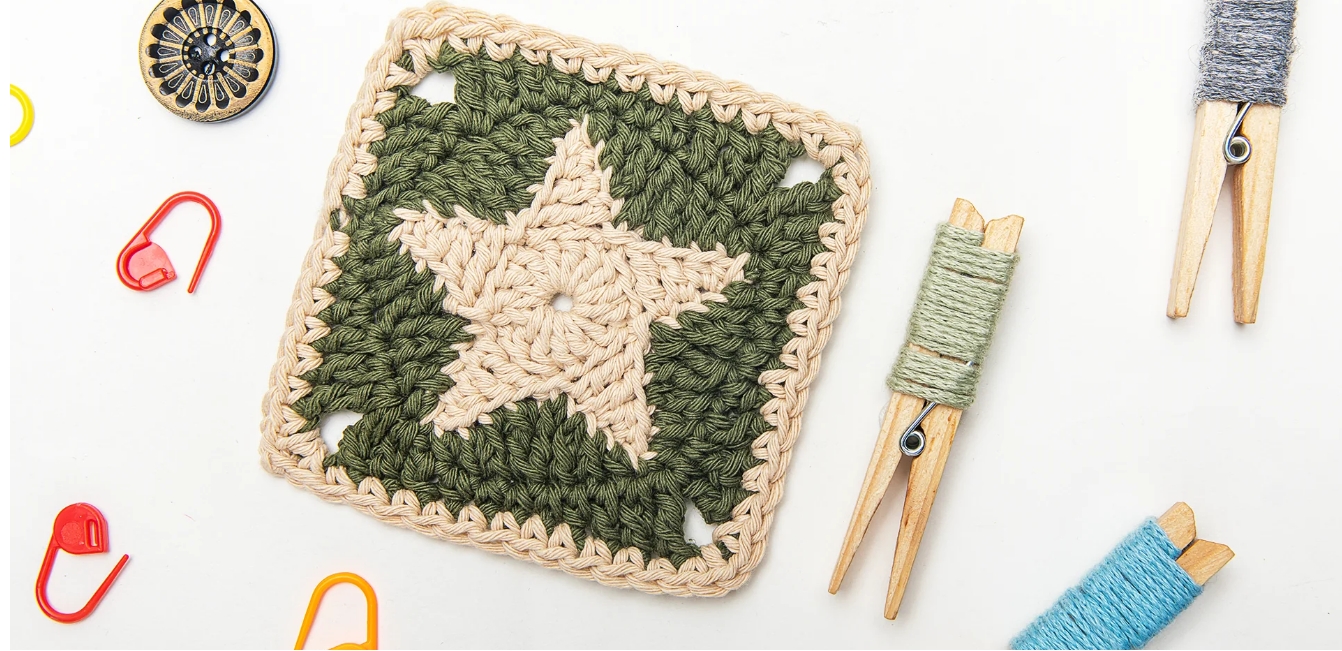
Hey there, fellow crafters! Are you ready to add a touch of magic to your crochet projects? Today, we’re diving into one of my absolute favorite designs: the Star Granny Square. It’s a gorgeous twist on the classic granny, bringing a unique, captivating star right to its center.
This square isn’t just pretty; it’s incredibly versatile. Imagine it gracing a cozy blanket, adding flair to a tote bag, or becoming a standout pillow. It’s perfect for both beginners looking to expand their horizons and seasoned crocheters seeking a delightful new challenge.
Get ready to infuse your next creation with a little bit of starlight! We’ll walk through everything you need to know to make your own dazzling Star Granny Square.
Materials & Yarn Suggestions
Gathering the right supplies is the first step to a successful project. Here’s what you’ll need to create your beautiful Star Granny Square:
- Yarn: Medium-weight (worsted weight) yarn. This is super versatile and great for definition.
- Hook: Crochet hook size H/8 (5 mm). This pairs perfectly with worsted weight yarn for a lovely drape.
- Scissors: For snipping yarn tails.
- Yarn Needle: Essential for weaving in ends neatly and seamlessly.
- Stitch Marker (optional): Handy for keeping track of your rounds, especially if you’re new to this!
Don’t be afraid to play with color! A bright yarn for the star contrasting with a neutral background is stunning. Alternatively, a single color can create a more subtle, elegant texture. Just ensure your yarn has a consistent thickness for even, beautiful stitches.
Technique Breakdown & Step-by-Step Guide
Let’s break down how this enchanting square comes to life. We’ll build it layer by layer, starting with the star itself, then crafting the classic granny square around it.
Crafting the Star’s Center
First, we’ll create the heart of your star. Begin with a magic ring to ensure a super snug center with no gaps. Into this ring, you’ll work 12 double crochet stitches, then gently pull the ring tight to close everything up. This forms a neat, round base for your star.
Forming the Star Points
Next, we define those beautiful star points! From your base circle, you’ll start forming groups of two double crochet stitches. After each group, make a chain-2 space and skip a stitch from the previous round before repeating. This process will elegantly shape six distinct points around your circle, giving your square its signature starry look.
Building the Granny Square Framework
With your star points defined, it’s time to build the traditional granny square around them. You’ll begin working into those chain-2 spaces from the previous round. Each corner of your granny square will be created by working a cluster of three double crochets, a chain-3, and another three double crochets into a single star point space. Along the sides, you’ll simply work clusters of three double crochets into the remaining chain-2 spaces, separated by a chain-1.
Completing the Square
For the final touch, you’ll work another round to solidify the square’s shape. Continue by placing double crochet stitches evenly across each side. When you reach a corner, you’ll create a new corner by working three double crochets, a chain-3, and three more double crochets into the corner space. This last round really brings the whole square together, making your star pop beautifully within its classic frame.
Finishing, Assembly & Styling Ideas
Once your Star Granny Square is complete, fasten off your yarn and weave in those ends like a pro! This gives your square a clean, polished finish that really makes a difference.
The beauty of granny squares is their versatility! Make a bunch and join them for a stunning blanket, a charming throw pillow, or a chic tote bag. You can even use a single square as a coaster or a decorative appliqué.
Pro Crafter Tips
Perfecting Your Tension
Keeping your tension consistent is key for a beautiful, even square. Practice helps a lot! If your stitches are too loose, your square might look floppy; too tight, and it could curl. Aim for a relaxed, even stitch every time.
Color Palette Magic
Experiment with your colors! A bright, bold star against a subtle background truly makes the motif shine. Or, try a monochromatic look for sophisticated texture. Don’t be afraid to mix and match to find your perfect combination.
Blocking for Perfection
Once your square is complete, consider blocking it. This simple step helps even out your stitches, straighten the edges, and really brings out the definition of your star motif. It’s like magic for your crochet!
Frequently Asked Questions
Can I make this square bigger?
Absolutely! You can easily expand your Star Granny Square by adding more rounds to the granny square framework. Just continue the established pattern of double crochet clusters and chain spaces around the corners and sides.
What if my star doesn’t look quite right?
Don’t worry, crochet is all about practice! The key areas are pulling your magic ring tightly and ensuring your star points are evenly spaced in the second stage. Review those steps, or simply try again – you’ll get it!
Ready to create some starlit magic? Grab your hook and yarn, and let’s get crocheting! Happy crafting, everyone!
Watch the Full Step-by-Step Video Tutorial
Prefer visual guidance? Follow along with the complete video tutorial below at your own pace: