
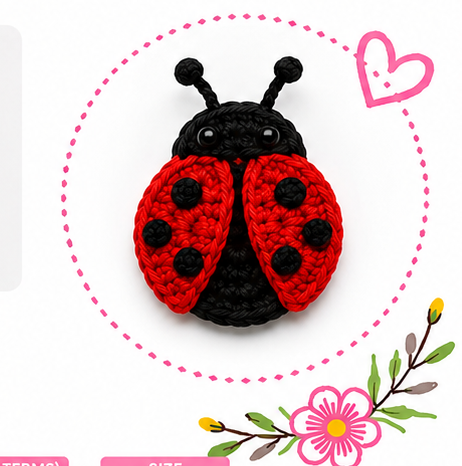
Overview & Design Inspiration
Welcome, fiber friends, to your next favorite handmade obsession! There is something undeniably magical about little ladybugs—they are universal symbols of luck, joy, and the beauty of nature.
Translating these charming creatures into a crochet project is an absolute delight. Whether you are building up your amigurumi skills or looking for a quick, gratifying weekend make, this design hits the sweet spot of easy yet utterly adorable.
Materials & Recommended Supplies
Gathering your supplies is the exciting first step toward bringing your little bug to life. Here is everything you need to have on hand before diving in:
- Yarn: Smooth cotton or acrylic yarn in vibrant red, classic black, and a touch of white for the eyes. Good stitch definition makes all the difference!
- Crochet Hook: A size appropriate for your yarn weight (typically a 2.5mm to 3.5mm US C/2 or E/4 hook works wonderfully). Going down a hook size keeps your stitches nice and tight.
- Fiberfill Stuffing: A small handful of lightweight stuffing to give your ladybug its signature rounded, lovable belly.
- Notions: Safety eyes (or black embroidery floss for a child-safe alternative), a tapestry needle for weaving ends, and sharp embroidery scissors.
Essential Techniques & Stitch Highlights
This project is a fantastic playground for practicing essential amigurumi techniques without getting overwhelmed by a massive pattern. You will start with a magic ring to create a seamless, tightly closed center.
Working primarily in single crochet builds a dense, sturdy fabric that keeps your stuffing securely hidden inside. As you go, you will master the art of simple increases and decreases to shape that classic dome, alongside seamless color changes from sleek black to bright, cheerful red.
Construction & Assembly Highlights
The construction journey is as fun as the finished product! You begin by crocheting the sleek black base of the body before transitioning to fiery red for the upper shell.
As the shape begins to close up, you will gently tuck in your fiberfill to achieve a smooth, rounded form. Finally, you will stitch on those iconic black spots, add expressive eyes, and attach delicate antennae to give your ladybug loads of personality.
Customization & Styling Ideas
One of the best parts about making these little cuties is how endlessly adaptable they are. Turn yours into a functional keychain by securing a sturdy metal ring, or stitch a whole cluster of them as flat appliqués to jazz up plain cardigans, baby blankets, or market bags.
Feel free to experiment with your color palette, too! While traditional red and black are timeless, pastel pinks, sunny yellows, or whimsical rainbow spots make for an incredible fantasy garden.
Pro Tips for Flawless Results
- Maintain Even Tension: Keep your stitches consistently snug so your fiberfill never peeks through the fabric gaps.
- Stuff Gradually: Add your stuffing in small increments rather than one giant clump to prevent stretching out your stitches and distorting the shape.
- Secure Your Ends: Always weave your yarn tails thoroughly through the interior before snipping to ensure your creation withstands plenty of love and handling.
Frequently Asked Questions
Is a crochet ladybug suitable for absolute beginners?
Yes, absolutely! Because it relies on basic stitches like single crochet, increases, and decreases, it is a wonderful confidence-boosting project for newer crafters.
How long does it typically take to make one?
Most small crochet ladybugs can be whipped up in just one to three hours, making them ideal stash-busting gifts or instant-gratification projects.
Can I make this project flat instead of three-dimensional?
Definitely! You can easily omit the stuffing and final decrease rounds to create a charming flat appliqué that looks stunning stitched onto clothing or accessories.
Watch the Full Step-by-Step Video Tutorial
Prefer visual guidance? Follow along with the complete video tutorial below at your own pace: