
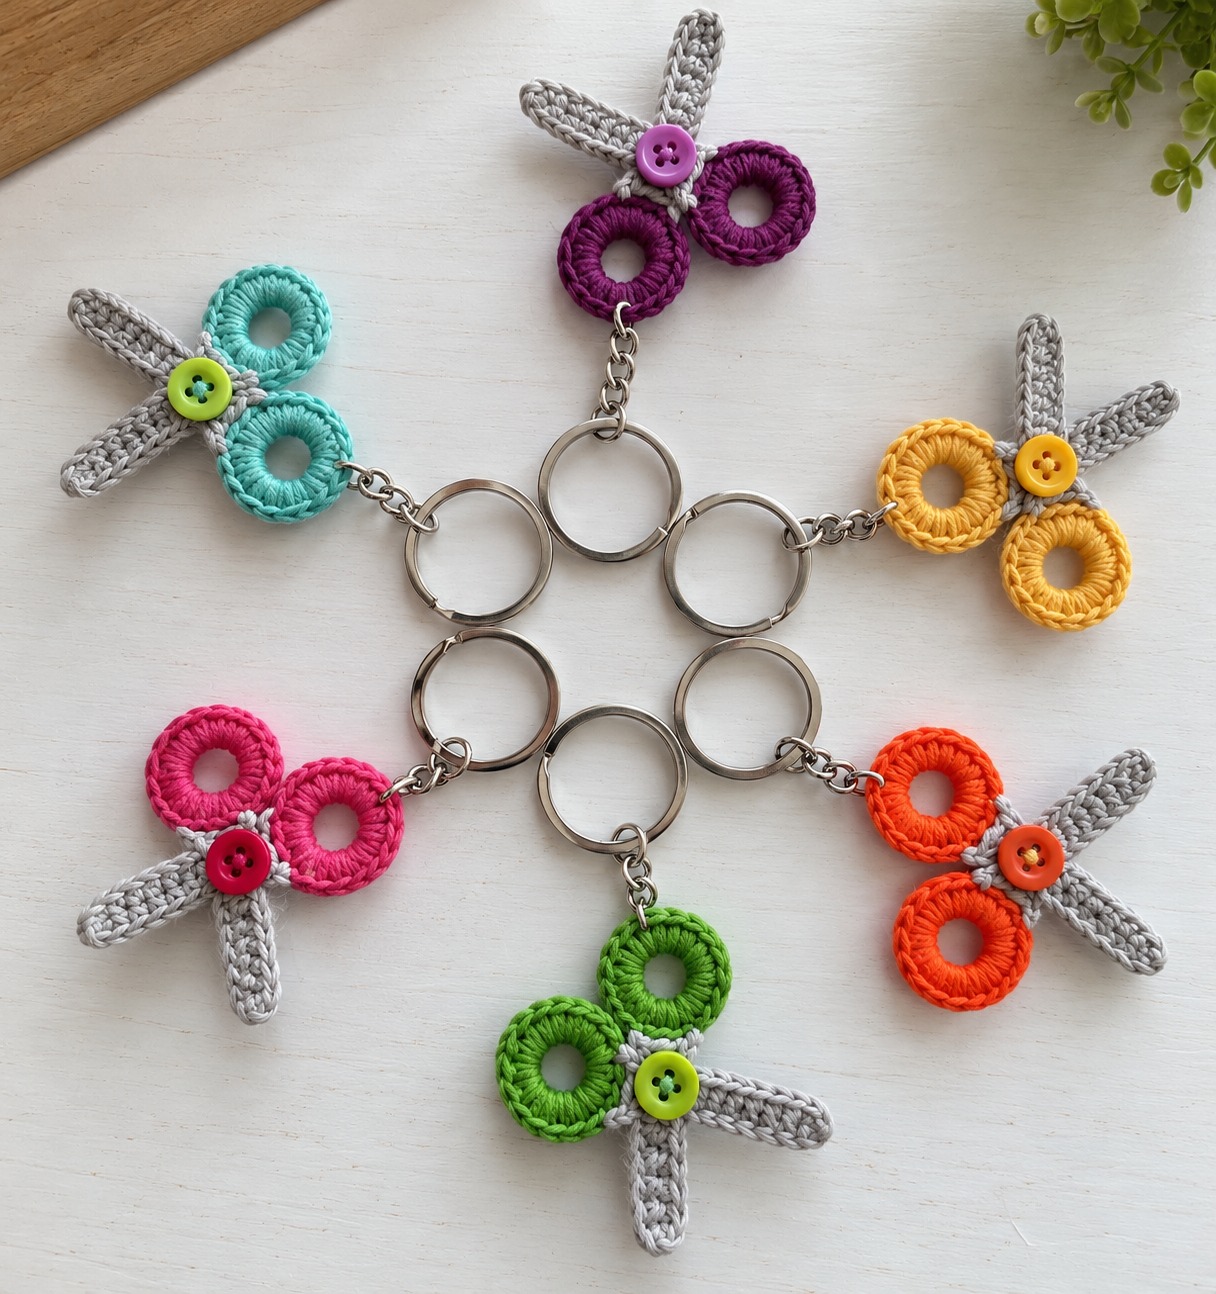
Welcome, cherished members of our vibrant crochet community! Today, we’re diving into a project that perfectly marries creativity with the undeniable charm of miniature handmade accessories. Get ready to fall in love with the enchanting “Crochet Little Scissors Keychain Pattern.”
This delightful creation is more than just a keychain; it’s a tiny celebration of crafting, a testament to how even the smallest details can bring immense joy. Imagine transforming an everyday sewing tool into an adorable, soft, and utterly irresistible accessory. It’s a project that promises to brighten your day and add a touch of whimsy to your keys, bags, or craft organizers.
Overview & Design Inspiration
The Crochet Little Scissors Keychain Pattern is a true handmade gem, blending practicality with irresistible charm. These miniature scissors, with their distinct circular handles, delicate crocheted blades, and a central decorative button, capture the essence of creativity in a tiny package. It’s the perfect project for anyone who delights in making small, colorful decorations with yarn, offering a quick and satisfying crafting experience.
What truly makes this pattern shine is its incredible versatility. You can unleash your creativity with a spectrum of bright colors—think turquoise, vibrant pink, sunny orange, regal purple, or leafy green—or opt for soft, calming pastels for a more delicate touch. Not only is it a thoughtful handmade gift, but it’s also a fantastic way to utilize those precious bits of leftover yarn from larger projects, transforming scraps into something truly special.
Materials & Recommended Supplies
To embark on your miniature scissors adventure, gather these essential tools and materials. Choosing quality supplies will ensure your finished keychain is both beautiful and durable.
- Yarn: Sport-weight or lightweight cotton yarn in two contrasting colors (one for handles, one for blades). Cotton is recommended for its excellent stitch definition and shape retention.
- Crochet Hook: 2.0 mm to 2.5 mm, depending on your personal tension.
- Yarn Needle: Essential for weaving in ends and assembly.
- Scissors: For trimming yarn.
- Decorative Button: One small button, approximately 8-12 mm, for the center embellishment.
- Keychain Ring: A sturdy metal ring for practical attachment.
- Connecting Chain: A short chain (optional) to link the scissors to the keyring.
- Handle Rings (Optional): Two small plastic or metal rings, 15-20 mm in outside diameter, for the handles (or you can crochet them entirely from yarn).
- Stitch Marker: Optional but highly recommended for working in rounds on small pieces.
Essential Techniques & Stitch Highlights
This delightful project is a fantastic opportunity to practice a range of useful crochet techniques, perfect for both beginners and seasoned crafters. The pattern uses standard US crochet terms, making the instructions straightforward and accessible. You’ll work with foundational stitches like chain (ch), slip stitch (sl st), single crochet (sc), and half double crochet (hdc).
Key techniques you’ll master include working seamlessly in rounds, which is crucial for creating the neat circular handles. You’ll also learn to form narrow crochet strips for the blades, achieving that characteristic elongated, slightly pointed shape. For those who enjoy precision, you might even find yourself crocheting into the back bump of a chain for extra neat edges. These methods combine to create a miniature accessory that is not only adorable but also boasts firm construction and a polished appearance.
Construction & Assembly Highlights
Crafting your little scissors begins with the two circular handles, the most recognizable feature of the design. Using your chosen bright yarn, you’ll crochet directly around small rings, creating a stable opening and a beautifully covered surface. Alternatively, for an entirely yarn-based design, you can form a foundation chain, join it into a circle, and work stitches around it for a slightly more flexible handle.
Next come the blades, crafted from a contrasting neutral shade like light gray, silver, or cream. These pieces are crocheted to be narrow, elongated, and slightly pointed, giving them their distinctive scissor-like appearance. The combination of single crochet and half double crochet stitches helps achieve this elegant shaping, resulting in soft yet structured blades that perfectly mimic their functional counterparts.
Bringing all these charming pieces together is where the magic truly happens. You’ll arrange the two handles side-by-side, with the blades angled outward, to form that iconic open-scissors silhouette. The inner edges of the handles and the bases of the blades are then carefully sewn together at a central intersection, ensuring the design remains symmetrical. Finally, a colorful decorative button is positioned over this central point and securely stitched through all layers, adding a charming finishing touch and reinforcing the structure. Once complete, attach your sturdy metal keyring and connecting chain, and your miniature masterpiece is ready to adorn your favorite belongings!
Customization & Styling Ideas
The beauty of the Crochet Little Scissors Keychain lies in its endless possibilities for customization, allowing you to truly make it your own. Experiment with a vibrant rainbow of colors for the handles—think jewel tones, neon brights, or serene pastels—to match your personality or a specific bag. For the blades, while neutral shades offer a classic look, don’t shy away from subtle variegated yarns or even a metallic-threaded yarn for a touch of sparkle.
Consider varying the size by using a slightly thicker yarn and larger hook for a more substantial charm, or a finer thread and smaller hook for an even tinier, delicate accessory. Beyond keychains, these little scissors make wonderful embellishments for craft bags, pencil cases, or even as unique zipper pulls on garment bags. They also make incredibly thoughtful handmade gifts for fellow crafters, teachers, or anyone who appreciates a touch of handmade charm. Imagine a set of these in different colors, each one a unique tiny treasure!
Pro Tips for Flawless Results
- Maintain Consistent Tension: This is key when working with small pieces. Even tension ensures your handles are uniform and your blades are identical in shape and size, contributing to a balanced final product.
- Weave in Ends Securely: For a durable and neat finish, take your time to weave in all yarn tails thoroughly. This prevents unraveling, especially for items like keychains that see frequent use.
- Check Symmetry Before Final Stitches: Before firmly sewing all pieces together, lay them out and adjust their positions until you achieve the desired symmetrical “open scissors” look. This prevents crooked assembly.
- Use Quality Hardware: If your scissors will be used as a keychain, invest in a strong metal keyring and connecting chain. Securely attaching them will ensure your beautiful creation stays put.
Frequently Asked Questions
Is this pattern suitable for beginners?
Absolutely! While it involves a few basic techniques, the steps are straightforward and the pieces are small, making it a great project for beginners to practice working in rounds, making chains, and assembling small components. More experienced crocheters will find it a quick and satisfying make.
What kind of yarn works best for these tiny scissors?
Lightweight cotton yarn, such as sport-weight, is highly recommended. Cotton provides excellent stitch definition, which is crucial for miniature details, and helps the finished scissors maintain their shape beautifully. It also comes in a wonderful array of colors.
How can I customize the size of my finished keychain?
You can easily adjust the size by changing your yarn weight and hook size. Using a slightly thicker yarn with a corresponding larger hook will result in a bigger keychain, while a finer thread and smaller hook will create an even more petite version. Remember to adjust the number of stitches for the handles accordingly.
Watch the Full Step-by-Step Video Tutorial
Prefer visual guidance? Follow along with the complete video tutorial below at your own pace: