
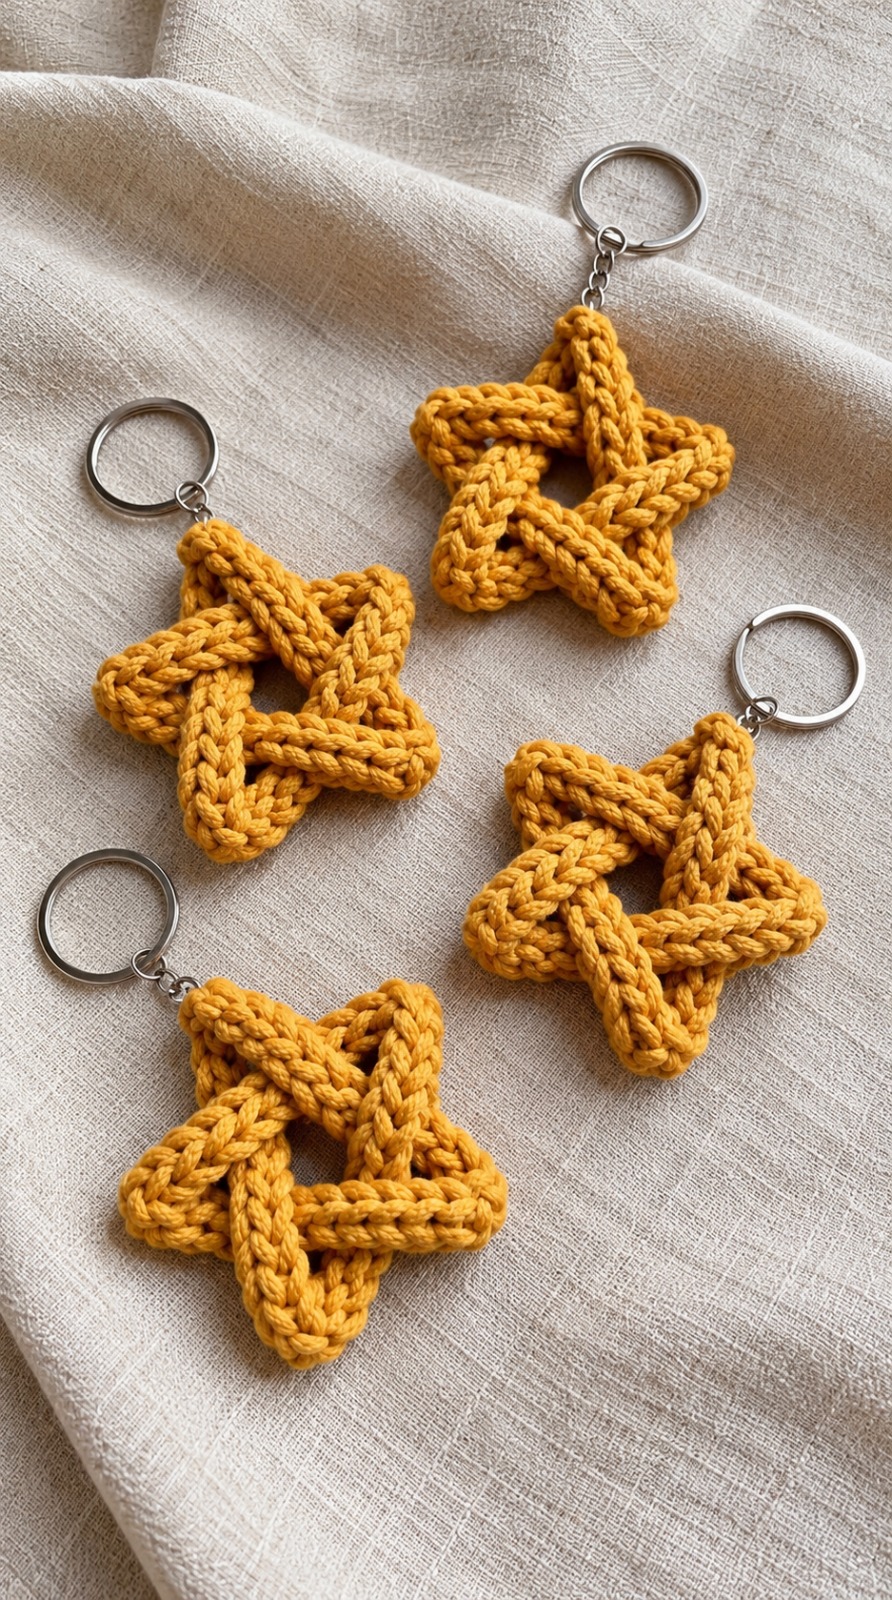
Overview & Design Inspiration
Hello, fellow yarn lovers! If you are anything like me, you are constantly on the hunt for small, satisfying projects that bring a little handmade joy into your daily routine. Enter the charming Crochet Braided Star Keychain, a delightful accessory that transforms simple stitches into a stunning three-dimensional work of art. With its elegant interwoven design and lovely tactile texture, this little star is guaranteed to make you smile every time you grab your house keys.
What makes this project truly special is its clever braided structure, which instantly elevates it above standard flat appliqués. Whether you want to add a touch of personality to your favorite handbag, use up some beloved yarn scraps, or stitch a thoughtful keepsake for a dear friend, this pattern hits that sweet spot between effortless fun and gorgeous style. Let’s dive into everything you need to know to bring your very own braided star to life!
Materials & Recommended Supplies
Gathering your supplies is half the fun, and this project is wonderfully gentle on your yarn stash! Here is everything you need to prepare for your star keychain:
- Yarn: Approximately 15–25 grams of medium-weight (Worsted / Aran) cotton yarn. Cotton provides crisp stitch definition and helps your star hold its sculptural shape.
- Crochet Hook: 3.0 mm to 4.0 mm (US size D/3 to G/6), depending on your personal tension and how firm you want your fabric to be.
- Metal Hardware: A sturdy metal key ring with a small connecting chain or jump ring.
- Notions: Sharp yarn scissors, a yarn needle for weaving in ends, and stitch markers to help hold pieces in place during assembly.
Essential Techniques & Stitch Highlights
This pattern relies on clear, foundational crochet skills that make the construction process approachable yet deeply rewarding. Written using standard US crochet terminology, the project primarily utilizes chains (ch), single crochets (sc), slip stitches (sl st), and working into the back loop only (BLO). These straightforward stitches come together to build narrow, durable strips that form the backbone of the star’s structure.
Instead of working in traditional rounds from the center outward, this design uses flexible crocheted cords that are folded and interwoven into a vibrant five-pointed geometric shape. Working in the back loop only creates subtle ridges that enhance the braided visual effect, giving the finished star its signature depth and modern, raised texture without feeling overly complicated.
Construction & Assembly Highlights
The magic of this project lies in how simple individual pieces transform into an intricate, dimensional design. You begin by crocheting five identical, narrow rectangular strips using firm, even single crochet stitches. Once your strips are complete, you lay them out to form the five distinct sides of a pentagram outline, ensuring each strip cleanly bridges two outer star points.
Next comes the fun part: weaving! By carefully alternating whether each strip passes over or under its neighbors at the intersections, you lock the pieces into a secure, beautiful lattice. Finally, you anchor the interwoven structure with neat hidden stitches and attach your sturdy metal key ring, turning a collection of simple crochet cords into a polished, everyday functional accessory.
Customization & Styling Ideas
One of the best parts about making a DIY crochet keychain is tailoring it to match your unique aesthetic! If you love a warm, earthy vibe, classic mustard yellow, cream, or terracotta will look stunning on your keyring. For a softer, dreamier look, try pastel pink, sage green, or gentle lavender.
Beyond standard keys, these sweet stars make magnificent zipper pulls for backpacks, decorative bag charms, or even festive holiday ornaments when hung from a loop of twine. You can also experiment with contrasting colorways for the individual braided strands if you want a bold, multicolored statement piece!
Pro Tips for Flawless Results
- Master Your Tension: Aim for firm, even stitches. If your tension is too loose, the cords will stretch out; if it’s too tight, folding and weaving the strips will become a struggle.
- Check for Consistency: Lay your five crocheted strips side-by-side before assembling to ensure they are identical in length for a perfectly balanced star.
- Secure Your Weaving: Use a few discreet anchor stitches with your yarn needle at the overlapping intersections to keep the star permanently locked in its shape.
- Choose Cotton Fiber: Stick with a quality cotton yarn rather than acrylic to ensure your keychain resists pilling and withstands daily tossing into purses and pockets.
Frequently Asked Questions
Is this crochet star pattern beginner-friendly?
Absolutely! While the finished braided look appears intricate, the individual strips are made using basic single crochet stitches, making it a fantastic project for confident beginners looking to try something new.
Can I use acrylic or wool yarn instead of cotton?
You certainly can, but cotton is highly recommended because its lack of stretch and crisp stitch definition help the star maintain its sharp, structural points over time.
How do I attach the finished star to the key ring?
You can securely attach your star by weaving a small piece of matching yarn or a sturdy jump ring through one of the top points and looping it directly onto your metal key ring’s chain.
Watch the Full Step-by-Step Video Tutorial
Prefer visual guidance? Follow along with the complete video tutorial below at your own pace: