
Overview & Design Inspiration
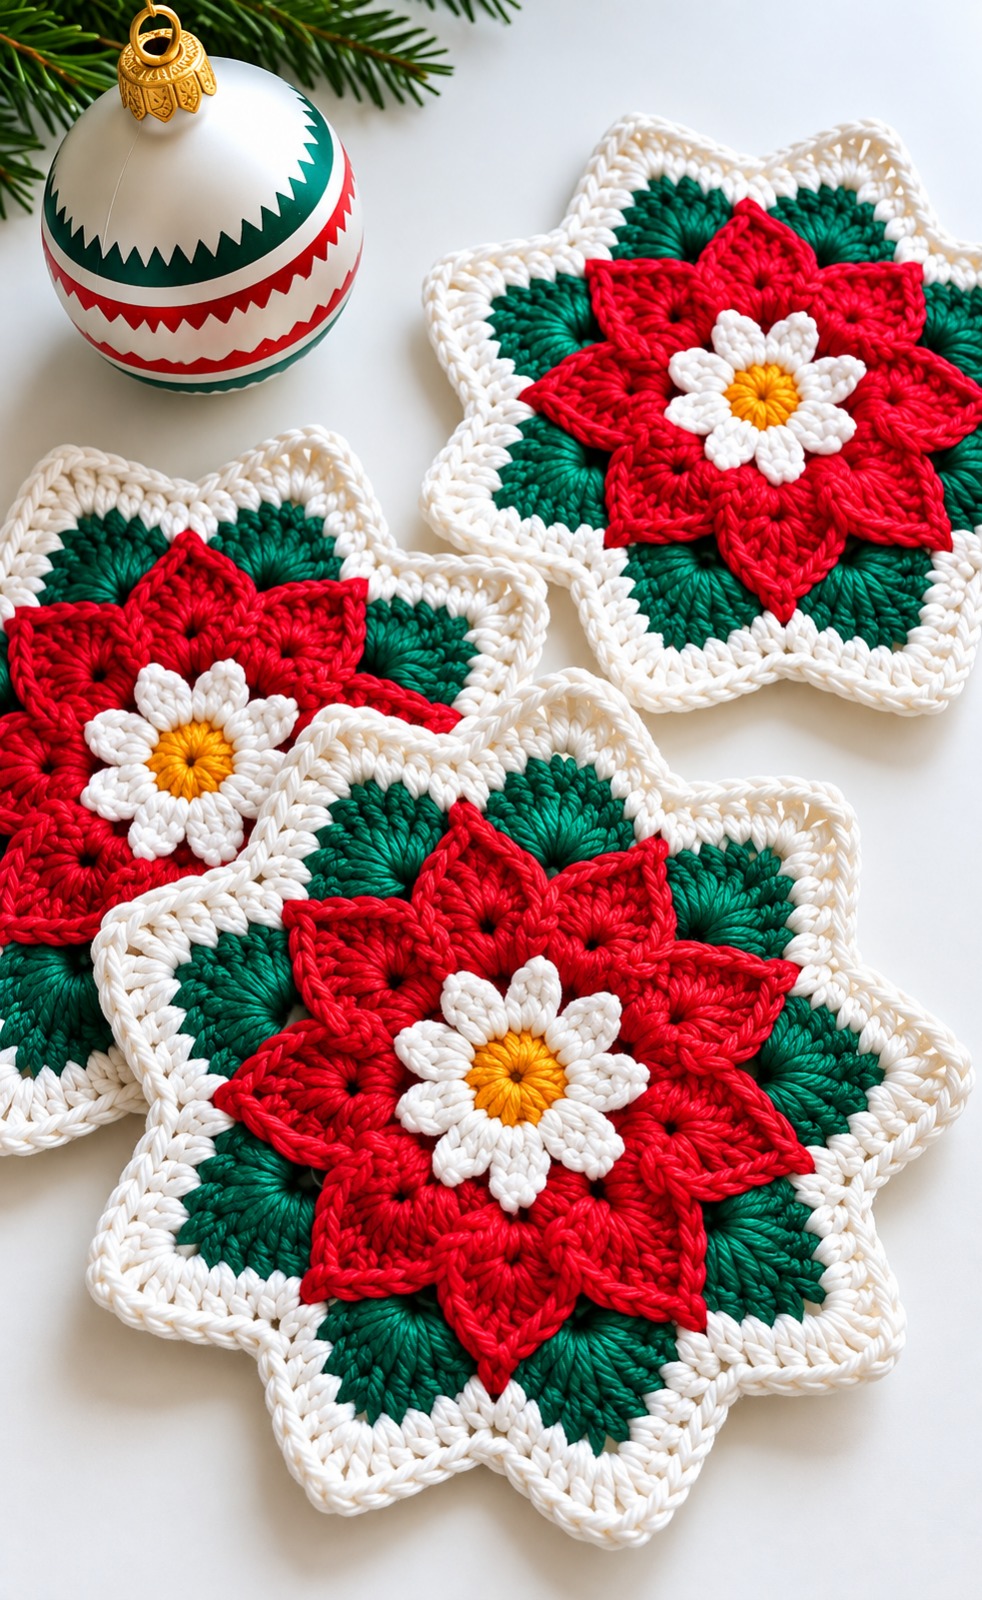
Hello, beautiful makers! Are you ready to infuse your holiday season with handmade charm and a touch of traditional elegance? Today, we’re diving into a project that promises to do just that: the “Crochet Christmas Poinsettia Star Pattern.” This design beautifully marries the iconic shape of a Christmas star with the delicate, festive appearance of poinsettia petals, creating a decoration that truly sings with the spirit of the season.
Imagine a stunning piece that combines vibrant red petals, a lush green background, and crisp white details, all centered around a cheerful floral accent. This pattern is a celebration of texture, color, and mindful crafting, resulting in a display-worthy decoration for your home or a heartfelt gift for loved ones. Whether you’re a seasoned pro or an enthusiastic beginner eager to expand your skills, this project offers a wonderful opportunity to create something truly special and meaningful.
Materials & Recommended Supplies
To bring your beautiful Poinsettia Star to life, gathering the right materials is your first joyful step!
- **Yarn:** Medium-weight cotton yarn is highly recommended for its excellent stitch definition and ability to hold shape. Cotton blend yarns are also suitable for a softer finish.
- Christmas Red (for prominent petals)
- Forest Green (for the background star)
- Creamy White (for border and central flower)
- Golden Yellow (for the flower’s center)
- **Crochet Hook:** 3.5 mm (US E/4) to 4.0 mm (US G/6) crochet hook, depending on your tension and chosen yarn.
- **Scissors:** For neat yarn cuts.
- **Yarn Needle:** Essential for weaving in ends and assembling layers.
- **Stitch Markers:** Very helpful for keeping track of your repeats and sections.
- **Measuring Tape:** For checking gauge and size if desired.
- **Blocking Pins & Foam Blocking Mat:** Highly recommended for shaping crisp star points.
- **Decorative Ribbon or Coordinating Yarn:** (Optional) For creating a hanging loop.
Essential Techniques & Stitch Highlights
This delightful project employs a range of fundamental crochet techniques and stitches, each contributing to the star’s unique beauty. You’ll begin with the versatile magic ring, creating a neat, tight center for your initial rounds without a gap. This sets a sturdy foundation for the layers to follow.
As you progress, you’ll utilize various stitch heights—single crochet (sc), half double crochet (hdc), double crochet (dc), and treble crochet (tr)—to meticulously sculpt the dimensional elements. These varying stitch heights are crucial for shaping the pointed star sections and the gracefully curved poinsettia petals. You’ll also encounter the picot stitch, which adds small, charming decorative points, especially effective on the border. Understanding how these stitches build on each other is key to achieving the beautiful layered effect and precise shaping of your festive star.
Construction & Assembly Highlights
Creating the Christmas Poinsettia Star is a rewarding journey, built up in distinct, manageable layers. You’ll begin by crafting the strong, foundational star in deep forest green, starting with a circular base before meticulously shaping eight distinct, pointed sections. This green star forms the beautiful backdrop and structure for the entire decoration.
Next, you’ll introduce the vibrant red poinsettia petals. These are worked as a separate dimensional layer, designed to be slightly raised and outward-curving, truly embodying the essence of the festive flower. A creamy white decorative border is then added around the outer edge of the green star, accentuating its points and providing a beautiful contrast. Finally, a smaller, delicate white flower with a golden-yellow center is crocheted to sit proudly at the very heart of the design. Once all components are lovingly crocheted, they are carefully layered and securely sewn together, bringing the entire stunning Poinsettia Star to life.
Customization & Styling Ideas
The Crochet Christmas Poinsettia Star is wonderfully versatile, offering endless possibilities for customization and display! While traditional red, green, and white evoke classic holiday charm, consider experimenting with a sophisticated palette of champagne, ivory, burgundy, or soft gold for an elegant touch. You can also vary yarn textures, perhaps a subtle sparkle for extra festive glitter, or a matte cotton for a rustic feel.
These stars make exquisite Christmas tree ornaments, especially when created in various sizes for a coordinated look. Enlarge the pattern for a striking table centerpiece or a festive wall hanging. Imagine them nestled in a decorative bowl on your coffee table, adorning a holiday wreath, or strung together as a charming garland. Beyond your own home, these handmade stars are truly thoughtful gifts, conveying warmth and personal care to friends, neighbors, and family members who cherish handcrafted treasures.
Pro Tips for Flawless Results
- **Master Consistent Tension:** Strive for even tension throughout your project. This ensures your star points are symmetrical, your petals lay beautifully, and the overall decoration maintains its structure and even appearance.
- **Embrace the Magic of Blocking:** After finishing, gently block your star. Pin out the points and edges on a blocking mat, mist with water, and let dry completely. This crucial step will crisply define your star’s shape and bring out the intricate details.
- **Weave Ends Neatly and Securely:** Take your time to weave in all yarn ends meticulously. This prevents unraveling and ensures your finished piece looks professional and polished from every angle.
- **Layer with Care:** When assembling the different components, take a moment to perfectly align each layer before stitching them together. A few well-placed stitch markers can help hold everything in place for a neat and secure finish.
Frequently Asked Questions
Can I use different yarn weights for this pattern?
While medium-weight cotton yarn is recommended for optimal stitch definition and shape retention, you can certainly experiment! Using a lighter weight yarn will result in a smaller, more delicate star, perfect for gift tags or smaller ornaments. A bulkier yarn will create a larger, statement piece. Just be sure to adjust your hook size accordingly to maintain appropriate tension.
How can I make my star points extra crisp and defined?
The secret to crisp, well-defined star points lies in blocking! After completing your star, gently wet it (or mist it with a spray bottle) and carefully pin out each point onto a foam blocking mat. Ensure symmetry and straight edges. Allow it to air dry completely, and your points will hold their beautiful shape perfectly.
Is this pattern suitable for beginners?
Absolutely! While the layered appearance might seem intricate, the pattern breaks down into manageable sections using common stitches like single crochet, double crochet, and treble crochet. Enthusiastic beginners will find this a wonderful opportunity to practice shaping, working with different stitch heights, and assembling components, all while creating a stunning holiday decoration.
Watch the Full Step-by-Step Video Tutorial
Prefer visual guidance? Follow along with the complete video tutorial below at your own pace: