
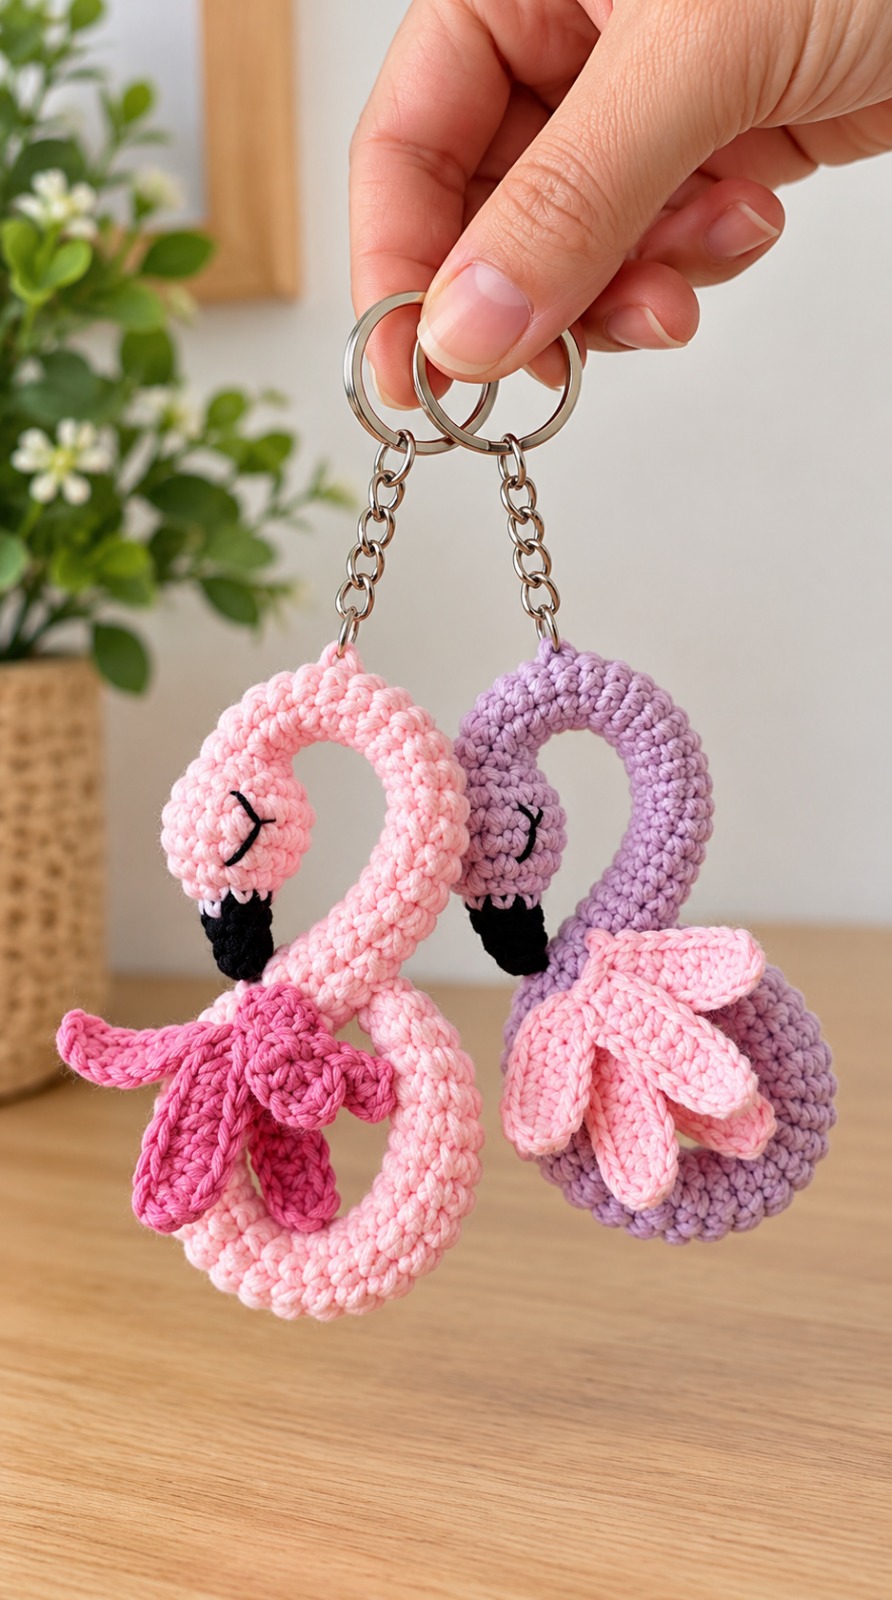
Welcome, cherished members of our vibrant crochet community! Today, we’re diving into a project that promises to add a splash of tropical charm to your everyday life: the enchanting Crochet Flamingo Keychain Amigurumi.
This delightful pattern offers a perfect blend of whimsy and practicality, allowing you to create a miniature avian marvel that’s bursting with personality. Whether adorning your keys, handbag, or simply bringing a smile to your desk, this little flamingo is a testament to the magic of handmade craft.
Overview & Design Inspiration
Imagine a tiny burst of sunshine, a graceful form captured in yarn, bringing a touch of the tropics wherever you go. That’s the magic of our Crochet Flamingo Keychain Amigurumi. This project celebrates the charm of handmade accessories, blending adorable animal design with delightful crochet techniques to create a truly unique piece.
Crafters adore this design for its charming details—the elegant curved neck, the adorable contrasting beak, and the vibrant, flower-like wings. It’s a fantastic way to transform small amounts of yarn into a thoughtful gift, a personalized accessory, or simply a joyful creation that expresses your unique style. Each stitch contributes to a playful, eye-catching piece that’s sure to turn heads!
Materials & Recommended Supplies
Gathering the right materials is your first step towards crocheting a perfect flamingo. Here’s what you’ll need to create a neat, durable, and utterly adorable keychain:
- **Yarn:** Lightweight cotton yarn (DK or sport weight) is ideal for crisp stitch definition.
- *Main Body & Neck:* Light pink, lavender, peach, or desired pastel shade.
- *Wings:* A contrasting darker pink or complementary shade.
- *Beak:* Black yarn.
- *Eye:* Small amount of black embroidery thread.
- **Crochet Hook:** 2.0 mm to 2.5 mm (US B/1 to C/2) for tight amigurumi stitches.
- **Stuffing:** Polyester fiberfill.
- **Yarn Needle:** For assembly and weaving in ends.
- **Stitch Markers:** Essential for tracking rounds in continuous amigurumi.
- **Scissors:** For cutting yarn.
- **Keychain Hardware:** A metal keychain ring with a short chain attachment.
Essential Techniques & Stitch Highlights
This flamingo amigurumi project skillfully combines basic crochet stitches to create its charming three-dimensional form. You’ll primarily be working in continuous rounds, a hallmark of amigurumi, which eliminates visible seams and creates a smooth fabric.
The magic ring (MR) is your go-to for starting pieces neatly, ensuring there’s no hole at the beginning of your work. Single crochet (sc) forms the dense, firm fabric necessary for amigurumi, while increases (inc) and invisible decreases (dec) are masterfully employed to sculpt the flamingo’s rounded body, slender neck, and adorable head. A few half double crochet (hdc) and double crochet (dc) stitches might pop up for decorative elements like the wings, adding delightful texture and shape. Understanding these core stitches and their application will allow you to confidently bring your flamingo to life!
Construction & Assembly Highlights
Creating your flamingo keychain involves crocheting several distinct components that come together to form the familiar bird silhouette. The body begins with a series of increases worked in continuous rounds, gradually expanding from a central magic ring to form a plump, spherical shape. Once the desired circumference is reached, several straight rounds are worked before mirror-image decreases bring the body back together, creating a perfectly rounded and stuffable form.
The graceful, curved neck is crafted as a narrow, elongated tube, meticulously crocheted in continuous single crochet rounds. This tube is lightly stuffed, allowing it to retain flexibility while still holding its iconic S-shape. The head is crocheted separately and then carefully attached to the neck, giving you control over its final position. Delicate wings, resembling overlapping petals, are crocheted as small, textured pieces and then artfully attached to the body. Finally, the embroidered closed eye and contrasting black beak are added, bringing the flamingo’s sweet expression to life, before securing the metal keychain hardware for a durable finish.
Customization & Styling Ideas
One of the joys of amigurumi is the endless potential for customization! While traditional pink flamingos are iconic, don’t shy away from exploring a spectrum of colors. Imagine a collection of keychains in lavender, coral, peach, or even a soft pastel yellow. You could even create a rainbow flock!
Consider varying yarn textures for a unique touch—a slight shimmer in your cotton, or a subtle tweed for a rustic feel (just avoid overly fuzzy yarns for miniature work). Embellish your flamingo with tiny beads, a delicate ribbon bow around its neck, or a small embroidered flower on its wing. These keychains make wonderful personalized gifts, charming party favors, or delightful additions to a child’s backpack, offering a handmade touch that’s truly one-of-a-kind.
Pro Tips for Flawless Results
- **Consistent Tension is Key:** Maintain an even, firm tension throughout your amigurumi pieces to prevent stuffing from showing through and to create a professional finish. A slightly smaller hook than recommended for your yarn can help achieve this density.
- **Stuffing Savvy:** Stuff your pieces gradually and evenly. For the body, ensure it’s firm but not overstuffed to maintain its smooth spherical shape. For the neck, use very small amounts of fiberfill to allow for graceful curving without stiffness.
- **Leave Long Tails:** When fastening off components like the head, neck, and wings, always leave a generously long yarn tail. This provides ample yarn for securely sewing the pieces together, ensuring a neat and strong attachment.
- **Secure Hardware:** For a practical keychain that withstands daily use, ensure the metal ring is attached very securely. Stitch through the fabric multiple times or use a strong knot to prevent it from detaching.
Frequently Asked Questions
Is this project suitable for beginners?
Yes, if you’re comfortable with basic stitches like single crochet, increases, and decreases, and have tried working in continuous rounds, you’ll find this pattern very approachable. It’s an excellent project for practicing amigurumi shaping and assembly techniques.
What type of yarn is best for a miniature keychain?
Lightweight cotton yarn (DK or sport weight) is highly recommended. It offers excellent stitch definition, holds its shape well, and comes in a wide array of vibrant colors perfect for a cheerful flamingo. Avoid overly fuzzy yarns as they can obscure stitch detail in small projects.
How do I make the flamingo’s neck hold its curved shape?
Lightly stuff the neck as you crochet it, ensuring it remains flexible. After it’s complete, gently bend it into the desired curve. For added stability, you can use a doubled strand of matching yarn and make a few small, discreet stitches along the inside curve to gently draw it into place and help it maintain its elegant shape.
Watch the Full Step-by-Step Video Tutorial
Prefer visual guidance? Follow along with the complete video tutorial below at your own pace: