
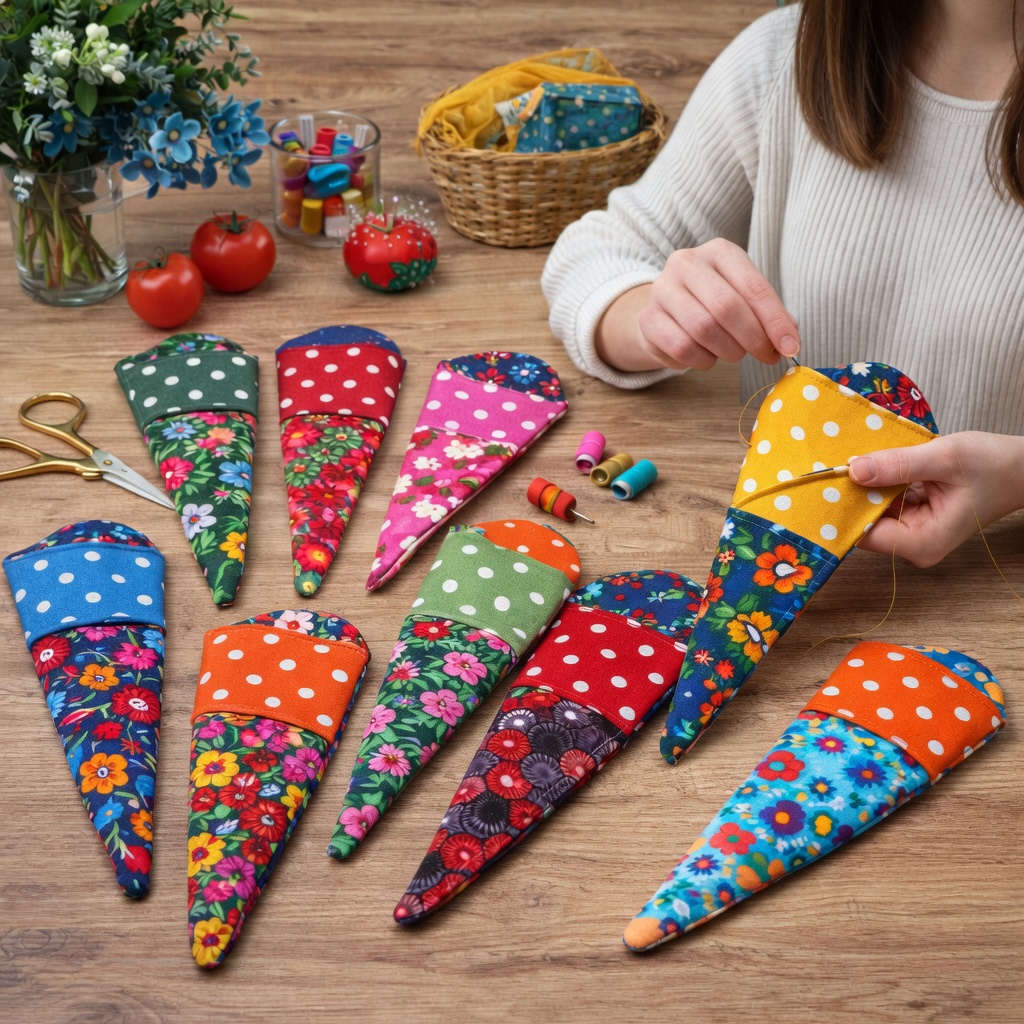
Overview & Design Inspiration
Welcome back to the studio, my fiber-loving friends! If your craft cart is anything like mine, it’s a vibrant, slightly chaotic wonderland of snips, clips, and sharp tools desperately in need of a cozy home.
That is why I am so thrilled to introduce you to our newest obsession: the Fabric Scissor Holder! This delightful project combines organization, creativity, and handmade charm into one incredibly satisfying make that will elevate your crafting space instantly.
Materials & Recommended Supplies
Gathering your supplies is half the fun! While this blog post focuses on the creative journey and inspiration, here is what you will want to pull from your stash to get ready:
- Main Fabric: Sturdy quilting cotton, linen, or a gorgeous canvas scrap.
- Lining Fabric: A contrasting cotton print to add a fun pop of color inside.
- Interfacing: Fusible fleece or medium-weight interfacing for that gorgeous, structured shape.
- Notions: Matching polyester thread, sharp sewing scissors, rotary cutter, and pins or wonder clips.
- Optional Embellishments: Cute buttons, delicate lace trims, or embroidery floss for custom hand-stitched details.
Essential Techniques & Stitch Highlights
Even though this is a sewing-based accessory rather than a crochet pattern, the principles of fiber arts carry right over! Precision cutting, accurate seam allowances, and thoughtful pressing are your best friends here.
You will master the art of layering and turning crisp corners, using simple straight stitches to create secure pockets tailored specifically to your favorite embroidery snips or larger fabric shears.
Construction & Assembly Highlights
Creating your holder is a breeze once your pieces are prepped! You begin by fusing your interfacing to give the fabric that lovely, professional structure that protects your blades and keeps its shape.
Next, stitch your outer and lining pieces together, leaving a small turning opening. Gently push your corners out with a blunt tool, press everything to perfection with a hot iron, and finish with a gorgeous topstitched edge for maximum durability.
Customization & Styling Ideas
The sky is truly the limit when it comes to personalizing your scissor holder! Try combining patchwork squares from your quilting leftovers to create a stunning scrap-busting masterpiece.
You can also add hand-embroidered florals, playful pom-pom trims, or match your holder to a whole suite of sewing accessories like pin cushions and needle books for a totally coordinated craft room aesthetic.
Pro Tips for Flawless Results
- Always pre-wash and press your fabrics to prevent any unwanted shrinkage after your hard work is done.
- Take your time pinning or clipping curved edges to ensure your outer fabric and lining match up seamlessly.
- Use a chopstick or turning tool to carefully push out the corners before ironing for that ultra-crisp, professional finish.
- Don’t skip the topstitching—it not only adds a lovely decorative frame but also anchors all your layers for daily use.
Frequently Asked Questions
Can I make this project if I am a total beginner?
Absolutely! This is one of the most rewarding quick-sew projects out there, making it wonderfully approachable for crafters of all skill levels.
How do I make sure my specific scissors will fit?
Always measure your scissors before cutting! You can easily adjust the pattern template slightly wider or deeper to accommodate bulky shears or tiny embroidery snips.
Where can I get the full printable pattern and tutorial?
You can access our complete step-by-step PDF pattern and video tutorial via the download link at the top of the page to guide you every step of the way!
Watch the Full Step-by-Step Video Tutorial
Prefer visual guidance? Follow along with the complete video tutorial below at your own pace: