
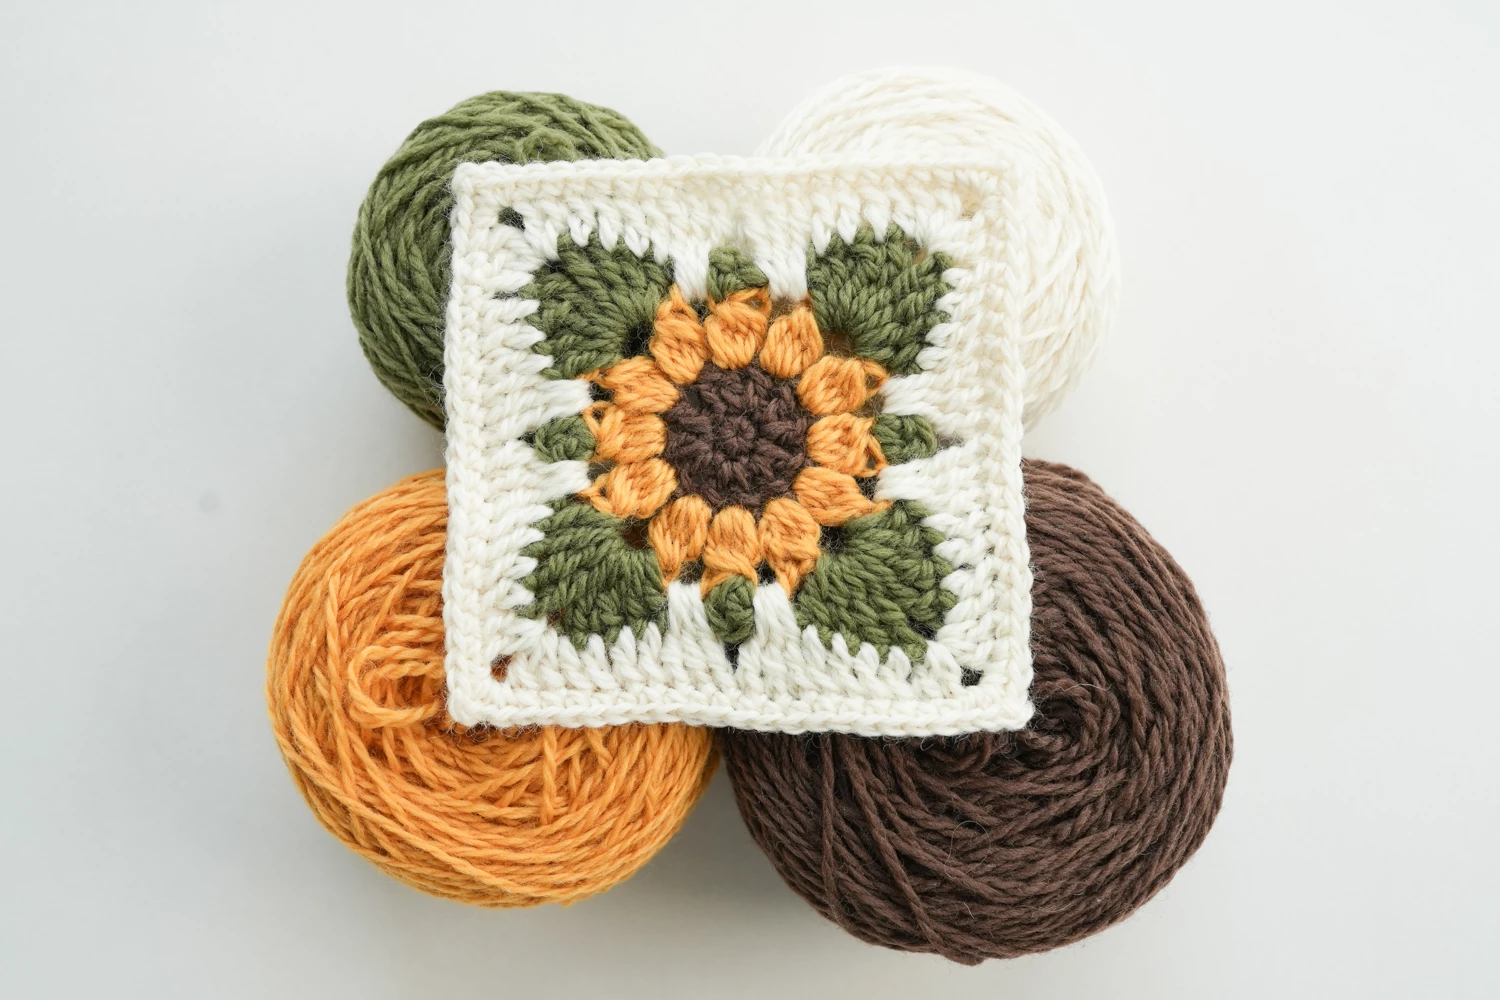
Overview & Inspiration
Welcome, my wonderful crochet family! Today, we are diving into a project that brings pure sunshine and texture right into your craft room with our Sunflower Crochet Square with Leaves Tutorial.
Whether you are making a cozy heirloom blanket, a cheerful statement pillow, or a charming tote bag, this floral square adds instant warmth to your handmade collection. Let’s grab our hooks and make something truly beautiful together!
Materials & Supplies Needed
- Medium-weight (Worsted weight / Yarn Weight 4) cotton or acrylic yarn in brown, yellow, green, and a neutral frame color like cream or beige.
- Crochet hook size 4.0 mm (US G/6) to 5.0 mm (US H/8).
- Yarn needle (tapestry needle) for weaving in ends.
- Stitch markers for tracking rounds.
- Sharp scissors.
- Optional: fiberfill stuffing if you prefer a slightly puffed center.
Stitches & Abbreviations
- Ch: Chain
- Sl st: Slip stitch
- Sc: Single crochet
- Hdc: Half double crochet
- Dc: Double crochet
- Tr: Treble crochet
- St(s): Stitch(es)
- Rnd(s): Round(s)
- Sp(s): Space(s)
Step-by-Step Pattern Instructions
Let’s begin making our gorgeous floral square by working from the center outward in distinct rounds.
Round 1: The Sunflower Center
Using brown yarn, start with a magic ring (or chain 4 and join with a sl st to form a ring). Work 12 dc into the ring. Join with a sl st to the top of the first dc. [12 sts]
Round 2: Expanding the Center
Ch 2 (does not count as a st here and throughout). Work 2 dc in each st around. Join with a sl st to the first dc. [24 sts]
Round 3: Texture and Base for Petals
Ch 2. Work [1 dc in first st, 2 dc in next st] 12 times around. Join with a sl st to the first dc, fasten off brown yarn. [36 sts]
Round 4: Crafting the Vibrant Petals
Join yellow yarn in any st. Ch 3, work (2 dc, ch 2, 3 dc) all in the same st to form a petal. Skip next 2 sts, work a sl st in the next st. Repeat this petal sequence around to form 12 bright yellow petals. Fasten off yellow yarn.
Round 5: Adding the Green Leaves
Join green yarn in the ch-2 space behind any petal. Ch 3 (counts as 1 dc), work (1 dc, ch 2, 2 dc) in the same sp to form a corner leaf cluster. Work tall stitches and chain spaces between petals to anchor the leaves naturally without pulling your work out of alignment.
Round 6: Squaring Up the Motif
Transition your circle into a square by working corner clusters of (2 dc, ch 2, 2 dc) in designated spaces. Work hdc and dc along the sides to establish straight edges. Maintain equal stitch counts on all four sides to prevent warping. [18 sts per side]
Round 7: Neutral Border Frame
Join your neutral cream or beige yarn to any corner ch-2 space. Ch 2, work (2 dc, ch 2, 2 dc) in the corner. Work 1 dc in each st across to the next corner. Repeat around and join with a sl st. Fasten off and secure all tails.
Assembly & Finishing Touches
Begin by weaving in all loose yarn tails securely using your tapestry needle, trimming any excess carefully. Dampen your finished square slightly and pin it flat on a blocking mat to define your stitches and ensure crisp, straight edges.
Once dry, join multiple squares together using your favorite method such as the slip stitch join, whip stitch, or join-as-you-go technique. Your gorgeous sunflower blocks are now ready to transform into blankets, pillows, or bags!
Pro Tips for Flawless Results
- Maintain consistent yarn tension throughout your rounds so your sunflower center lays completely flat without puckering.
- Count your stitches carefully at the end of every round, especially when transitioning from the circular petals to the square frame.
- Block every finished square before assembly to make seaming easier and give your final project a polished, professional finish.
Frequently Asked Questions
What skill level is required for this project?
This project is ideal for confident beginners to intermediate crocheters who are comfortable with basic stitches like chains, single crochets, and double crochets.
How long does it take to make a single square?
On average, completing one sunflower square takes between one to two hours, depending on your personal crochet speed and experience.
Can I use different yarn weights for this pattern?
Yes, you can use thinner or thicker yarns, but always remember to adjust your crochet hook size accordingly to match the yarn weight for the best results.
Watch the Full Step-by-Step Video Tutorial
Prefer visual guidance? Follow along with the complete video tutorial below at your own pace: