
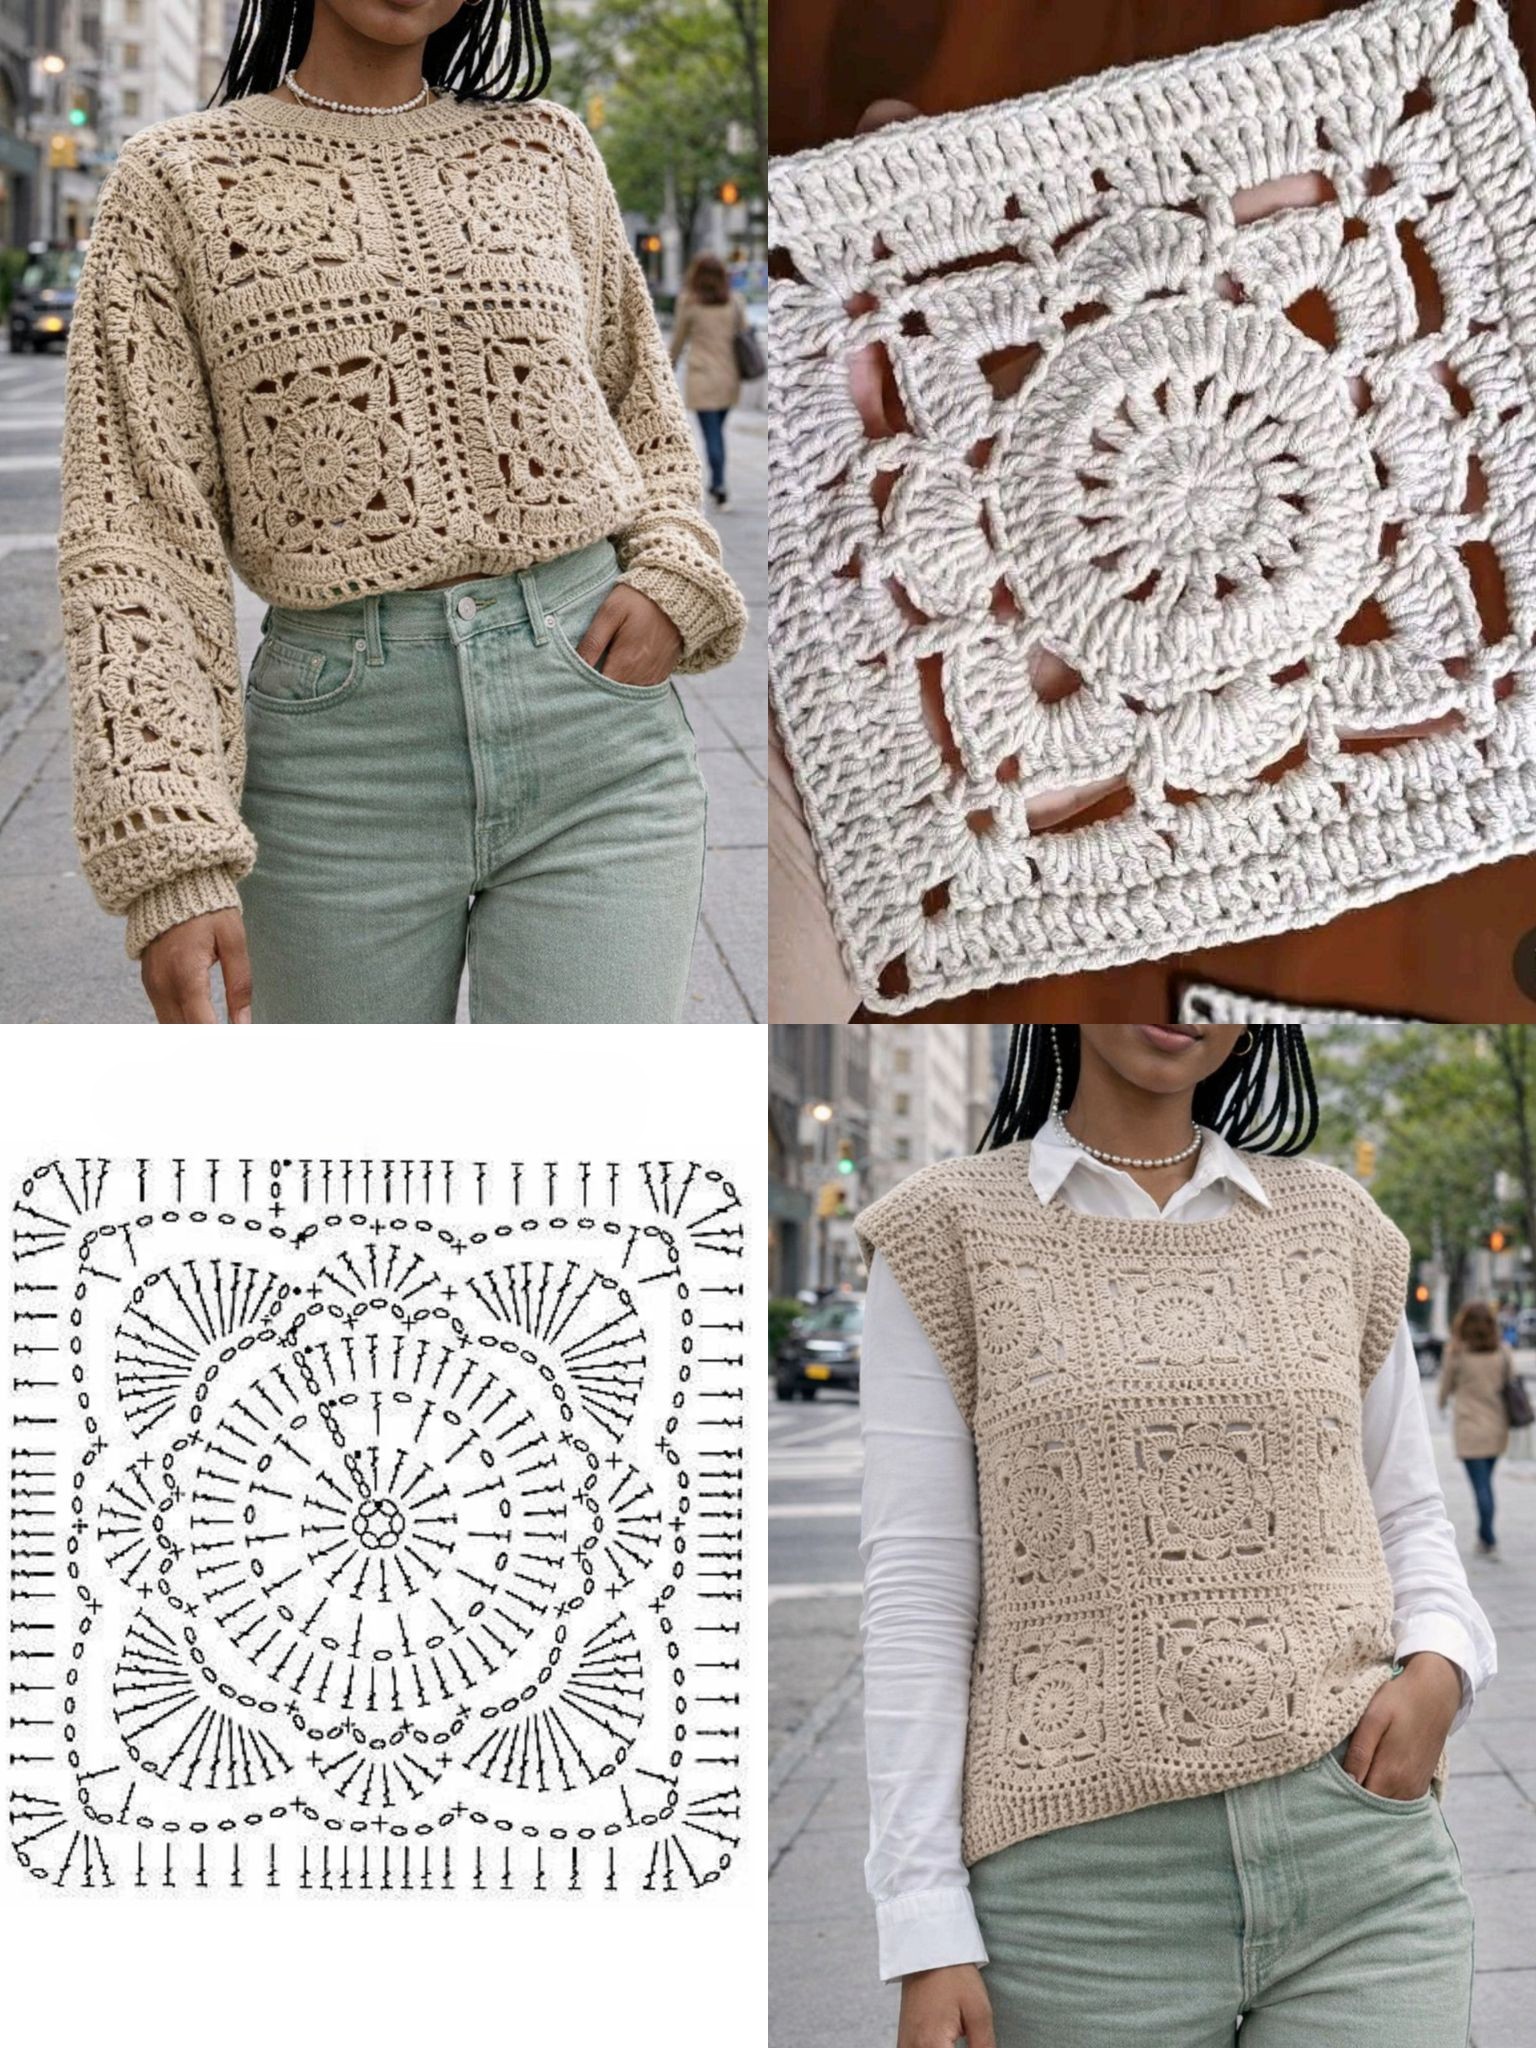
Overview & Inspiration
Welcome, fiber friends! There is something genuinely magical about transforming a pile of simple crochet squares into a stunning, wearable garment that you can proudly style all year round.
The crochet square vest pattern is the ultimate celebration of slow fashion, creativity, and personal expression. Whether you are a brave beginner tackling your first garment or an experienced maker looking for a joyful scrap-busting project, this modular beauty will quickly become a staple in your handmade wardrobe.
Materials & Supplies Needed
- Yarn: Sport weight, DK weight, or Worsted weight yarn (approx. 600–900 yards depending on your desired size)
- Fibers: 100% Cotton for spring/summer, Acrylic for vibrant durability, or Wool/Wool-blend for cozy warmth
- Colors: Choose a cohesive palette of 3-5 contrasting or complementary colors, or embrace your stash with endless scrap yarns
- Crochet Hook: 4.5 mm (US 7) or 5.0 mm (US H/8) hook (or size needed to obtain gauge)
- Tapestry Needle for weaving in ends and seaming
- Stitch Markers for planning your layout and securing seams
- Scissors
Stitches & Abbreviations
- ch = chain
- sl st = slip stitch
- sc = single crochet
- hdc = half double crochet
- dc = double crochet
- tr = treble crochet
- st(s) = stitch(es)
- sp(s) = space(s)
- yo = yarn over
- rep = repeat
Step-by-Step Pattern Instructions
To construct your vest, you will first create a series of identical individual squares. Follow the round-by-round instructions below for each classic square motif.
Round 1
Start with a magic ring, or ch 4 and sl st to the first ch to form a ring. Ch 3 (counts as first dc here and throughout), work 2 dc into the ring, ch 2, *3 dc into the ring, ch 2; rep from * 2 more times, join with a sl st to the top of the initial ch-3. [12 dc, 4 ch-2 sps]
Round 2
Sl st across to the nearest ch-2 corner space. Ch 3, (2 dc, ch 2, 3 dc) in the same ch-2 sp (first corner made). *Ch 1, skip 3 dc, (3 dc, ch 2, 3 dc) in the next ch-2 corner sp; rep from * around, ch 1, join with a sl st to top of initial ch-3. [24 dc, 4 ch-1 sps, 4 ch-2 sps]
Round 3
Sl st across to the nearest ch-2 corner space. Ch 3, (2 dc, ch 2, 3 dc) in the same corner sp. *Ch 1, skip 3 dc, 3 dc in the next ch-1 sp, ch 1, skip 3 dc, (3 dc, ch 2, 3 dc) in the next corner sp; rep from * around, ch 1, join with a sl st to top of initial ch-3. Fasten off, leaving a long tail for seaming if using the whip stitch method, or weave in ends if joining separately. [36 dc]
Assembly & Finishing Touches
Lay your finished squares flat on a blocking mat and block them to identical dimensions to ensure a smooth, professional assembly process.
Arrange your blocked squares according to the desired vest layout, leaving natural openings for the armholes and neckline. Use a slip stitch join or a whip stitch from the wrong side to secure your seams cleanly.
Once the shoulders and side seams are secure, finish your vest by working a simple round of single crochet evenly around the neckline, armholes, and bottom hem for a polished, durable edge.
Pro Tips for Flawless Results
- Maintain consistent tension across every square to prevent distortion in your final garment layout.
- Block your squares before joining to make the seaming process infinitely easier and cleaner.
- Weave in your yarn tails as you go to drastically cut down on finishing time at the end of the project.
Frequently Asked Questions
What skill level is required for this vest pattern?
This pattern is entirely suitable for confident beginners with basic crochet knowledge, as the modular square construction makes garment-making approachable and fun.
How many squares are needed to make the vest?
The total number of squares depends heavily on your desired size, length, and fit, typically ranging anywhere from 12 to 20 standard squares.
Can I use leftover scrap yarn for this project?
Absolutely! This vest pattern is an incredible stash-buster, allowing you to mix and match colorful yarn scraps for a vibrant, eclectic, slow-fashion statement piece.
Watch the Full Step-by-Step Video Tutorial
Prefer visual guidance? Follow along with the complete video tutorial below at your own pace: