
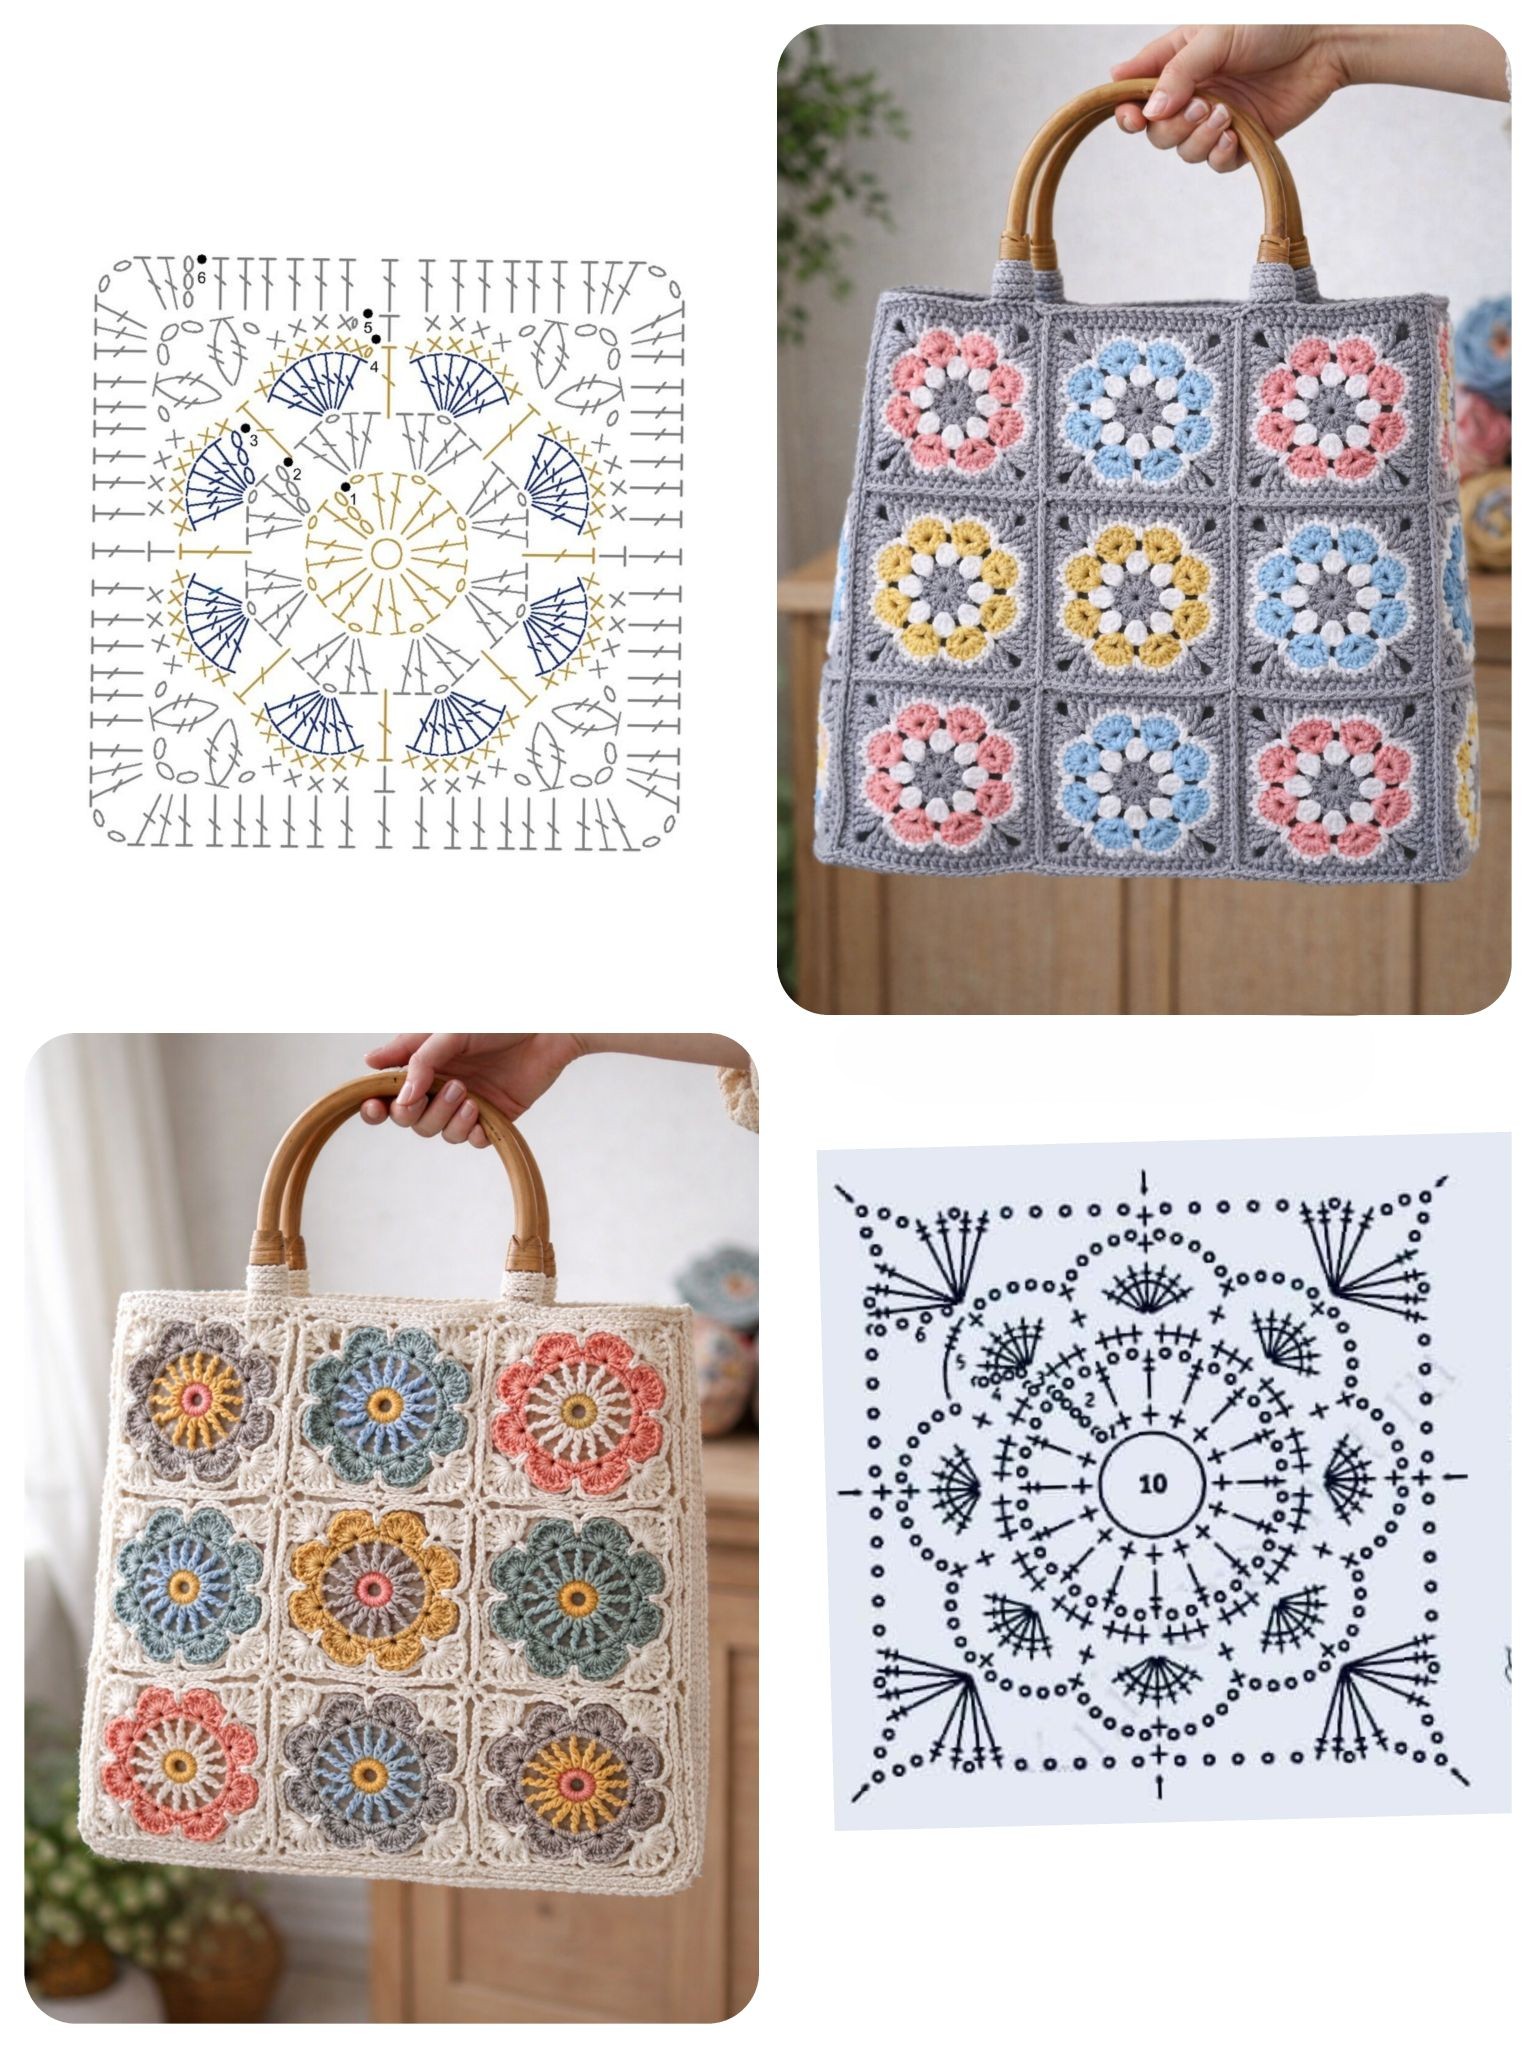
Overview & Inspiration
Welcome, fellow makers! There is nothing quite like the satisfaction of turning simple yarn into a gorgeous, highly functional accessory you can proudly show off everywhere you go.
Today, we are diving into the wonderful world of the crochet square bag pattern. Whether you are using up your favorite scrap yarns or curating a brand-new color palette, this modular project is an absolute joy to stitch up!
Materials & Supplies Needed
- Worsted weight yarn (approx. 400-500 yards total, in your choice of colors)
- Recommended fiber: 100% cotton yarn for durability and structure
- US H/8 (5.0 mm) crochet hook
- Tapestry needle for weaving in ends and seaming
- Stitch markers (4 to 6 pieces)
- Sharp scissors
- Optional: Fabric lining and sewing thread for extra structure
Stitches & Abbreviations
- ch = chain
- sl st = slip stitch
- sc = single crochet
- hdc = half double crochet
- dc = double crochet
- st(s) = stitch(es)
- rep = repeat
- RS = right side
Step-by-Step Pattern Instructions
The bag is constructed using 13 identical classic granny-style squares: 4 for the front, 4 for the back, 1 for the base, and 4 folded to create the gusset sides. Work according to the rounds below for each square.
Square Motif (Make 13)
Foundation: With Color A, ch 4, join with sl st to first ch to form a ring.
Round 1 (RS): Ch 3 (counts as first dc here and throughout), work 2 dc into the ring, ch 2. (3 dc into ring, ch 2) 3 times. Join with sl st to top of beg ch-3. Fasten off Color A. [12 dc, 4 ch-2 spaces]
Round 2: Join Color B in any ch-2 corner space. Ch 3, (2 dc, ch 2, 3 dc) in same ch-2 space. *Ch 1, skip next 3 dc, (3 dc, ch 2, 3 dc) in next ch-2 space; rep from * twice more. Ch 1, skip last 3 dc, join with sl st to top of beg ch-3. Fasten off Color B. [24 dc, 4 ch-1 spaces, 4 ch-2 spaces]
Round 3: Join Color C in any ch-2 corner space. Ch 3, (2 dc, ch 2, 3 dc) in same ch-2 space. *Ch 1, (3 dc in next ch-1 space, ch 1), (3 dc, ch 2, 3 dc) in next ch-2 corner space; rep from * around, ending with ch 1, 3 dc in last ch-1 space, ch 1, join with sl st to top of beg ch-3. Fasten off yarn and weave in ends. [36 dc, 8 ch-1 spaces, 4 ch-2 spaces]
Assembly & Finishing Touches
Lay your 13 finished squares out in a flat T-shape or cross layout to plan your final bag construction. Fold the outer squares upward to form the 3D body of your bag around the central base square.
Use your tapestry needle and a whipstitch or flat slip stitch join from the wrong side (WS) to seam the adjacent edges securely together. Double-check all stress points around the base and corners to ensure maximum durability.
Weave in all remaining yarn tails securely using your tapestry needle. If desired, hand-block your assembled bag lightly with steam or water spray to crisp up the square motifs before attaching any optional straps or fabric lining.
Pro Tips for Flawless Results
- Maintain a consistent hook size and hand tension across all 13 squares so they align perfectly during the seaming process.
- Weave in your yarn tails as you finish each individual square to save yourself hours of tedious finishing work at the very end.
- Opt for a sturdy plant fiber like cotton or a cotton blend to prevent your finished bag from stretching out of shape when loaded with everyday items.
Frequently Asked Questions
What skill level is required for a crochet square bag pattern?
This pattern is fantastic for confident beginners who are comfortable with basic stitches like chains, double crochets, and slip stitches, as well as experienced makers looking for a relaxing, portable project.
How long does it take to complete a crochet square bag pattern?
The timeframe varies depending on your personal speed and available crafting time. Because the bag is broken down into small, manageable squares, many makers finish the motifs within a few days and assemble them over the weekend.
What yarn works best for this project?
100% cotton yarn or durable cotton-acrylic blends work absolute wonders for bags. They offer fantastic stitch definition, hold up well against daily wear and tear, and do not stretch out excessively when you carry heavy items.
Watch the Full Step-by-Step Video Tutorial
Prefer visual guidance? Follow along with the complete video tutorial below at your own pace: