
Overview & Inspiration
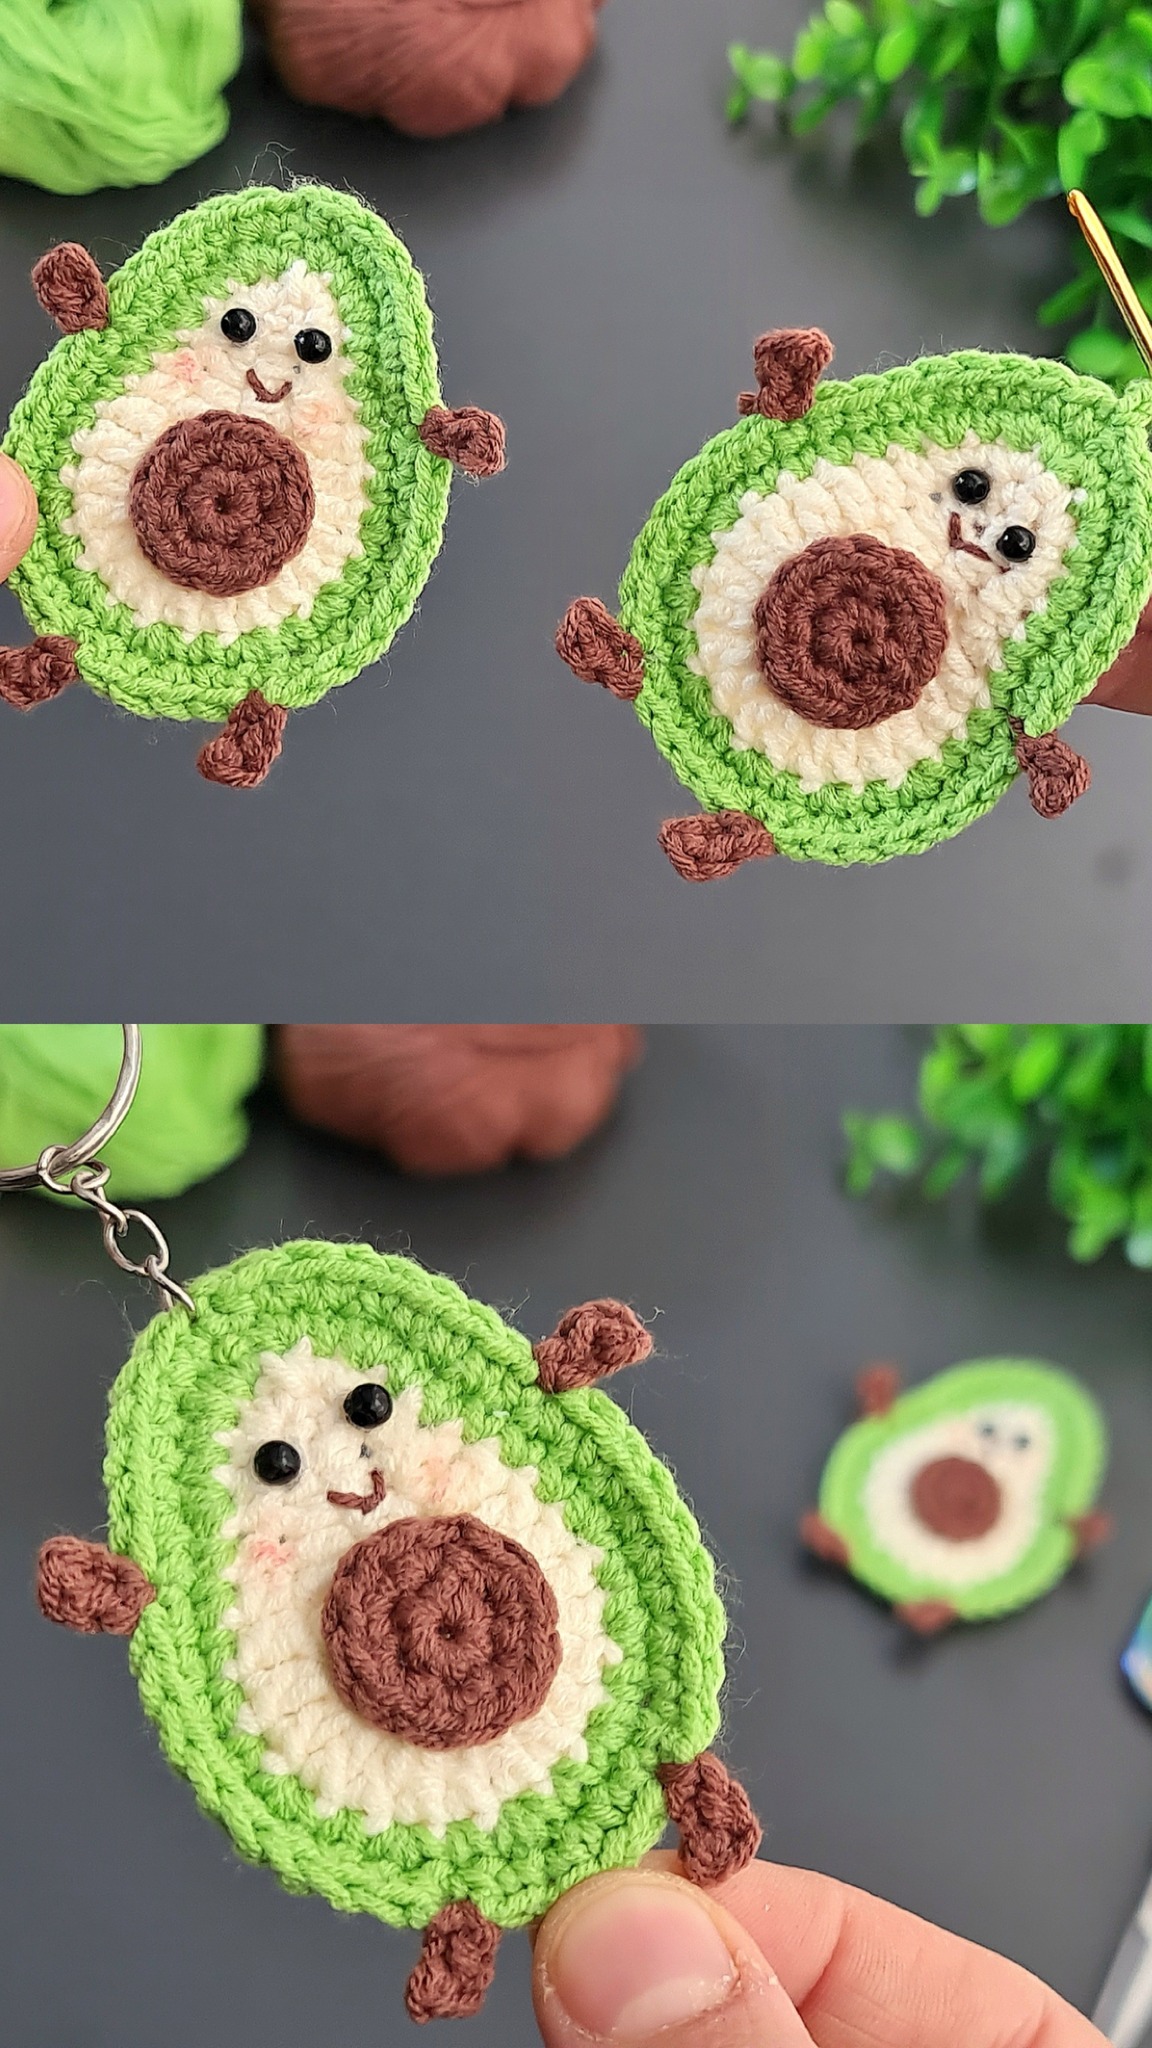
Welcome, fellow yarn lovers! If you are looking for a quick, utterly charming, and deeply satisfying project, you are going to fall head over heels for our Crochet Avocado Keychain Pattern.
Avocado-themed accessories have taken the crafting world by storm because they symbolize freshness, fun, and creativity. Whether you want to whip up a thoughtful handmade gift, a trendy bag charm, or stock your craft fair booth, this beginner-friendly amigurumi project ticks every single box!
Materials & Supplies Needed
- Lightweight (Sport/DK) or Medium (Worsted/Aran) weight yarn in Dark Green, Light Green, and Brown.
- Fiber content: 100% Cotton (recommended for shape retention) or durable Acrylic.
- Crochet hook: 3.5 mm (US E/4) or a size that matches your yarn choice to ensure tight, neat stitches.
- Stitch markers for working in continuous rounds.
- Tapestry needle for weaving in ends and embroidering details.
- Sharp scissors.
- Polyfill fiberstuffing for gentle shaping.
- Metal keyring or lobster clasp.
Stitches & Abbreviations
- ch: chain
- sc: single crochet
- inc: single crochet increase (work 2 sc in the same stitch)
- dec: single crochet invisible decrease (sc 2 stitches together)
- sl st: slip stitch
- st(s): stitch(es)
Step-by-Step Pattern Instructions
Avocado Body (Outer Green)
Using your dark green yarn, we will begin working in continuous rounds to form the iconic pear-shaped silhouette of the avocado.
- Round 1: Start with a magic ring and work 6 sc into the ring [6 sts].
- Round 2: Work an inc in each st around [12 sts].
- Round 3: (Sc 1, inc) repeat 6 times [18 sts].
- Rounds 4-6: Sc in each st around [18 sts].
- Round 7: (Sc 2, inc) repeat 6 times [24 sts].
- Rounds 8-12: Sc in each st around [24 sts]. Switch to light green yarn on the final stitch of Round 12 to represent the inner flesh.
- Rounds 13-14: Sc in each st around with light green [24 sts].
- Round 15: (Sc 2, dec) repeat 6 times [18 sts]. Begin stuffing firmly.
- Round 16: (Sc 1, dec) repeat 6 times [12 sts]. Add a little more fiberfill.
- Round 17: Work 6 dec [6 sts]. Fasten off, leaving a tail to weave closed.
The Avocado Pit
Using your brown yarn, we will create the center seed of the avocado.
- Round 1: Make a magic ring and work 6 sc into the ring [6 sts].
- Round 2: Work an inc in each st around [12 sts]. Fasten off, leaving a long tail for sewing.
Assembly & Finishing Touches
Position the brown pit centrally onto the light green flat section of your avocado body and pin it in place. Using your tapestry needle and the remaining brown yarn tail, neatly whipstitch the pit to the body.
If you want to add an extra dash of cuteness, use black embroidery floss to stitch a tiny smiling mouth and sleepy eyes just above the pit. Weave in all loose yarn ends securely inside the body.
Finally, attach a secure loop of yarn or a jump ring to the top stem of the avocado, and securely fasten your keyring or lobster clasp.
Pro Tips for Flawless Results
- Drop down one hook size smaller than your yarn label recommends to keep your stitches extra tight and prevent stuffing from peeking through.
- Always use a stitch marker at the start of your continuous rounds so you never lose count of your shaping increases and decreases.
- Stuff your avocado gradually as you work the final decrease rounds to ensure a smooth, symmetrical shape without overstretching the fabric.
Frequently Asked Questions
What skill level is needed for this pattern?
This design is wonderfully beginner-friendly! As long as you are comfortable making a magic ring, working in the round, and executing basic single crochet increases and decreases, you will master this project in no time.
How long does it take to complete one avocado keychain?
On average, a single keychain takes about one to two hours to complete, making it the ultimate instant-gratification project for busy crafters.
Can I wash my crochet avocado keychain?
Yes! If your keychain gets dirty, simply remove the metal keyring, gently hand-wash the crocheted piece in warm soapy water, and let it air-dry completely before reattaching the hardware.
Watch the Full Step-by-Step Video Tutorial
Prefer visual guidance? Follow along with the complete video tutorial below at your own pace: