
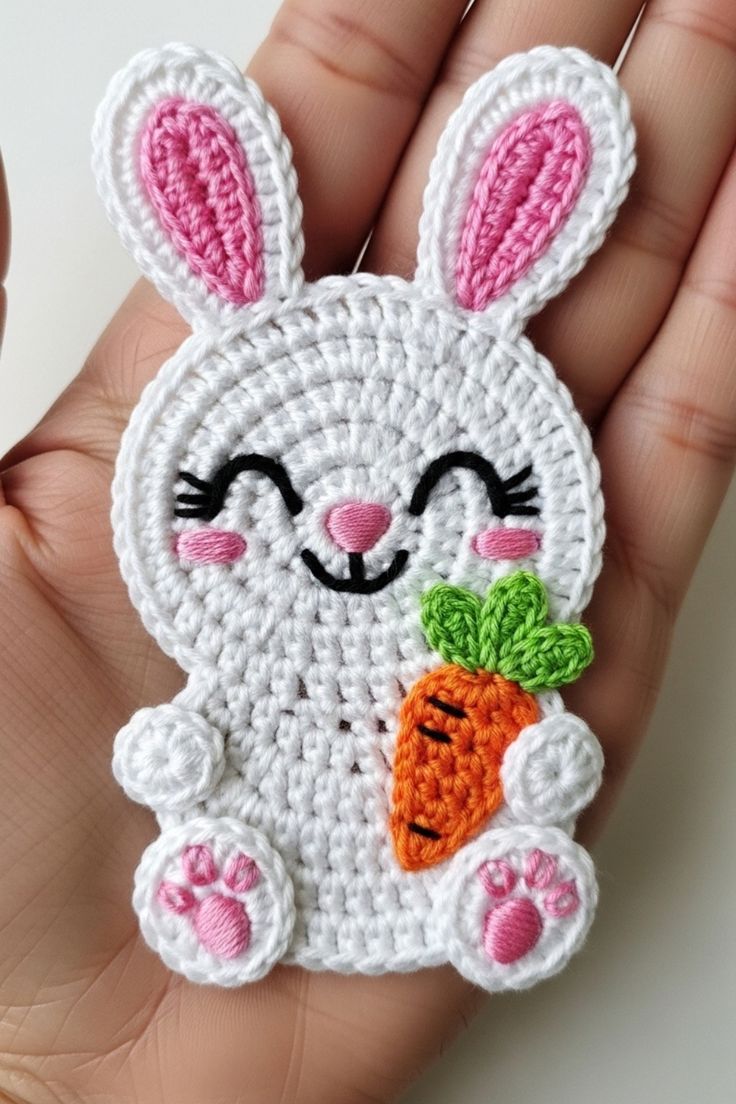
Overview & Inspiration
Welcome, crafty friends! There is nothing quite like the joy of creating small, meaningful pieces that instantly bring a smile to your face, and the Crochet Bunny Cute Appliqué Pattern does just that. This charming motif combines the sweetness of floppy ears and twitchy noses with the incredible practicality of flat appliqué work.
Whether you want to jazz up a plain baby blanket, customize a tote bag, or create adorable spring décor, this quick-working design is an absolute must-have. Because it relies on simple shaping and works up in no time at all, it is a wonderfully satisfying project for both eager beginners and seasoned hookers alike!
Materials & Supplies Needed
- Lightweight (Sport/DK) or Medium (Worsted/Aran) weight cotton or acrylic yarn in bunny colors (white, cream, pink, grey) and contrasting pink for the inner ears.
- Crochet hook size 3.5 mm (US E/4) for lightweight yarn or 4.0 mm (US G/6) for medium weight yarn.
- Tapestry needle (yarn needle) for weaving in ends and sewing the appliqué securely.
- Stitch markers (optional, but helpful for keeping track of rounds).
- Sharp embroidery scissors.
- Optional: Black embroidery floss and a sharp needle for stitching facial features and whiskers.
Stitches & Abbreviations
- ch: chain
- sc: single crochet
- hdc: half double crochet
- dc: double crochet
- sl st: slip stitch
- inc: increase (work 2 sc in the same stitch)
- st(s): stitch(es)
- FO: fasten off
Step-by-Step Pattern Instructions
We will begin our bunny appliqué by working from the center head outwards, before adding those signature adorable ears and finishing details.
Head & Body Foundation
Begin with a magic ring. Alternatively, ch 4 and join with a sl st to form a loop.
- Round 1: Work 6 sc into the magic ring. Join with a sl st to the first sc. [6 sts]
- Round 2: Ch 1, work 2 sc in each st around. Join with a sl st to the first sc. [12 sts]
- Round 3: Ch 1, (1 sc in next st, inc in next st) repeat around. Join with a sl st to the first sc. [18 sts]
Creating the Bunny Ears
Now we will work the ears directly off the top of the head using simple height variations to get that classic curved shape.
- Ear 1: Ch 6, starting in the 2nd ch from the hook, work 1 sc, 1 hdc, 2 dc, 1 hdc down the chain. Skip 1 st on the head base, sl st into the next st.
- Ear 2: Ch 6, starting in the 2nd ch from the hook, work 1 sc, 1 hdc, 2 dc, 1 hdc down the chain. Skip 1 st on the head base, sl st into the next st.
FO, leaving a long tail for sewing the appliqué onto your final project.
Assembly & Finishing Touches
Take your tapestry needle and thread it with the long tail left from your bunny. Before attaching, weave in any remaining loose yarn ends securely on the back of your motif.
Use black embroidery floss or a strand of leftover yarn to embroider a tiny cross-stitch nose and sleepy eyes centered on the lower half of the head. Position your finished bunny appliqué onto your chosen blanket, hat, or bag, pinning it in place so it doesn’t shift.
Sew around the outer perimeter using neat, hidden whip stitches to secure it flat. If your edges curl slightly, lightly steam block the piece to ensure a crisp, professional finish.
Pro Tips for Flawless Results
- Hook Sizing: Go down one hook size smaller than normally recommended for your yarn weight to keep your stitches tight, neat, and well-defined.
- Yarn Choice: Use 100% cotton yarn for a smoother finish and cleaner edges that hold up wonderfully to washing.
- Symmetry Check: Double-check your ear placement by folding the head in half before sewing down facial features to ensure total balance.
Frequently Asked Questions
What skill level is required for a Crochet Bunny Cute Appliqué Pattern?
This pattern is completely beginner-friendly! It relies on fundamental stitches like single crochet, half double crochet, and basic increases, making it a wonderful way to practice shaping skills.
How long does it take to complete a bunny appliqué?
A single appliqué typically takes under an hour to complete, depending on your familiarity with the basic stitches and how long you spend on the embroidered facial details.
Can I use this appliqué on items that will be washed frequently?
Yes, absolutely! Just be sure to use a durable, machine-washable yarn like mercerized cotton or acrylic, and secure all sewing tails tightly so it withstands regular laundering.
Watch the Full Step-by-Step Video Tutorial
Prefer visual guidance? Follow along with the complete video tutorial below at your own pace: