
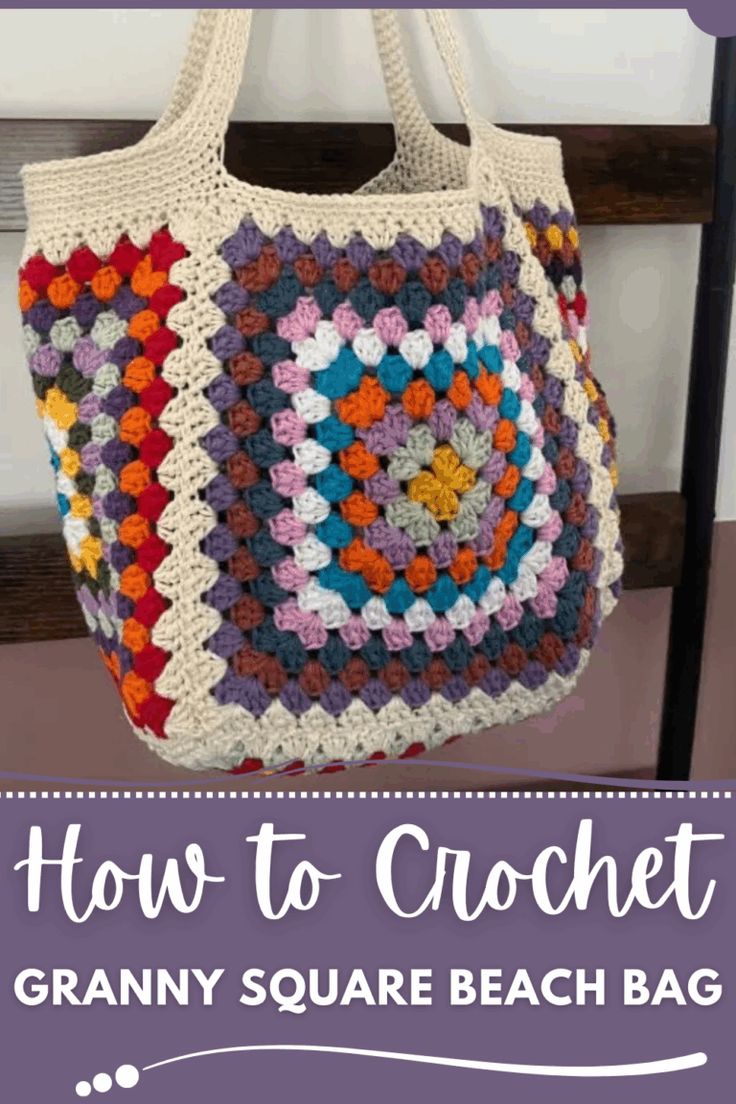
Overview & Inspiration
Welcome, fellow yarn lovers, to your new favorite summer project! There is something undeniably magical about combining classic granny squares with modern, functional bag construction.
Whether you are packing for a sunny vacation, a relaxing afternoon by the waves, or just running errands around town, this handmade tote offers endless opportunities for creativity and self-expression. Let us dive right in and create something truly beautiful together!
Materials & Supplies Needed
- Yarn: Worsted weight (Category 4) cotton or cotton-blend yarn.
- Fibers: 100% Cotton for durability and moisture resistance.
- Colors: Assorted leftover scraps or a curated palette of vibrant summer hues and neutral tones.
- Crochet Hook: 4.5 mm (US size 7) hook to create wonderfully tight, sturdy stitches.
- Tapestry Needle: For weaving in all your ends seamlessly.
- Stitch Markers: Essential for keeping track of your panels and assembly layout.
- Scissors: A sharp, reliable pair for trimming yarn.
- Optional Stuffing: Not required, as this is a flat bag project!
Stitches & Abbreviations
- ch = chain
- sl st = slip stitch
- sc = single crochet
- dc = double crochet
- sp = space
- st(s) = stitch(es)
- rnd = round
- yo = yarn over
Step-by-Step Pattern Instructions
Let us begin by making the individual classic granny squares that will form the body of our gorgeous summer tote. You will need to make multiple identical squares depending on your desired bag dimensions.
Rnd 1: Start with a magic ring (or ch 4 and join with a sl st to form a ring). Ch 3 (counts as first dc here and throughout), work 2 dc into the ring, ch 2. [Work 3 dc into the ring, ch 2] 3 times. Join with a sl st to the top of the starting ch-3. Fasten off color A. [12 dc, 4 ch-2 spaces]
Rnd 2: Join color B in any ch-2 corner space. Ch 3, work (2 dc, ch 2, 3 dc) in the same corner sp. *Ch 1, skip 3 dc, work (3 dc, ch 2, 3 dc) in the next ch-2 corner sp; repeat from * around, ch 1, join with a sl st to top of starting ch-3. Fasten off color B. [24 dc, 4 ch-2 spaces, 4 ch-1 spaces]
Rnd 3: Join color C in any ch-2 corner space. Ch 3, work (2 dc, ch 2, 3 dc) in the same corner sp. *Ch 1, skip 3 dc, work 3 dc in the next ch-1 sp, ch 1, skip 3 dc, work (3 dc, ch 2, 3 dc) in the next ch-2 corner sp; repeat from * around, working a final ch 1 and joining with a sl st to the top of the starting ch-3. Fasten off and weave in ends. [36 dc]
Assembly & Finishing Touches
Once all your granny squares are completed, lay them out flat in your preferred geometric arrangement to test your color palette and symmetry.
Block your squares lightly with steam or water spray to ensure crisp, even edges that make seaming an absolute breeze. Join the squares together using your preferred method, such as a neat whip stitch or a textured single crochet join.
Work two rounds of single crochet evenly around the top opening of the bag to reinforce the structure and create a clean edge. Finally, crochet or securely sew your sturdy shoulder straps onto the reinforced top band, and weave in any remaining yarn tails.
Pro Tips for Flawless Results
- Maintain consistent tension across all squares to ensure they match up perfectly during the assembly process.
- Use a slightly smaller hook size than recommended on your yarn label to keep stitches tight and prevent small items from slipping through the gaps.
- Block your finished motifs before joining to guarantee crisp corners and professional-looking seams.
- Consider adding a lightweight cotton fabric lining to increase durability and prevent stretching when carrying heavy items.
Frequently Asked Questions
What skill level is required for the Granny Square Beach Bag Crochet Pattern?
This pattern is wonderfully beginner-friendly while still offering plenty of engaging colorplay and assembly techniques for experienced crocheters.
Can I use acrylic yarn instead of cotton?
While you can use acrylic, cotton or cotton-blend yarns are strongly recommended because they resist stretching, handle weight much better, and breathe easily in warm weather.
How do I clean and maintain my finished crochet beach bag?
We recommend gentle hand washing in cool water with mild detergent, followed by reshaping the bag and laying it flat to air dry.
Watch the Full Step-by-Step Video Tutorial
Prefer visual guidance? Follow along with the complete video tutorial below at your own pace: