
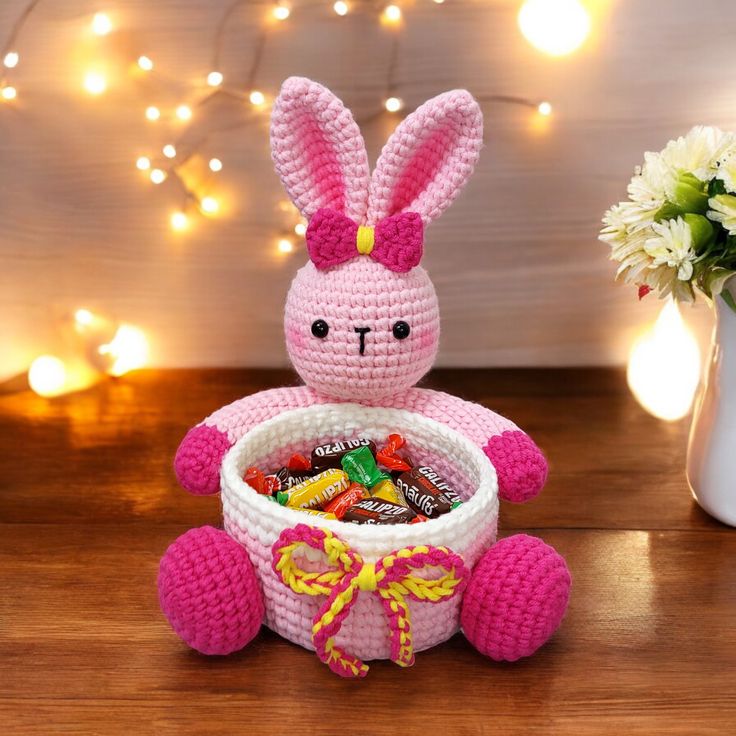
Overview & Inspiration
Welcome, fellow yarn lovers! There is nothing quite like combining practical home organization with the absolute joy of handmade whimsy, and this charming project does just that.
Whether you are prepping for springtime celebrations, organizing a little one’s nursery, or searching for a heartfelt gift, this delightful project brings warmth and personality to any room.
Materials & Supplies Needed
- Medium (Worsted/Aran) or Bulky weight yarn in main color and accent colors
- Fiber content: 100% Cotton or cotton-blend for ideal structure and durability
- Crochet hook: 5.0 mm (US H/8) or a size smaller than recommended for your yarn to achieve a dense fabric
- Stitch markers (2-4 pieces)
- Tapestry needle for weaving in ends
- Sharp scissors
- Optional: Small amount of polyester fiberfill for stuffing the bunny ears
Stitches & Abbreviations
- ch = chain
- sl st = slip stitch
- sc = single crochet
- hdc = half double crochet
- inc = increase (work 2 sc in the same stitch)
- dec = decrease (sc 2 stitches together)
- st(s) = stitch(es)
- Rnd = round
Step-by-Step Pattern Instructions
Basket Base
Working in continuous rounds without joining, unless otherwise stated.
- Rnd 1: Make a magic ring, work 6 sc in ring. [6 sts]
- Rnd 2: Inc in each st around. [12 sts]
- Rnd 3: (Sc in next st, inc in next st) repeat around. [18 sts]
- Rnd 4: (Sc in next 2 sts, inc in next st) repeat around. [24 sts]
- Rnd 5: (Sc in next 3 sts, inc in next st) repeat around. [30 sts]
- Rnd 6: (Sc in next 4 sts, inc in next st) repeat around. [36 sts]
Basket Sides
- Rnd 7: Working in back loops only (BLO) for this round only, sc in each st around. [36 sts]
- Rnds 8-15: Working in both loops, sc in each st around. [36 sts]
- Finish with a sl st in the next st, fasten off, and weave in your ends.
Bunny Ears (Make 2)
- Row 1: Ch 7, sc in 2nd ch from hook and in each ch across, turn. [6 sts]
- Rows 2-8: Ch 1, sc in each st across, turn. [6 sts]
- Row 9: Ch 1, dec, sc in next 2 sts, dec, turn. [4 sts]
- Row 10: Ch 1, sc in each st across, turn. [4 sts]
- Row 11: Ch 1, dec twice, turn. [2 sts]
- Row 12: Ch 1, dec. [1 st]
- Fasten off, leaving a long tail for sewing.
Assembly & Finishing Touches
Position the freshly crocheted bunny ears along the top edge of your basket, spacing them evenly apart on the front-facing side. Use your tapestry needle and the long yarn tails to securely whipstitch the ears into place.
Weave in any remaining loose yarn ends neatly on the inside of the basket to keep the exterior looking polished. Gently hand-wash your finished basket in lukewarm water, press out excess moisture, and reshape it firmly while drying to ensure crisp, upright walls.
Pro Tips for Flawless Results
- Drop down one hook size smaller than your yarn label suggests to create a dense, sturdy fabric that helps the basket walls stand tall on their own.
- Use stitch markers at the start of every round to keep your count accurate and prevent the spiral from shifting unexpectedly.
- Opt for sturdy cotton yarns instead of acrylic to give your basket the weight and structure it needs to hold heavy items.
Frequently Asked Questions
What skill level is required for this pattern?
This pattern is suitable for adventurous beginners who are comfortable working in the round and understand basic stitches like single crochet and increases.
Can I wash my finished basket?
Yes! Baskets made with 100% cotton yarn can be gently hand-washed in cool water and reshaped while damp to maintain their original form.
Can I sell items made from this pattern?
Absolutely, you are welcome to sell finished handmade baskets at local craft fairs or online shops, provided you give design credit to the original creator.
Watch the Full Step-by-Step Video Tutorial
Prefer visual guidance? Follow along with the complete video tutorial below at your own pace: